You can schedule automatic raw data exports at specific intervals based on your configurations in Mapp Q3.
To set this up, follow these steps:
Log into Mapp Q3.
Go to Configuration > Raw Data Export. The configuration dialog for raw data exports will open.
These necessary settings are described below:
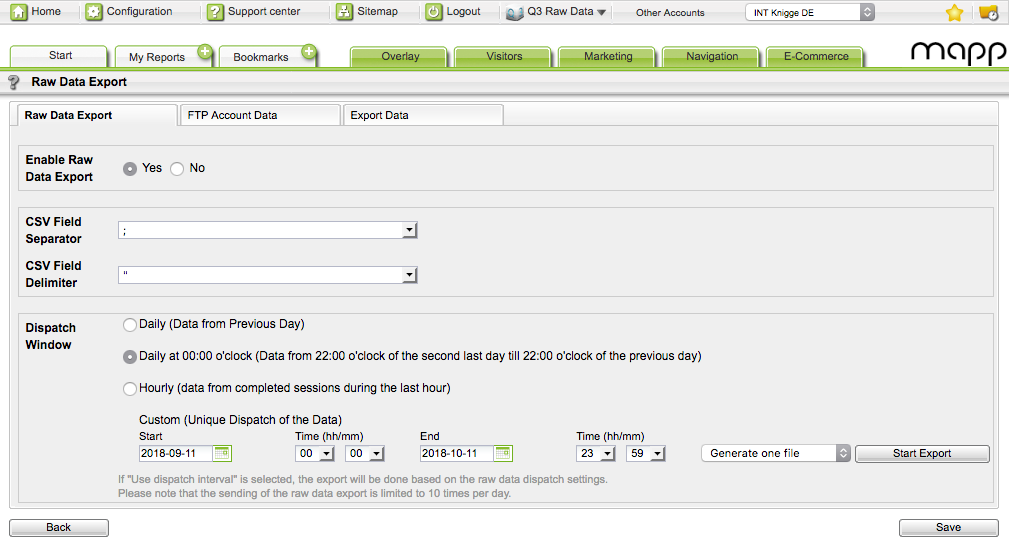
Raw Data Export
Configure the basic settings for the raw data export.
Under the tab Raw Data Export, make the following basic settings:
Parameter
Description
Enable Raw Data Export
Activate the feature using the corresponding radio button.
CSV Field Separator
Specify the character that separates the individual table entries from each other. Select the separator you want from the drop down list:
Semicolon (;)
Comma (,)
Space
Tab
Custom
The following characters cannot be defined as separators:
Hyphen (-)
Tilde (~)
A semicolon automatically replaces these.
CSV Field Delimiter
Specify the character used to delimit table entries (that is, the character before and after each table entry). Select the desired field delimiter from the drop-down list:
None
Apostrophe (')
Quotation marks (")
Custom
The following character cannot be defined as a separator:
Hyphen (-)
Please use only those characters as "Custom characters" that do not appear in the table entries. Furthermore, field separators and field delimiters must differ from each other.
Dispatch Window
Specify when a raw data export is to take place:
Daily
The data tables contain the data for the previous day. This includes data from all sessions that were started in the period. Therefore, data records from the following day may also be included if a session lasts beyond midnight
Example
A user starts a session at 11:45 p.m., which lasts 30 minutes, i.e., ends at 00:15 a.m.The export takes place as soon as the data for the previous day has been entirely written (daily closing).
Daily at 00:00 o'clock
The data tables shall comprise the data set from 10:00 p.m. on the penultimate day to 10:00 p.m. on the previous day.Hourly
The tables contain the data of the closed sessions of the last hour.This option is not available by default. For activation, contact the Mapp Support Team.
Custom
The period that the data tables are to cover can be set individually. With the button [Start export] you initiate the export ad-hoc, see Custom Export.This process may be carried out a maximum of 10 times per day. Further execution can take place immediately - there is no need to wait for the tables to be received for any previous export.
Click Save.
FTP Account Data
Specify the connection details for the target server where the raw data tables will be sent.
Proceed as follows to configure the FTP access data:
Make the following settings:
Parameter
Description
Data Source
Select the protocol with which the data is to be sent:
FTP
SFTP
FTPS (SSL)
FTPS (TLS)
Host
Specify the IP or URL of the server on which the data is to be stored.
Remote Path
Select the directory on the target server in which the raw data files are to be stored. The directory must always be specified as absolute.
Login
Specify the user to be used to login to the server.
The selected user must have write permissions on the specified target server.
Authentication
Select the authentication option using the corresponding radio button:
Password
Pivate key
Password
Enter the password or private key (in the case of SFTP with key pair).
Port
Usually, the default ports are specified. However, you can define alternative ports.
The button Test connection allows you to check whether the server can be addressed with the entered data and whether it is possible to change to the specified directory.
Click Save.
Export Data
Select which raw data tables should be included in the export.
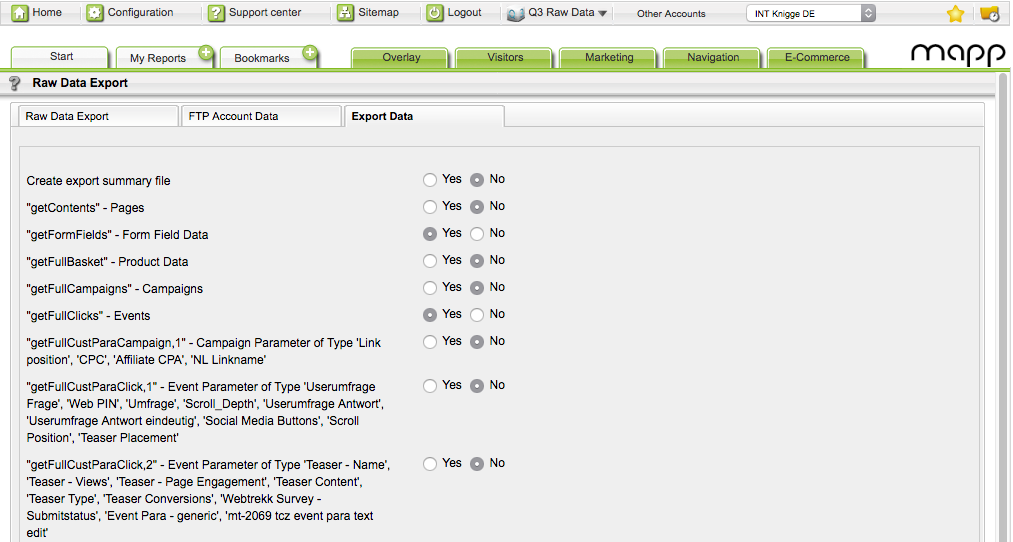
First, select via the corresponding radio button whether an export summary file should be created or not.
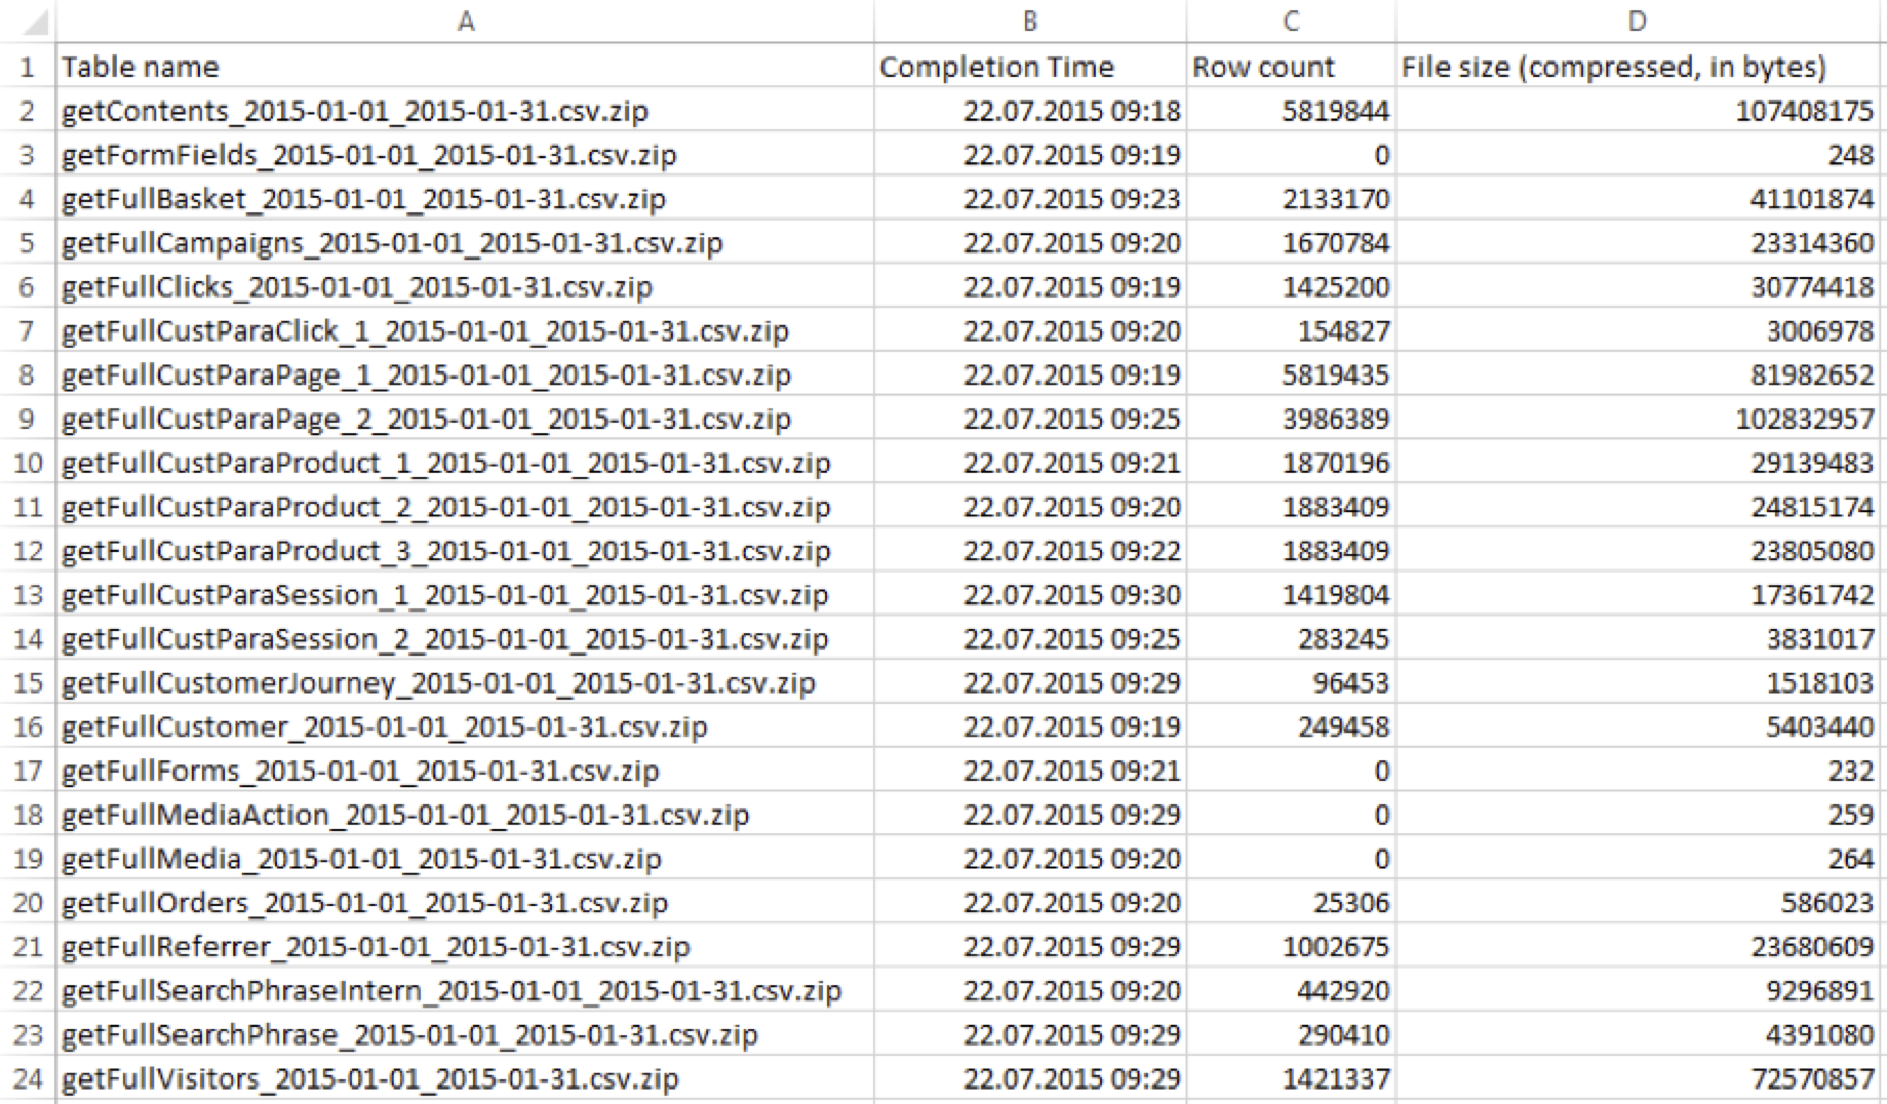
The export log file is a CSV file that contains the following information:
exported tables
export time
number of rows in exported tables
file size
This file is transferred last and only when all tables have been successfully transferred and can be used as a signal to start further processing for systems that process the raw data.
Example log file
Use the radio button to select which tables the export should contain.
Click Save.