This section shows how to integrate and activate the Cookie Control plugin. Choose your integration method. The parameters depend on the migration you plan. See Changing from First-Party to Third-Party Cookies and Moving Third-Party Cookies to a New Domain.
Important
Mapp activates the redirection internally. Contact your designated point of contact before you integrate the plugin. All notes on costs, integration period and installation are in Cookie Control.
Integrate and Activate the Plugin
Use this method if you integrated the Smart Pixel and use the wtSmart API.
Plugin Activation
Activate the plugin with this method:
wtSmart.extension.cookie_control.activate();Optional methods:
wtSmart.extension.cookie_control.deactivate();
wtSmart.extension.cookie_control.isActivated();
Plugin Configuration
Define the migration with config(). The parameters depend on the migration. Examples are in Changing from First-Party to Third-Party Cookies and Moving Third-Party Cookies to a New Domain.
Parameter | Required | Description |
|---|---|---|
| Yes | Type of migration. |
| Yes | Date until which the plugin is active, in the format |
| No | Lifetime of the migrated server-side cookie in days. If you omit it, the default of the plugin applies. |
| No | Track ID of your new setup. If you omit it, the track ID of your Smart Pixel is used. |
| No | Track domain of your new setup. If you omit it, the track domain of your Smart Pixel is used. |
| Only for | Track ID of your previous setup. |
| Only for | Track domain of your previous setup. |
Methods and Properties
Method / Property | Description |
|---|---|
| Returns the name of the extension. |
| Returns the version of the extension. |
| Sets the configuration. Without an argument, it returns the current configuration. |
| Returns whether the extension is activated. |
| Activates the extension. |
| Deactivates the extension. |
Integrate the plugin into the container of the website that you want to measure. First, create a custom plugin.
Step 1: Create the Custom Plugin
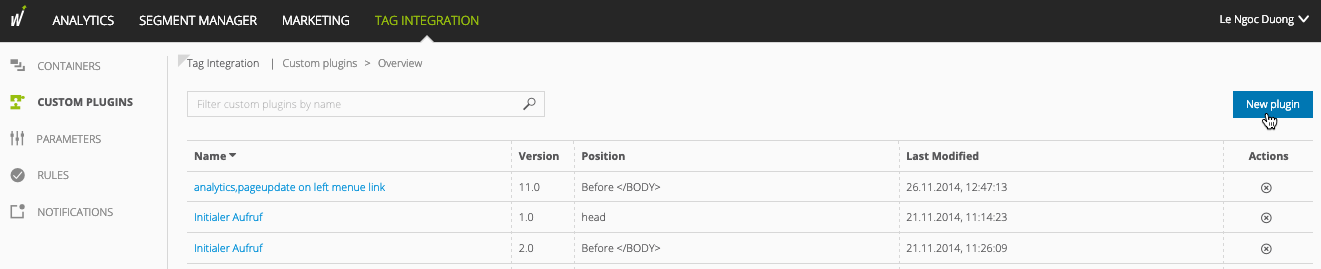
In the Tag Integration, go to Custom Plugins and click New plugin. The configuration dialog opens.
Enter the following information, then click Create.
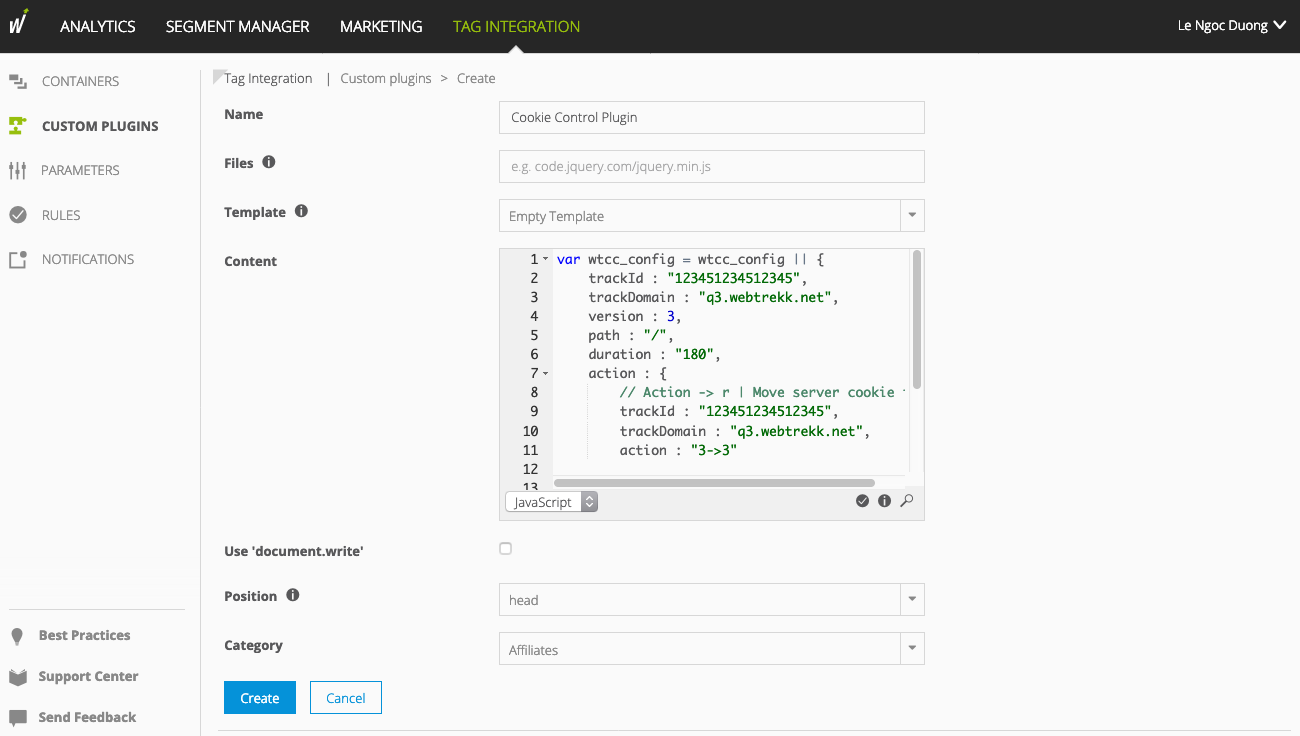
Parameter | Description |
|---|---|
Name | A name for the plugin, for example Cookie Control Plugin. |
Content | The code of the JavaScript file that Mapp provides on request. Add your configuration to the plugin content. |
Position | Select head. |
Step 2: Add the Plugin to Your Container
In the container overview, select the container of your website.
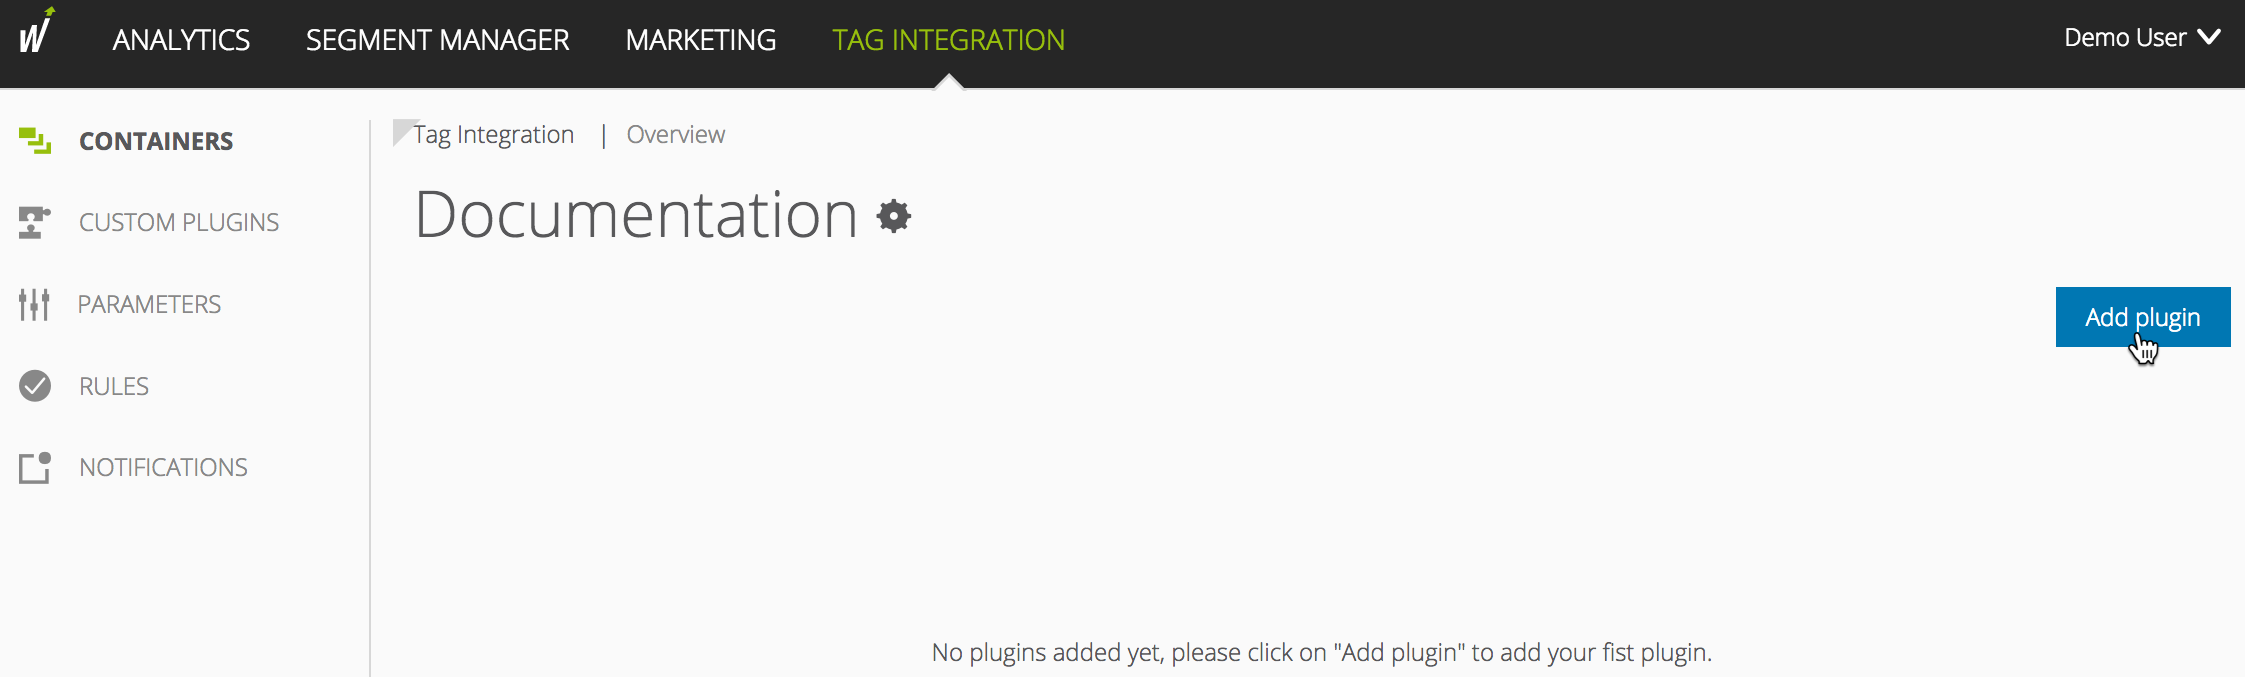
Click Add Plugin. The overview of all available plugins opens.
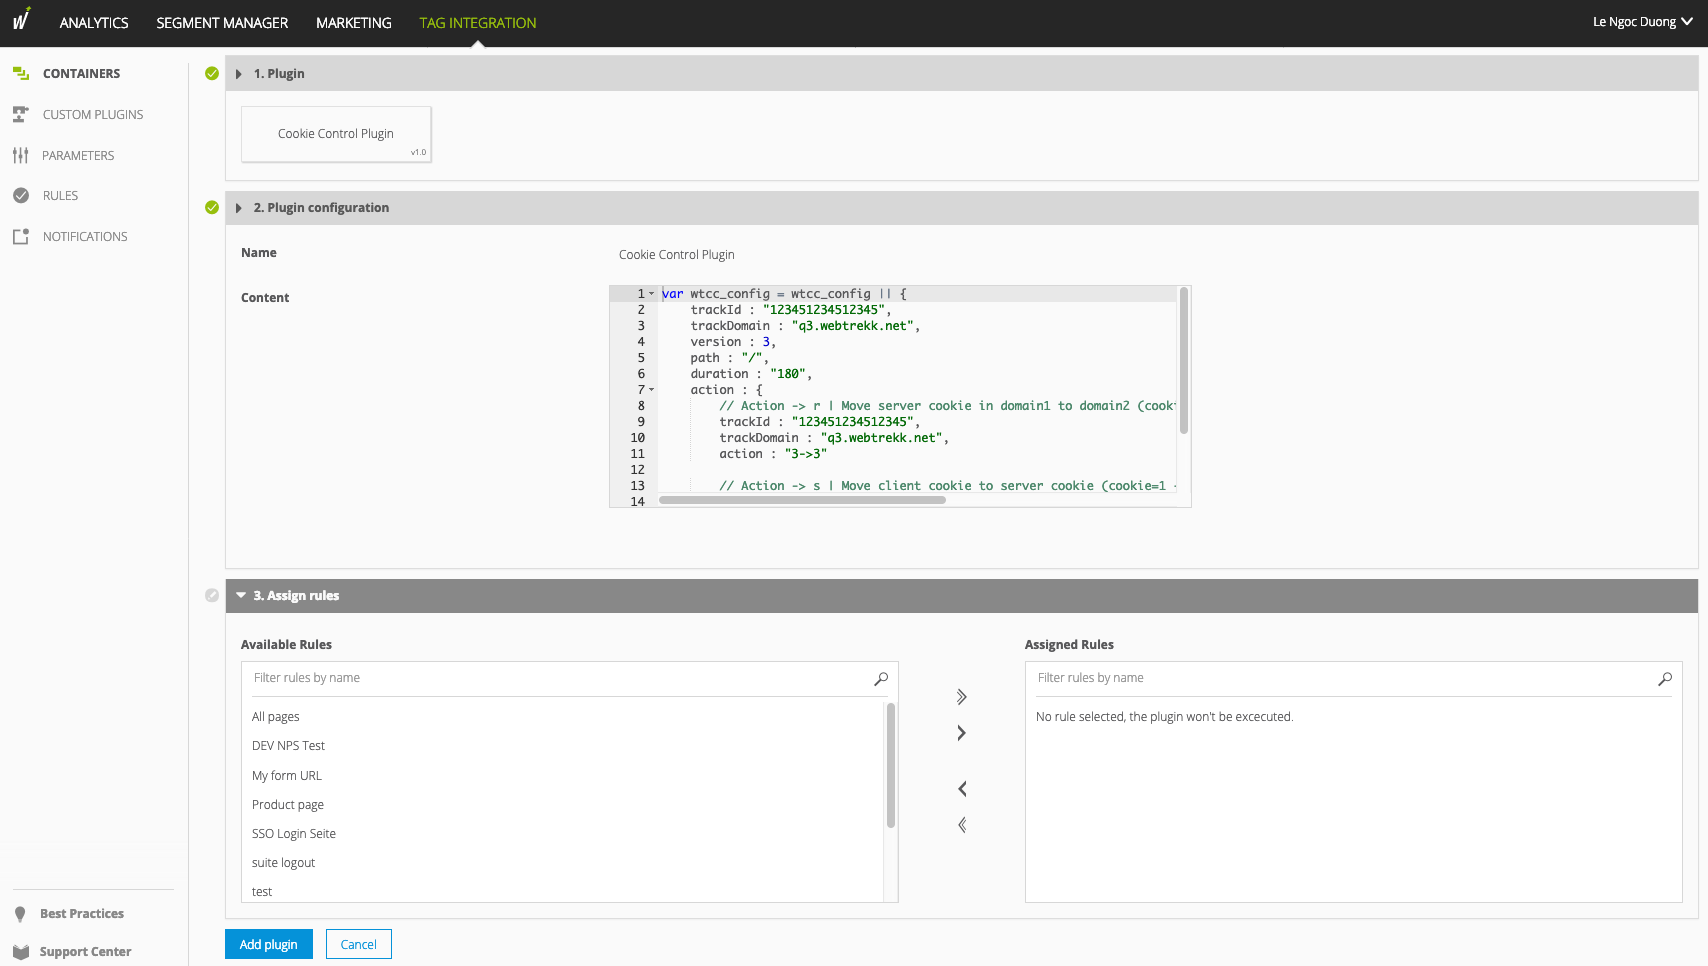
Under Custom Plugins, select the plugin you created. The plugin configuration dialog opens.
In the Assign rules area, define the page areas where the plugin runs. Include all potential entry pages.
Click Add plugin.
Step 3: Publish the Container
Click Publish to publish the container with the new plugin.
Configuration
The Cookie Control plugin is available only as a custom plugin. You enter your configuration in the content of this plugin, together with the plugin code. The parameters depend on the migration you plan. See Changing from First-Party to Third-Party Cookies and Moving Third-Party Cookies to a New Domain.
Note
Pixel Version 4 is outdated. Use the Smart Pixel for new integrations. This tab is for existing Pixel Version 4 setups.
Integrate the Script
Download the plugin file as described in Technical Requirements and Download. Integrate it before the script webtrekk_v4.min.js.
<script type="text/javascript" src="path/to/file/pixel-cookieControl.min.js"></script>
<script type="text/javascript" src="path/to/file/webtrekk_v4.min.js"></script>
Activate the Plugin
Set the parameter executePluginFunction to wt_cookieControl. You can set it in the configuration variable webtrekkConfig or as a parameter of a page-specific pixel object.
Example: Global Configuration
var webtrekkConfig = {
	trackId: "111111111111111",
	trackDomain: "data.exampleshop.com",
	domain: "www.exampleshop.com",
	executePluginFunction: "wt_cookieControl"
};
Example: Page-Specific Configuration
var wt = new webtrekkV3();
wt.contentId = "de.startseite";
wt.executePluginFunction = "wt_cookieControl";
wt.sendinfo();
Configure the Plugin
Define the global variable wtcc_config before the first tracking request is sent. The parameters depend on the migration. Examples are in Changing from First-Party to Third-Party Cookies and Moving Third-Party Cookies to a New Domain.
Parameter | Required | Description |
|---|---|---|
| Yes |
|
| Yes |
|
| Yes | Date until which the plugin is active, in the format |
| No | Lifetime of the migrated server-side cookie in days. If you omit it, the default of the plugin applies. |
| Yes | Type of migration: |
| Only for | The new track ID. |
| Only for | The new track domain. |
Important
In Pixel Version 4, the roles of
trackIdandtrackDomainon the top level depend on the migration. For1->3, they describe the target. For3->3, they describe the previous setup, and the new setup is insideaction. In the Smart Pixel, the parameters are named differently:currentTrackIdandcurrentTrackDomainare always the new setup,oldTrackIdandoldTrackDomainare the previous one.
Verify the Integration
Open your website and the developer tools of your browser, then go to the Network tab. Reload the page. You should see one additional request to your track domain before the regular tracking requests. In Pixel Version 4, the path of this request ends with /cc.
The plugin sends this request only once per browser. To test it again, delete the marker cookie wt_cookiecontrol (wtstp_cookiecontrol in the Smart Pixel) and reload the page.