Overview
The Mapp Cloud Flutter integration provides tools to enhance mobile apps with powerful user engagement features, including push notifications, in-app messaging, and geolocation-based targeting. This guide helps you set up the necessary prerequisites, install the Mapp Flutter plugin, and configure platform-specific settings for both Android and iOS.
Procedure
Step 1: Ensure Prerequisites are Installed
Before beginning, ensure you have the following set up:
Flutter: Flutter installation
CocoaPods (for iOS integration): CocoaPods installation
Supported Platforms:
iOS: Requires iOS 10 or later
Android: Requires Android 21 (Lollipop) or later
Mapp Flutter Plugin:
.png "image(674).png")
The Flutter plugin is supported by the Mapp SDK (iOS SDK 6.0.5+ / Android 6.0.17+).
Step 2: Install the Mapp Flutter Plugin
To install the Mapp plugin and integrate it with your Flutter project, run the following command in your project directory:
flutter pub add mapp_sdkThis command adds the Mapp SDK as a dependency, allowing your app to access Mapp’s engagement features.
Step 3: Platform-Specific Configuration
For Android
Set Up Firebase in Android Project:
Add the following plugin in your
build.gradlefile to integrate FCM:apply plugin: 'com.google.gms.google-services'Set the target and minimum SDK versions in
build.gradle:targetSdkVersion 33 minSdkVersion 21
For iOS
Configure CocoaPods: Navigate to the iOS folder in your Flutter project and install the pods:
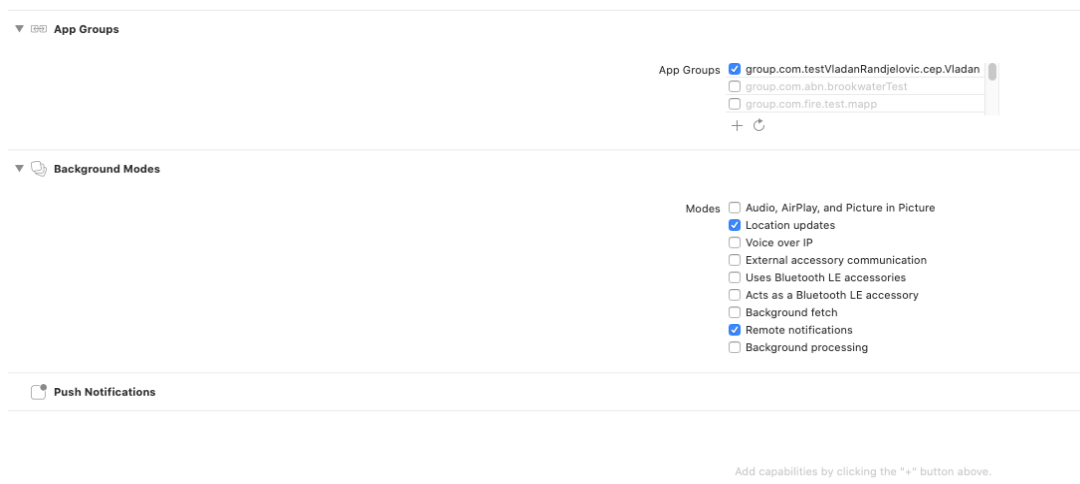
cd ios && pod installEnable Capabilities:
In Xcode, enable “Push Notifications” and “Background Modes” (for Remote Notifications and Location Updates).
Create App Configuration File: Create an
AppoxeeConfig.plistfile, add your Mapp account settings, and include it in the app’s target:.png)
<?xml version="1.0" encoding="UTF-8"?>
<!DOCTYPE plist PUBLIC "-//Apple//DTD PLIST 1.0//EN" "http://www.apple.com/DTDs/PropertyList-1.0.dtd">
<plist version="1.0">
<dict>
    <key>inapp</key>
    <dict>
        <key>custom_fields</key>
        <array>
            <string>customString</string>
            <string>customNumber</string>
            <string>customDate</string>
        </array>
        <key>media_timeout</key>
        <integer>5</integer>
    </dict>
    <key>sdk</key>
    <dict>
        <key>app_id</key>
        <string>your app id</string>
        <key>dmc_system_id</key>
        <integer>your dmc id</integer>
        <key>sdk_key</key>
        <string>your sdk key</string>
        <key>is_eu</key>
        <true/>
        <key>open_landing_page_inside_app</key>
        <false/>
        <key>jamie_url</key>
        <string>your inapp server url</string>
        <key>apx_open_url_internal</key>
        <string>YES</string>
    </dict>
</dict>
</plist>
With these steps complete, your app is ready for deeper configuration. Continue to the Bridge API Guide to enable features like push notification handling, in-app messaging, and custom event tracking.