This article shows the necessary steps for showing a layer with a link to the newsletter subscription for all visitors without an existing registration in case they want to leave the website.
Looking for a structured learning path?
Learn step by step in our Academy Course: Mapp Intelligence - Onsite Layers.
.png "grafik(33).png")
Use Case
This article shows the steps required to display a layer for users without a newsletter subscription.
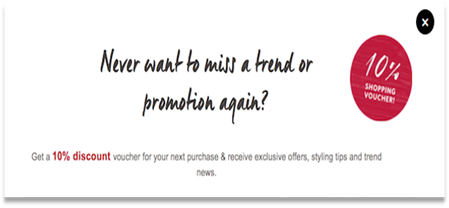
A layer with a link to a newsletter subscription is to be displayed for all visitors who have not subscribed to a newsletter yet and are trying to leave the website.
Setup in Marketing Automation
Creating the Target Group A target group, which describes who is being addressed in the campaign, must be set up.
Selecting Content Determines what is being shown to the target group.
Selecting Placement The creation of a Placement is necessary to decide where the content will be displayed.
Campaign Setup Campaigns have to be created.
Creating the Target Group
As a target group, we must create both a segment and a real-time behavior.
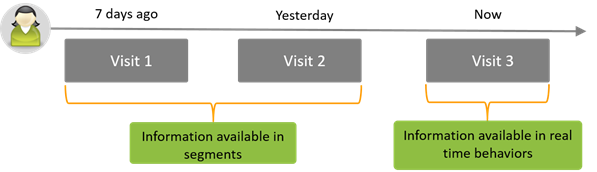
It is possible to view the in-session behavior with real-time behavior, whereas a segment is used for historical behavior within past visits.
We want to display the newsletter layer only to users who are about to leave the website (real-time behavior) and have neither registered for a newsletter in the same visit (real-time behavior) nor in a past visit (segment).
Creating Target Group 1
All visitors, that have already registered for a newsletter, should not be taken into account.
First, a segment has to be created.
We are using the predefined User category "User-Email Receiver Id". Make sure that this category is being filled out as soon as a visitor registers for a newsletter.
In Segment Manager, create a segment containing all visitors who have not registered for a newsletter yet. Then, import this segment into Marketing Automation.
Creating the segment in Segment Manager
Mapp Segment Manager > Create new segment

Name of the segment
Filter
Saving the segment
Importing the segment in Marketing Automation
Mapp Marketing Automation > Target Groups > Segments

Select Segment
Click “Import Segment”
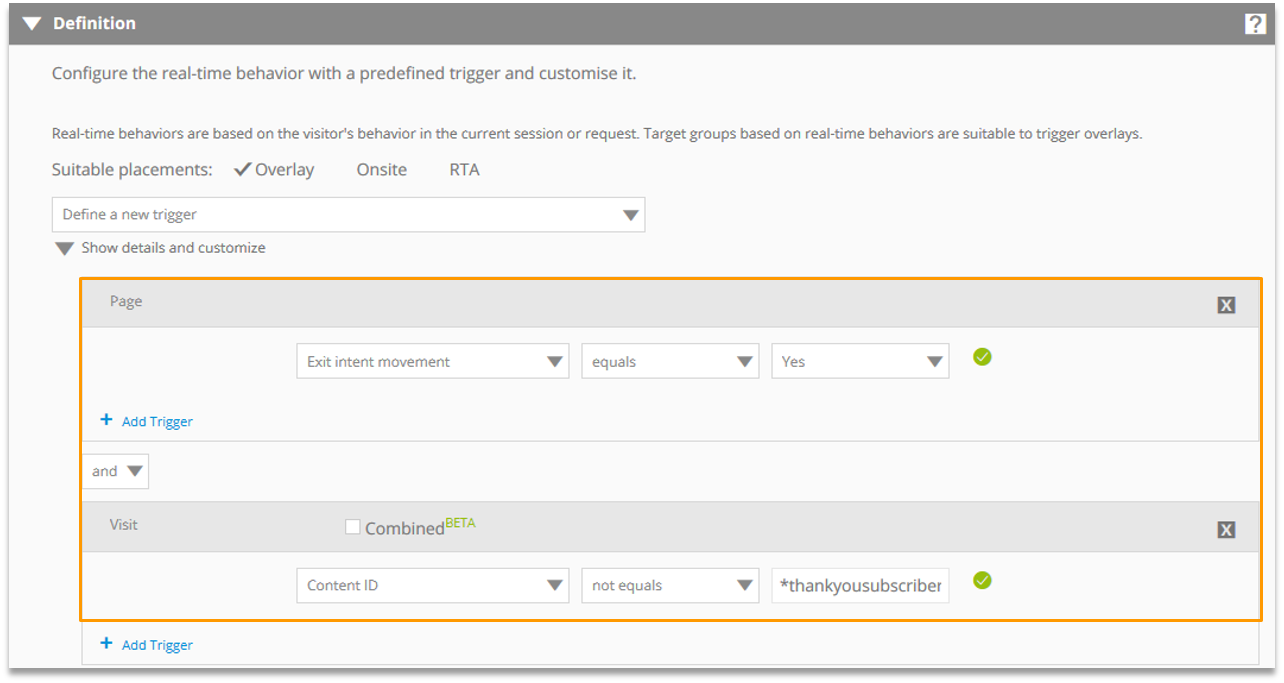
Creating a real-time behavior
Second, a real-time behavior has to be created.
All returning visitors who have not registered for a newsletter in the current session and are trying to leave the website should be taken into account.
Mapp Marketing Automation > Target Groups > Real-time Behaviors > Create a new Real-time Behavior
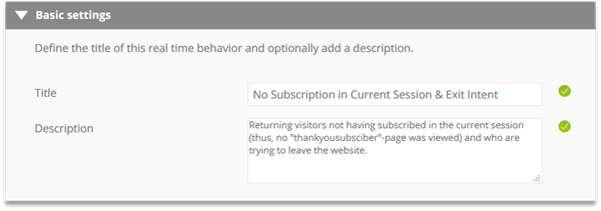
Filter on visitors who are trying to leave the website but have not viewed the "Thank you"-Page as a result of a successful subscription in the current session.
Creating Target Group 2
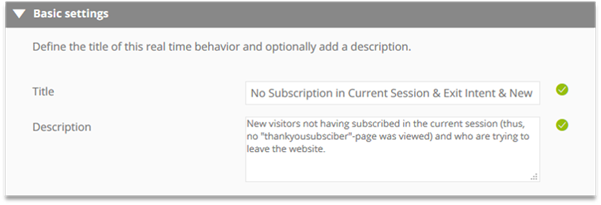
All new visitors who have not registered for a newsletter and are trying to leave the website should be considered.
The configured Target Group 1 would not cover new visitors. Since new visitors do not have historical information, they can not be addressed when using a segment (here: "No Newsletter Subscription"). Hence, a different target group is needed.
As segments do not work with new visitors, the filter on new visitors has to be set on the real-time behavior of our second target group instead of the segment.
Mapp Marketing Automation > Target Groups > Real-time Behaviors > Create a new Real-time Behavior
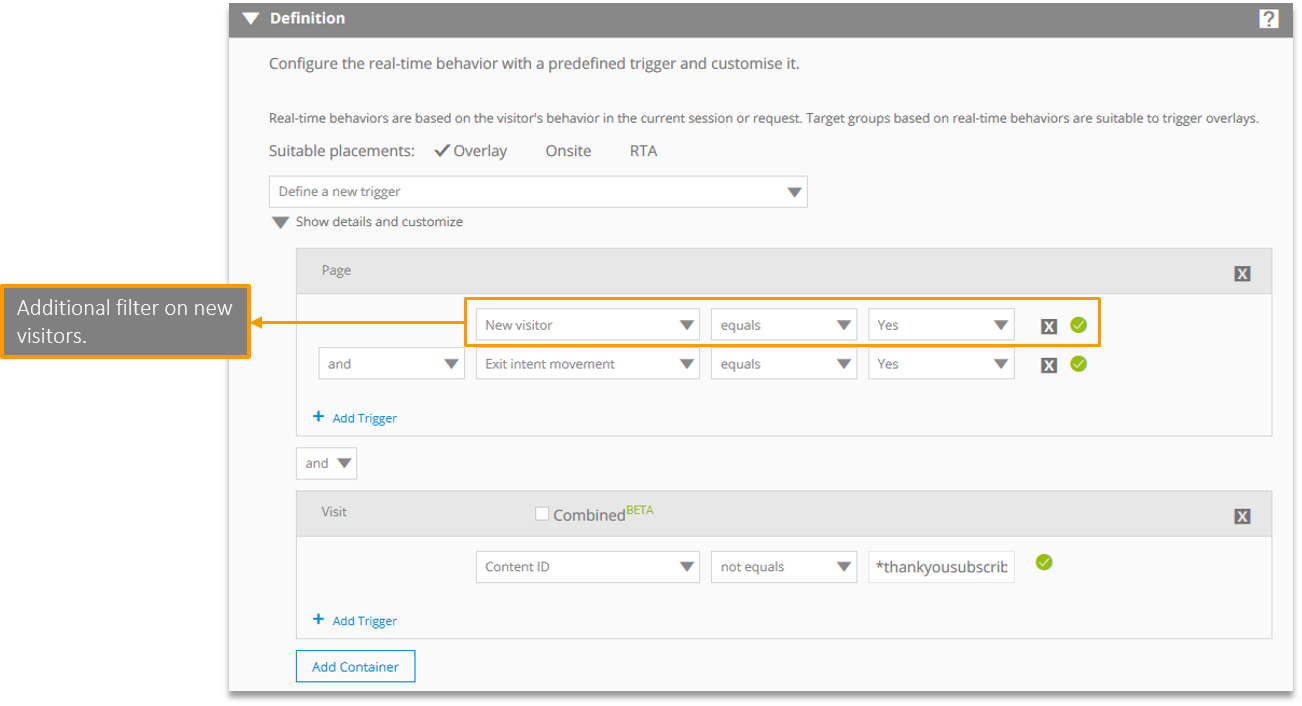
Selecting Content
After configuring both target groups, the URL that will be shown in the layer has to be defined.
Mapp Marketing Automation > Contents > Layer > Create a new layer
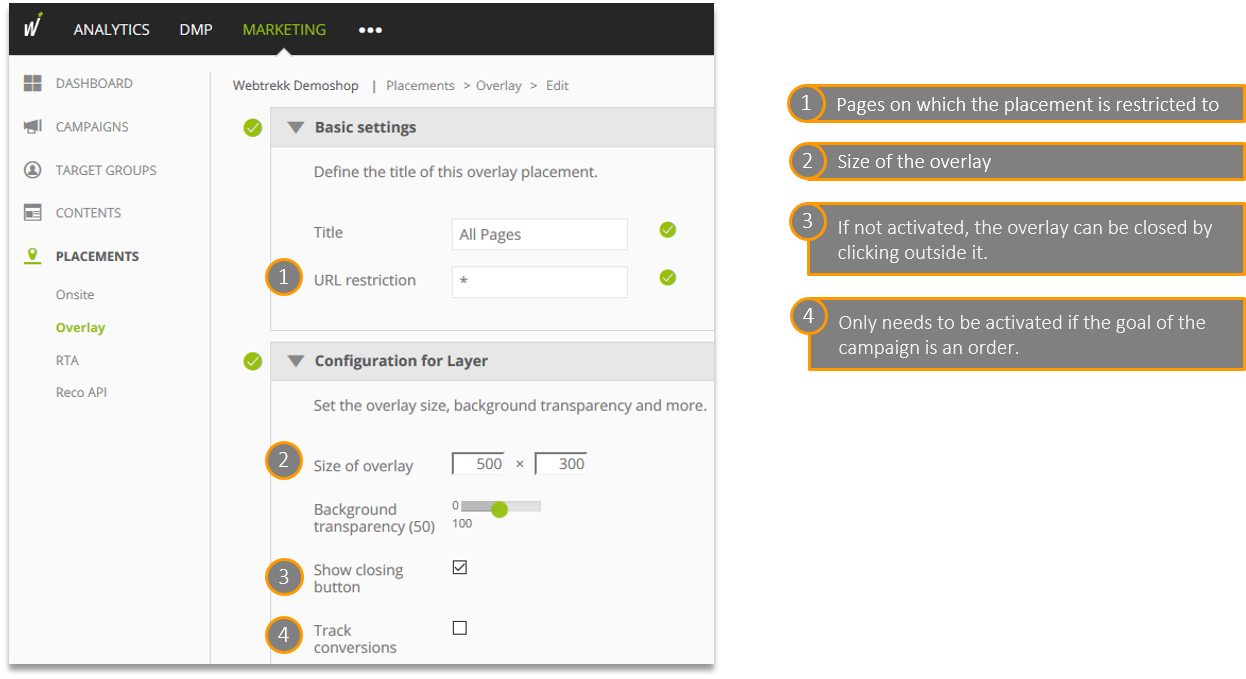
Selecting Placement
Lastly, a placement has to be set up. Regardless of the page, the layer should always be able to show if the visitor matches the target group. Thus, we set "*" as a placeholder.
Mapp Marketing Automation > Placements > Overlay
Campaign Setup
Now that all three campaign components have been configured, the campaign itself can be set up. As a campaign can not combine two target groups, two campaigns are needed. Both campaigns will have the same content and placement. They only differ from each other through their target group.
a) Campaign for returning visitors:
All visitors who have been on the website before, have not registered for a newsletter in a past visit or in the current visit, and intend to leave the website.
Segment: No Newsletter Subscription
Real-time behavior: No subscription in Current Session & Exit Intent
b) Campaign for new visitors:
All visitors, that have not been on the website before, have not registered for a newsletter in the current visit and intend to leave the website.
Segment: All Users
Real-time behavior: No subscription in Current Session & Exit Intent & New
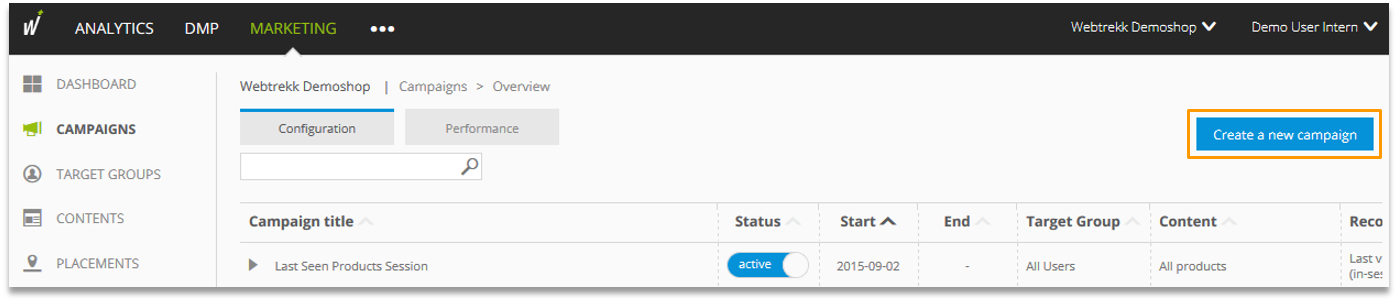
The configuration is done under Mapp Marketing Automation > Campaigns > Create a new campaign
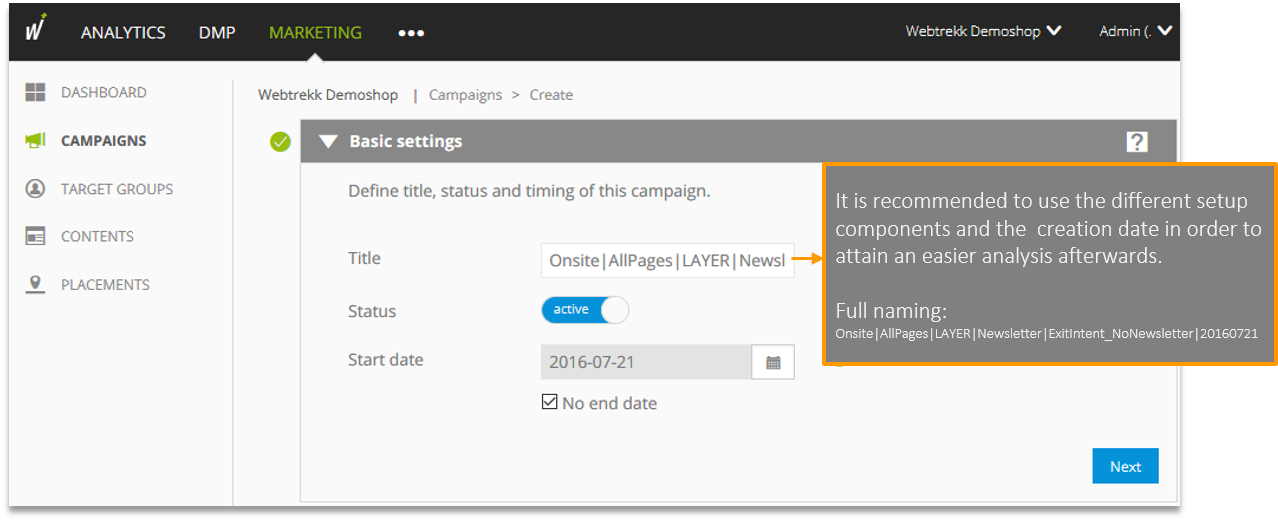
a) Campaign creation for returning visitors
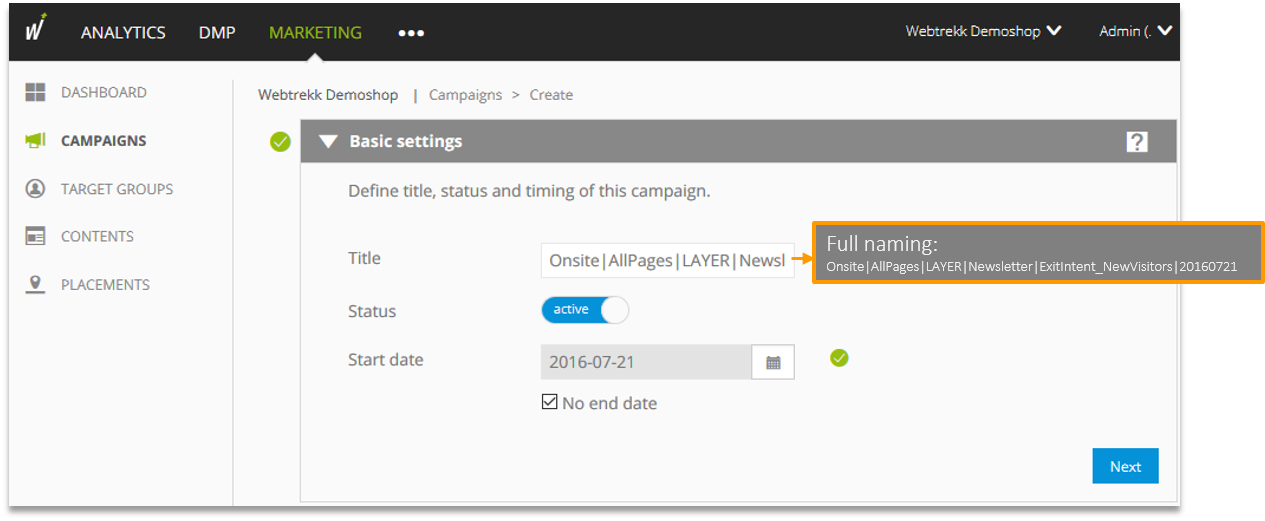
Basic Settings
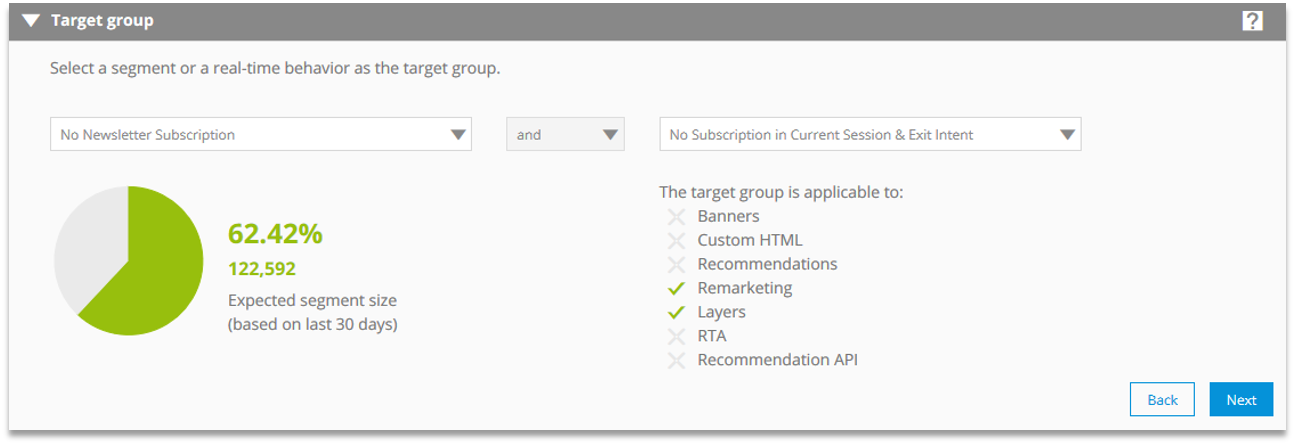
Target Group
Select the just created segment "No Newsletter Subscription" and real-time behavior "No Subscription in Current Session & Exit Intent".
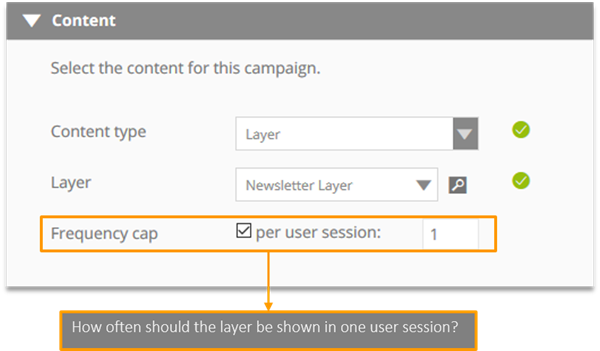
Content
Select the preconfigured layer "Newsletter Layer" as content.

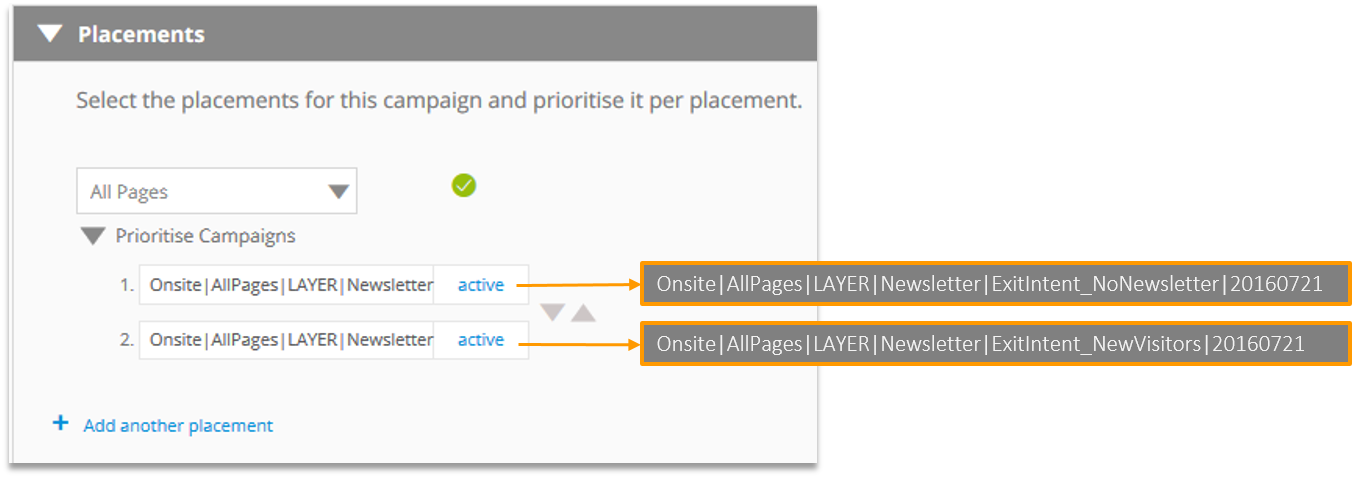
Placements
Choose the preconfigured placement "All Pages".

b) Campaign creation for new visitors
Basic Settings
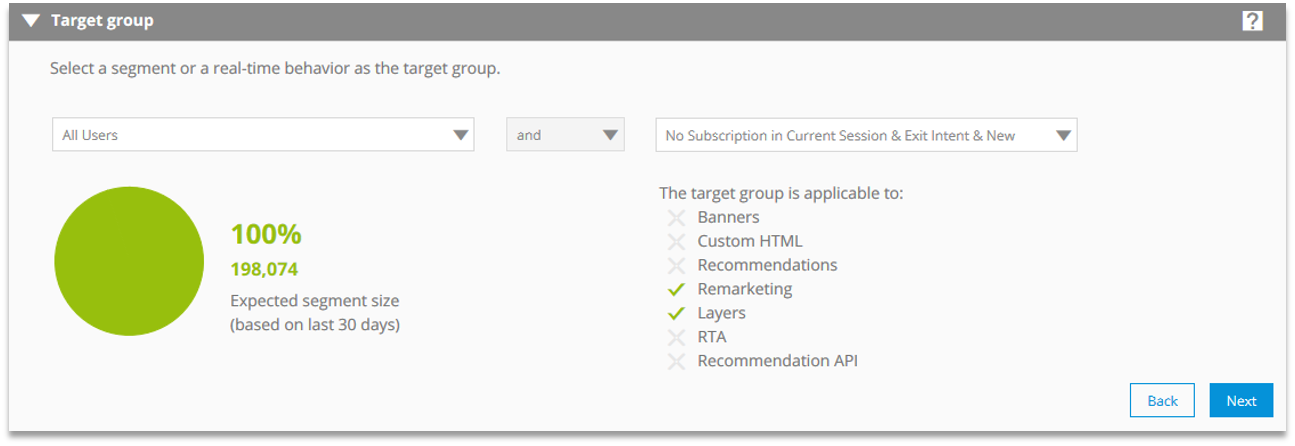
Target Group
Select the segment "All Users", that is available by default, and the real-time behavior "No Subscription in Current Session & Exit Intent & New".”
Content
Select the preconfigured layer "Newsletter Layer" as content.
Placements
Choose the preconfigured placement "All Pages".
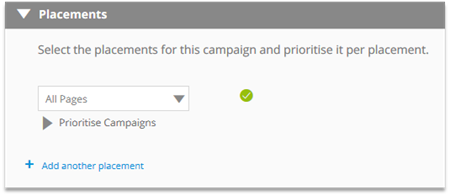
Prioritizing Campaigns
After creating two campaigns, one last step is needed: prioritizing them. The order does not matter because both campaigns show the same content.