On-site placements allow you to determine where and how content such as banners, recommendations, or Custom HTML is displayed on your website. These placements integrate seamlessly into your web pages using predefined identifiers.
Configuration for Onsite Placements
Step 1: Prepare the Website
Before configuring an on-site placement in Marketing Automation, ensure your website is ready to support the placement. This involves identifying or setting up a location on the page where the content will appear.
.png)
Add or Reuse an Identifier
Existing Elements or New Identifiers:
You can reuse existing elements on your website, such as a teaser or other interactive components, and simply replace their content.
Alternatively, create a new DIV ID or CSS class specifically for the placement.
Example DIV ID: #example-div
Example CSS Class: .example-class
Prepare for Integration:
Ensure the identifier (new or reused) is included on the pages where the placement will be used.
Verify that the structure and naming conventions align with your website’s design and functionality.
Step 2: Configure the On-Site Placement in Marketing Automation
Once the website is prepared, configure the placement under Marketing Automation > Placements > Onsite. This step includes defining the identifier, applying additional restrictions, and adapting settings based on the content type.
Define the Placement
Add a Name: Provide a unique name for the placement to identify it in the system.
Select the Identifier:
Manual Selection: Input the DIV ID or CSS class defined during website preparation.
Visual Selector: Use the tool’s visual guide to choose the correct identifier directly from your webpage.
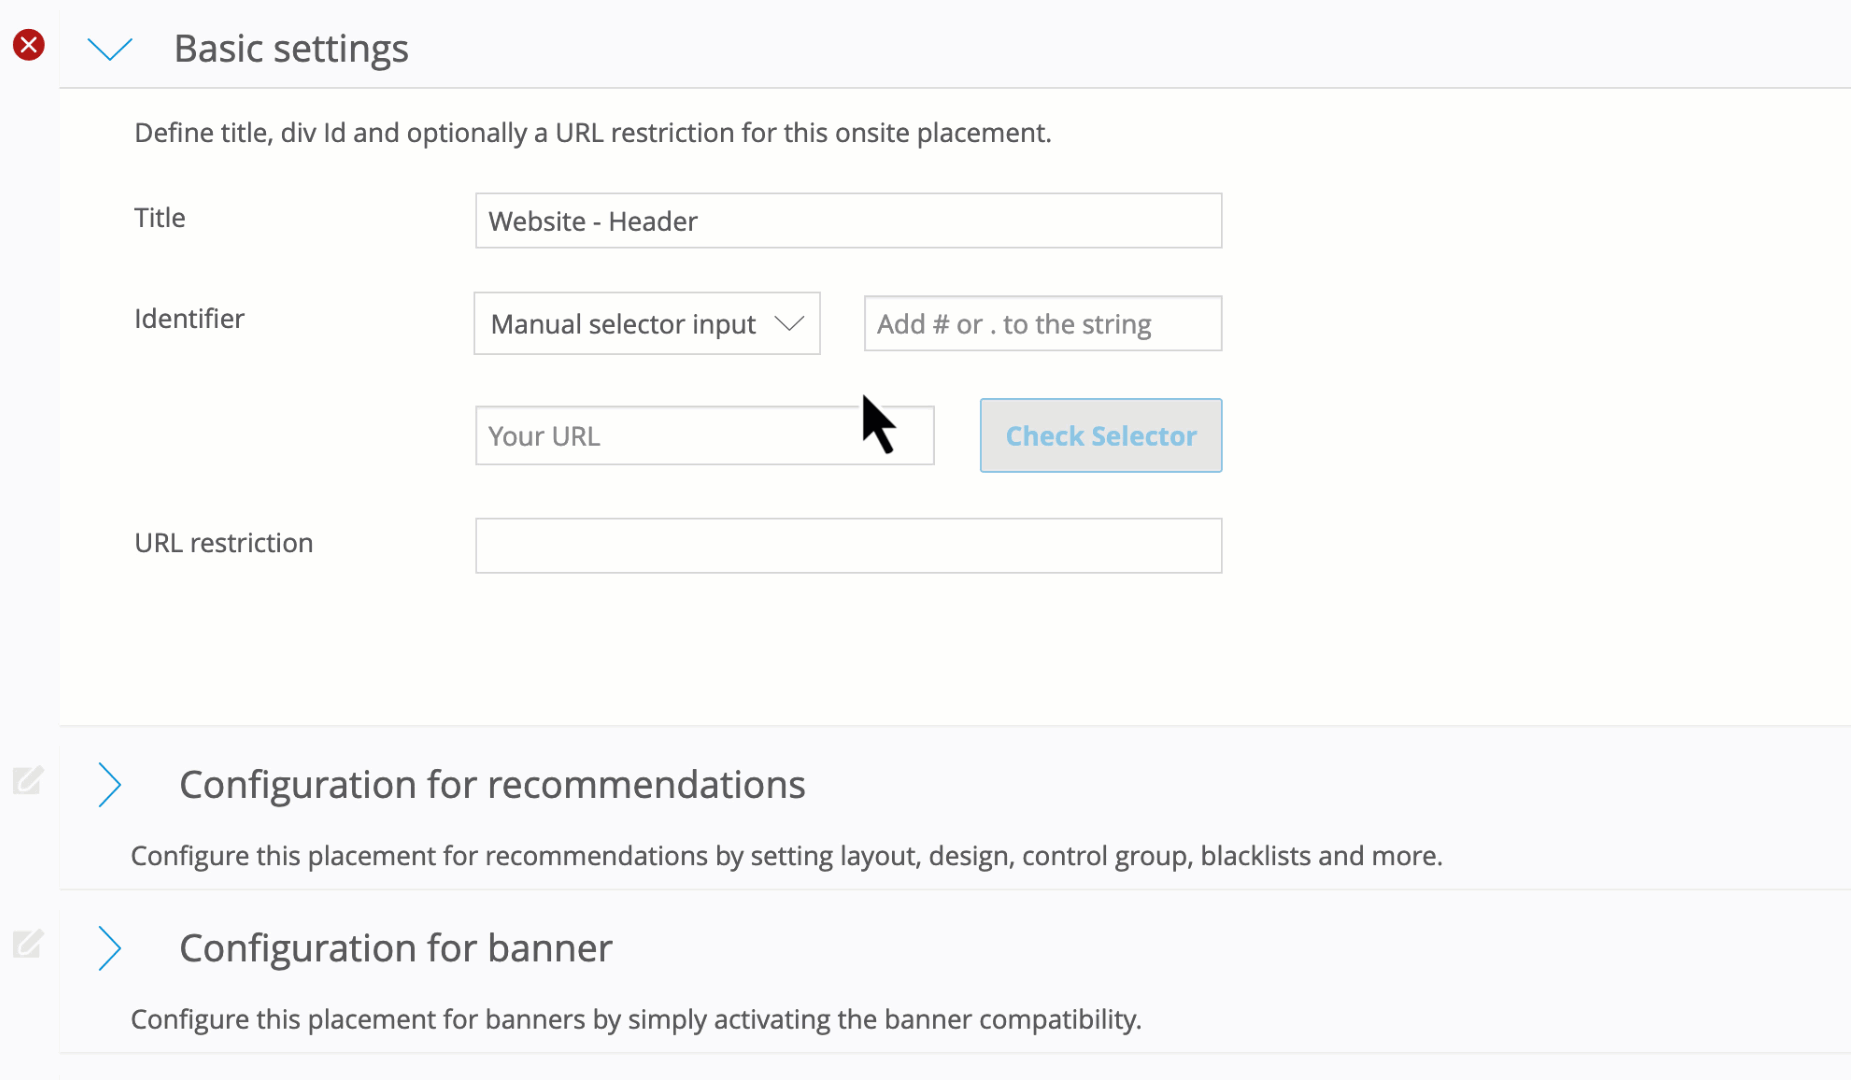
Add URL Restrictions:
Limit the placement to specific pages where the identifier appears.
Example: Restrict to product pages using URL patterns like www.example.com/products/*.
Placement Configuration Options
Once the identifier is defined, configure additional settings based on the content type selected for the placement:
Recommendations:
Customize layout and design, including the number of items displayed and their order.
Apply CSS styling to align with your website’s design.

Banners:
Configure the scaling (e.g., original size, container fit).
Custom HTML:
Limited configuration; the content is displayed as is.
Things to Consider
Website Preparation: Ensure the correct identifiers (DIV IDs or CSS classes) are in place on your website before creating placements.
Flexibility: On-site placements can handle multiple content types, making them suitable for diverse use cases.
Customization: Use visual selection tools, URL restrictions, and styling options to optimize placement performance.
Testing and Optimization: Leverage control groups and blacklists to refine and enhance content delivery.