---
title: "Best Practice: Consent Management with UserCentrics"
slug: "best-practice-consent-management-with-usercentrics"
updated: 2026-07-03T12:53:59Z
published: 2026-07-03T12:53:59Z
canonical: "docs.mapp.com/best-practice-consent-management-with-usercentrics"
---
> ## Documentation Index
> Fetch the complete documentation index at: https://docs.mapp.com/llms.txt
> Use this file to discover all available pages before exploring further.
# Best Practice: Consent Management with UserCentrics
## Preface
The Usercentrics Consent Management Platform (CMP) can be implemented into Tag Integration quickly and easily. Thus, it allows you to only fire your tags if you have the consent of your user.
In this step-by-step guide, we'll show you how to
- implement the Usercentrics script in Tag Integration, and
- fire your Tags only after consent.
For a precise description of the Usercentrics system's functionality, please visit their website at [usercentrics.com](https://usercentrics.com).
> [!NOTE]
> Note
>
> This guide implements a block-until-consent model: no tags fire, including Mapp Intelligence, until the user gives consent. If you'd prefer to track anonymously by default and only unlock identifiable tracking after consent, see [How to Control Anonymous Tracking with UserCentrics](/v1/docs/how-to-control-anonymous-tracking-with-usercentrics) instead.
---
## Integration
### 1. Create Custom Plugin
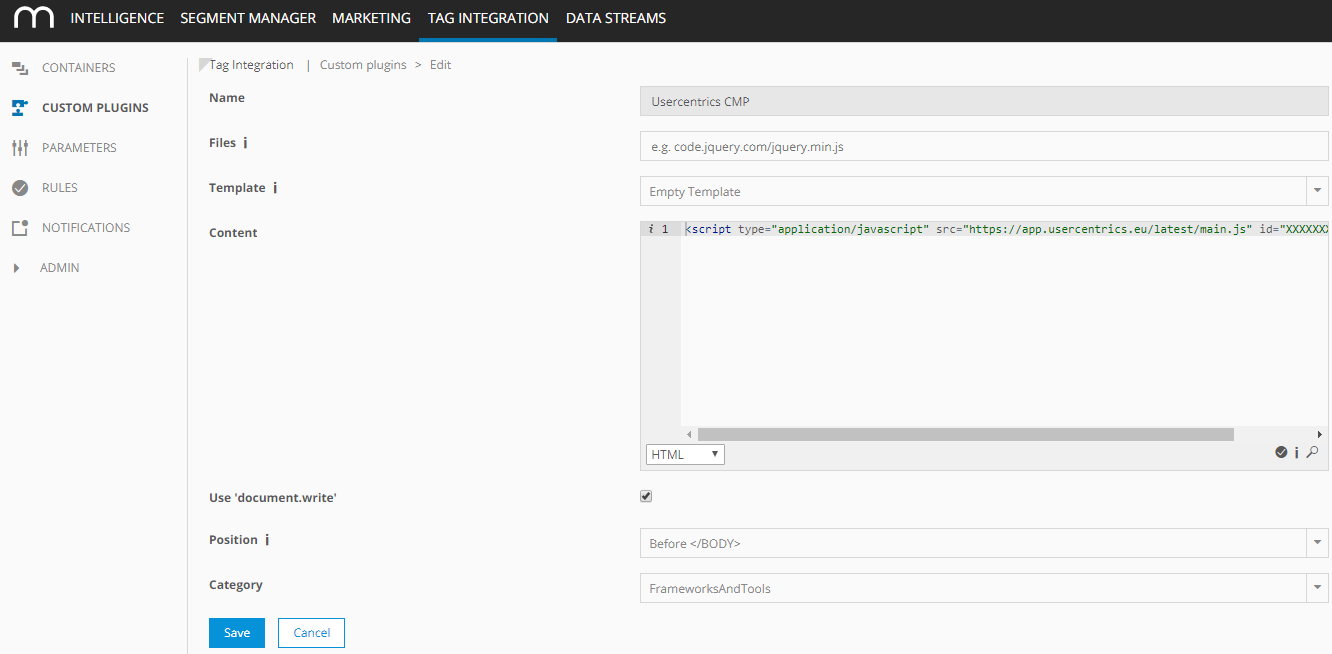
First, you have to create a new tag, in which the code for the Usercentrics script is saved.
To do this, open Tag Integration, choose **Custom plugins**, and click **New plugin**.
Enter a name for the plugin (e.g. "Usercentrics CMP") and select **HTML** at the lower edge of the **Content** box.
In the **Content** box, you can add the script. You can find the script at your Usercentrics settings-dashboard at the menu item **General > Script**. It looks as follows:
```plaintext
```
> [!NOTE]
> Note
>
> In the above example you should replace "XXXXXXXXX" with your Usercentrics Settings-ID. The Settings-ID can be found in your Settings-Backend when you login to your Usercentrics Account.
Check **use 'document.write'** and save the plugin.
### 2. Add Plugin to Container
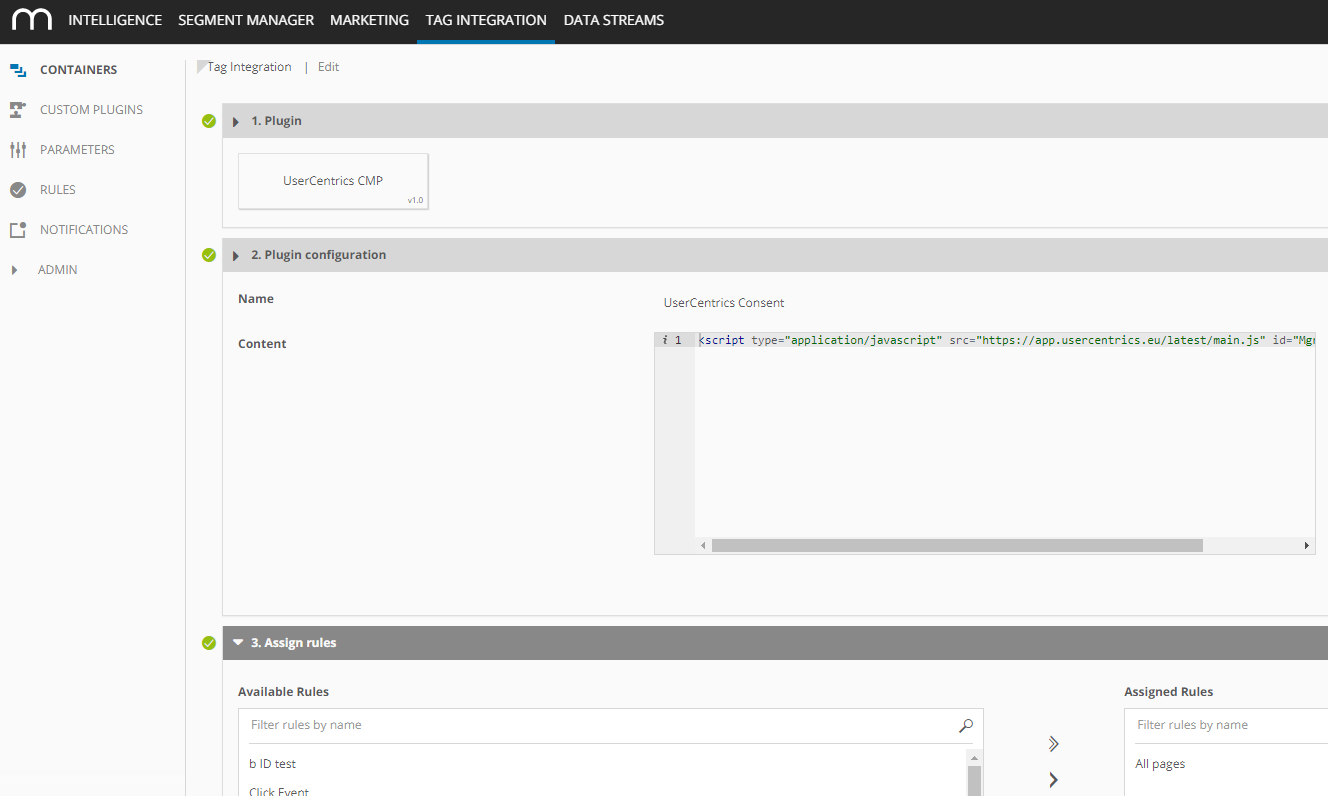
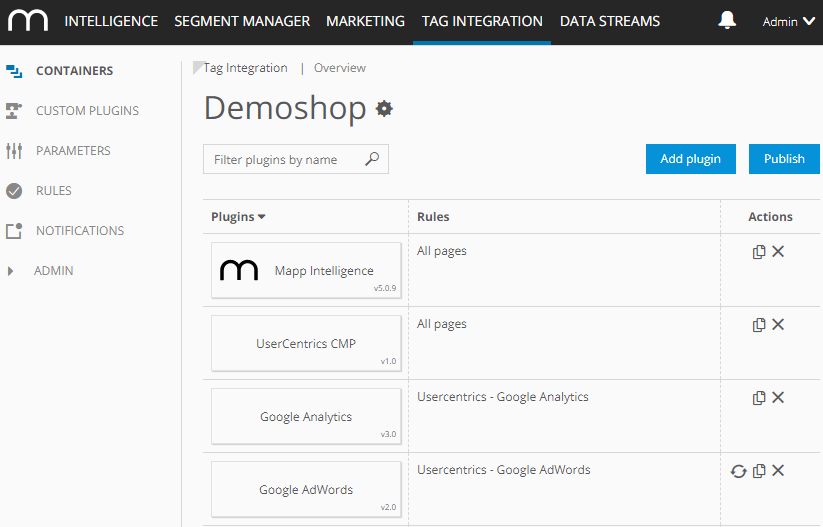
Select your WEB container at the menu item **Containers** and add the custom plugin (in our example "Usercentrics CMP"). Assign the rule **All pages** and click on the button **Add plugin**.
### 3. Parameter set-up
The Usercentrics script communicates with Tag Integration via custom events. Therefore, it is still necessary to define the corresponding parameters which are used by Tag Integration.
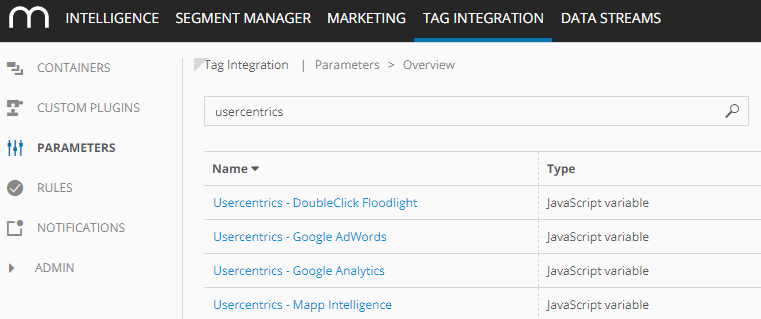
To this end, click on the button **New parameter** at the menu item **Parameters**.
Enter a name (e.g. "Usercentrics - Google AdWords"). As Type, select **JavaScript variable**.
At Definition, add `ti_event.data['<<NAME>>']` , where <> is the name of the specific consent service. In our example, we want to configure the Google AdWords service and define `ti_event.data['Google AdWords']` (case-sensitive and space-sensitive!).
> [!NOTE]
> The name of the variable is the same, as well as the corresponding consent in your settings.

Please repeat the creation of the parameters for each tag which should be fired only after the active consent of your visitors.
### 4. Rule set-up
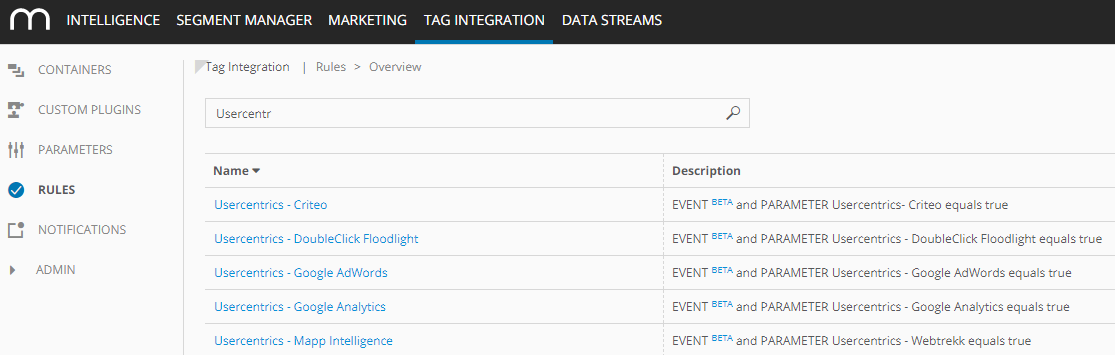
Click on the button **New rule** at the menu item **Rules**.
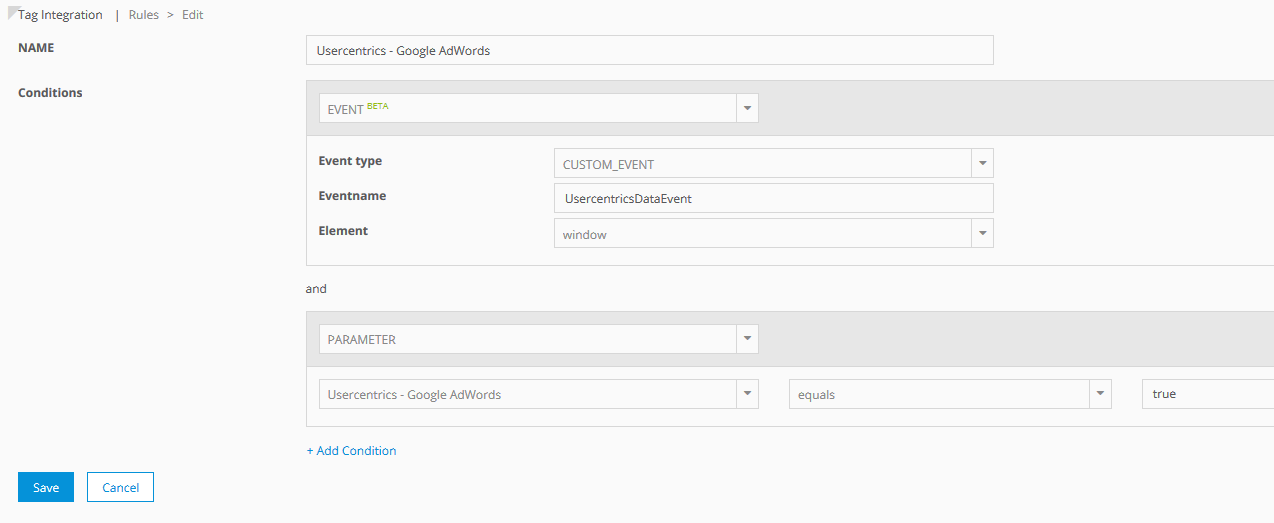
Enter a name (e.g. "Usercentrics - Google AdWords"). Select the condition **Event**, and configure the following settings:
- **Event type:** CUSTOM_EVENT
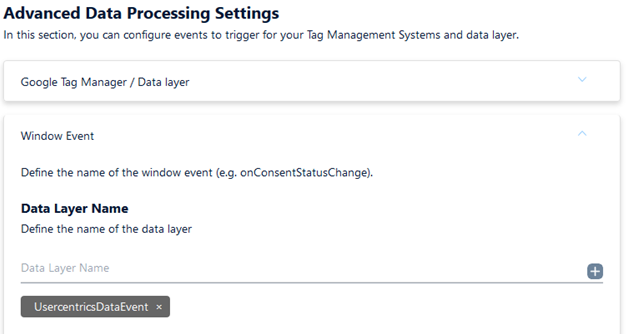
- **Eventname:** Insert the name of the window event (e.g. "UsercentricsDataEvent"). To this end, please log in to Usercentrics and copy the event name as defined in your Usercentrics settings at the menu item *Service Settings > Advanced Data Processing Settings > Window Event*. Activate the trigger **consents_initialized_storage** and **specific_consents_changed**.
- **Element:** window
Window event in your UserCentrics Settings:
Afterwards, click the button **Add Condition**, select **Parameter,** and configure the specific consent parameter (in our example "Usercentrics - Google AdWords") with the condition `equals` and value `true` .
Please repeat the creation of the rules for each tag, which should be fired only after the active consent of your visitors.
### 5. Activation
Select your WEB container at the menu item **Containers** and reconfigure all custom plugins that require a consent for execution.
## Do you need an opt-in for Mapp Intelligence?
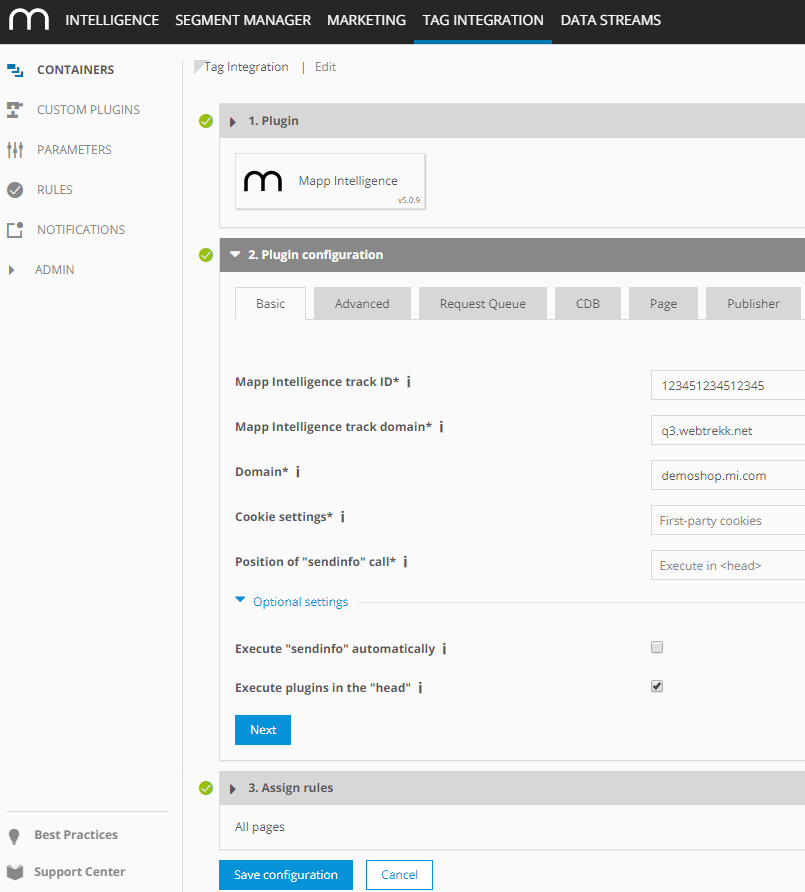
In this case, open your **Mapp Intelligence plugin** and execute the following tasks:
- Deactivate "Execute 'sendinfo' automatically" in *Basic > Optional settings*.
- Activate "Execute plugins in the "head" in *Basic > Optional settings*.
- Optional: In the Event tab, leave the field "Event tracking" blank in case you want to track link clicks.
- Optional: In the Form tab, leave the field "Form tracking" blank in case you want to track forms.
As execution rule, you can still use "All pages":
**Basic tab:**
**Event tab:**

**Form tab:**

Afterwards, create a custom plugin *(Custom Plugins > New plugin)*. Enter a name (e.g., "Send Mapp Intelligence Pageview"). As Template, select **Send Page update (don't execute all plugins again)**. Enter the following lines of code in the plugin:
```plaintext
window.wts = window.wts || [];
//Optional: add link tracking
window.wts.push(["linkTrackInstall"]);
//Optional: add form tracking
window.wts.push(["formTrackInit", ti_parameter("FormParam")]);
window.wts.push(["formTrackInit", document.forms[0]]);
//Send request to trackserver
window.wts.push(["send", "pageupdate", true]);
```
> [!NOTE]
> If you use form tracking, create the corresponding JavaScript ti_parameters before adding them to the custom plugin.
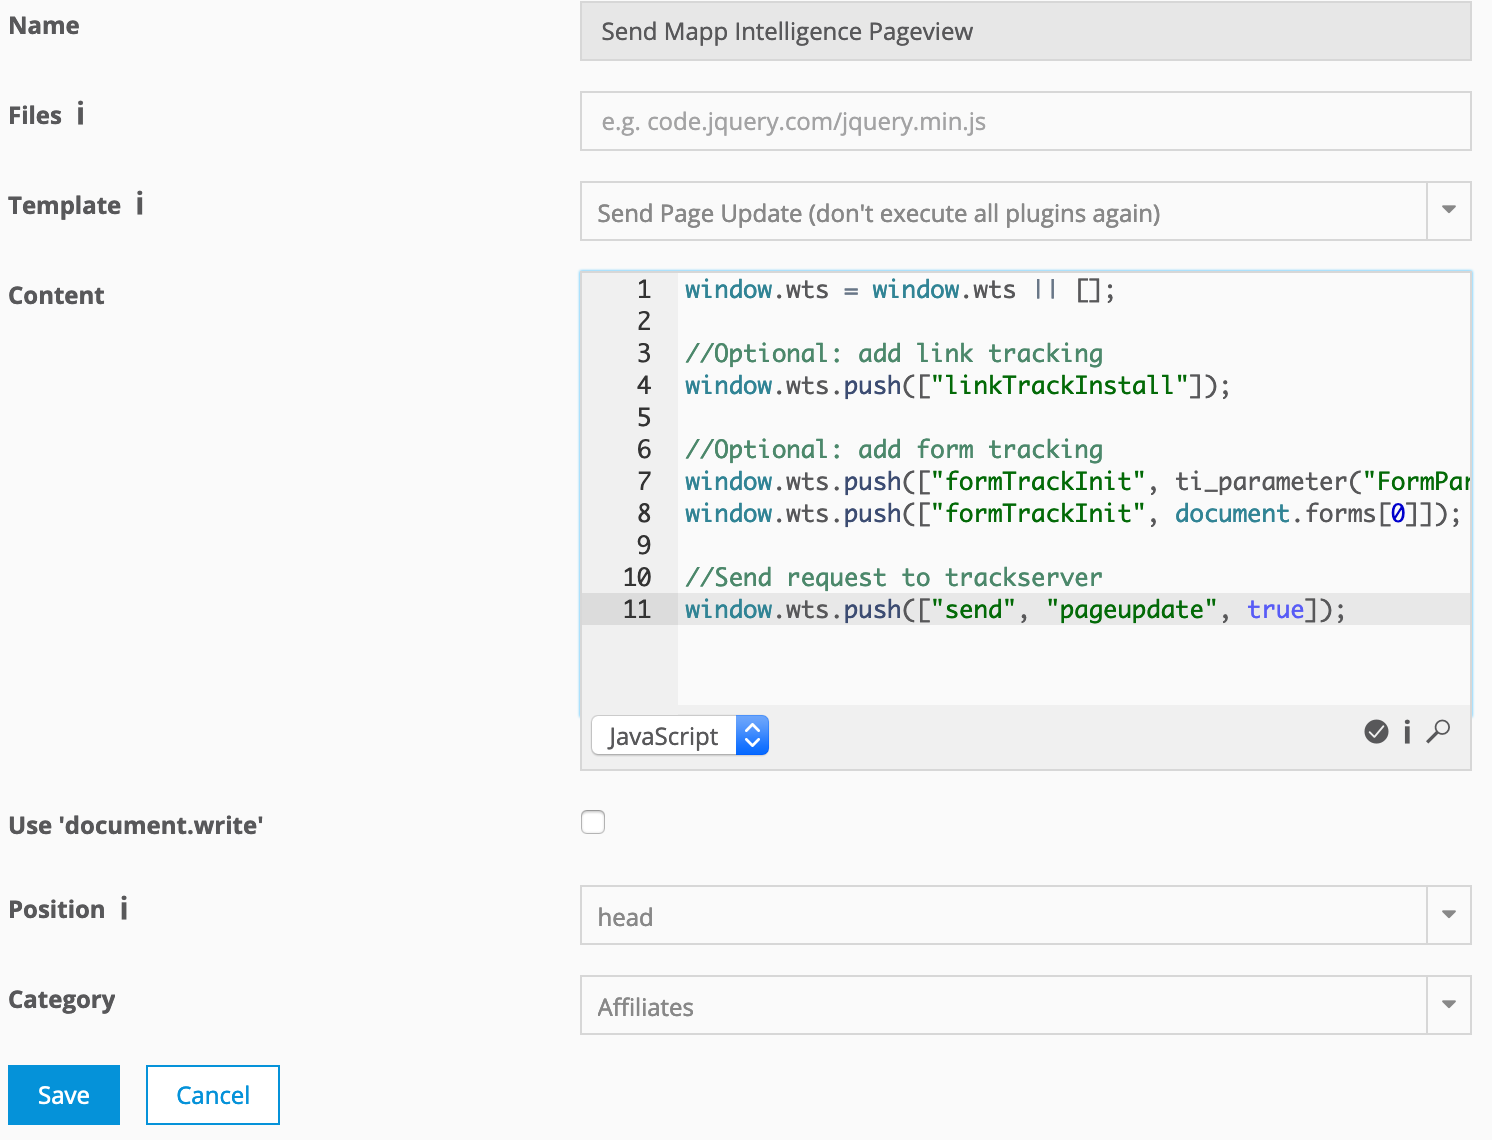
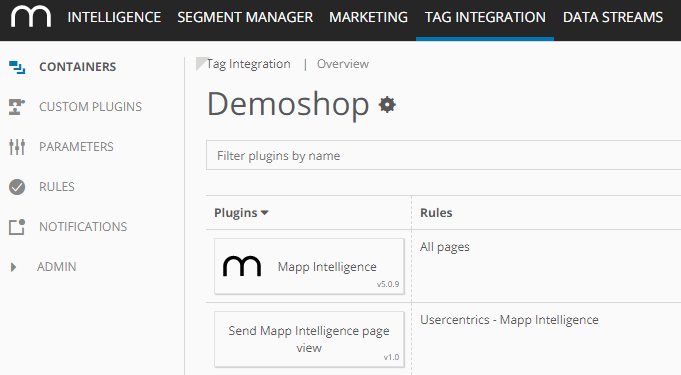
Add this plugin to your WEB container. As an execution rule, configure your specific consent rule (e.g., "Usercentrics - Mapp Intelligence").