Prerequisites
Active Engage and Shopify accounts.
Shopify Plus is required to stop Shopify messages and replace them with Engage messages.
If you are not already using Shopify with Intelligence, install the Mapp Cloud app from the Shopify App Store. You can find our guides for installing the Mapp Cloud Shopify App here
You can only "stop" the Shopify messages and replace them with Engage messages if you have Shopify plus
The Shopify help page has more information about finding applications. To set this up, select the Engage tab.
Data Flow
The following webhooks handle data flow between Shopify and Mapp Engage:
CUSTOMERS_CREATE,CUSTOMERS_UPDATE,CUSTOMERS_DELETEPRODUCTS_CREATE,PRODUCTS_UPDATEORDERS_CREATE,ORDERS_FULFILLED,ORDERS_CANCELLED,ORDERS_DELETEREFUNDS_CREATEORDERS_EDITED
For products with up to 2000 variants, data is fetched in increments:
The initial 100 variants are processed first.
Subsequent requests handle 250 variants at a time while respecting API limits.
Procedure
A) Create Subscriber and Customer Groups for Shopify
Please refer to this article: Create a New Group
B) (Optional) Create prepared messages
You can use Shopify to send updates, confirmations, refunds, and cancellations of orders. See Prepared Messages for information on how to create these.
C) Create a new integration in Mapp Connect
In the main navigation, click Data Management > Mapp Connect.
Click Add New Integration.
In the Create new integration window, select Type: Shopify. Provide the Name and Description (optional).
Click Create.
Make sure to note your Integration ID and Secret. You will need to add these to Shopify.
Also, set up mapping with your new groups and messages.
More information about Mapp Connect integrations can be found here: Integration Setup.
D) Set Up Shopify
In the Shopify admin page, go to the Apps section and click Add apps.
Click Shopify App Store and search for Mapp Cloud.
Open the Mapp Cloud app and click Add app.
Click Install app.
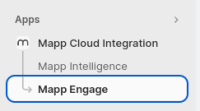
Select Engage from the menu on the left.
Add your Cluster and domain.
Next, add the integration ID and Secret.
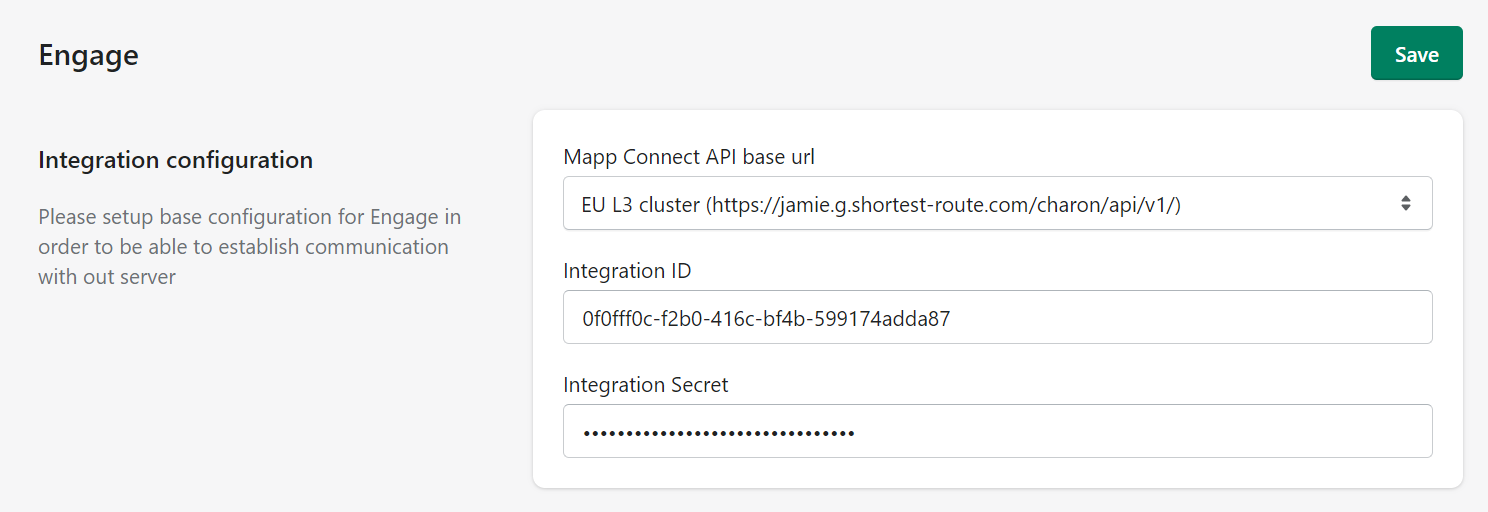
Select Save. Now, other fields will become visible.
Add in your SFTP information.
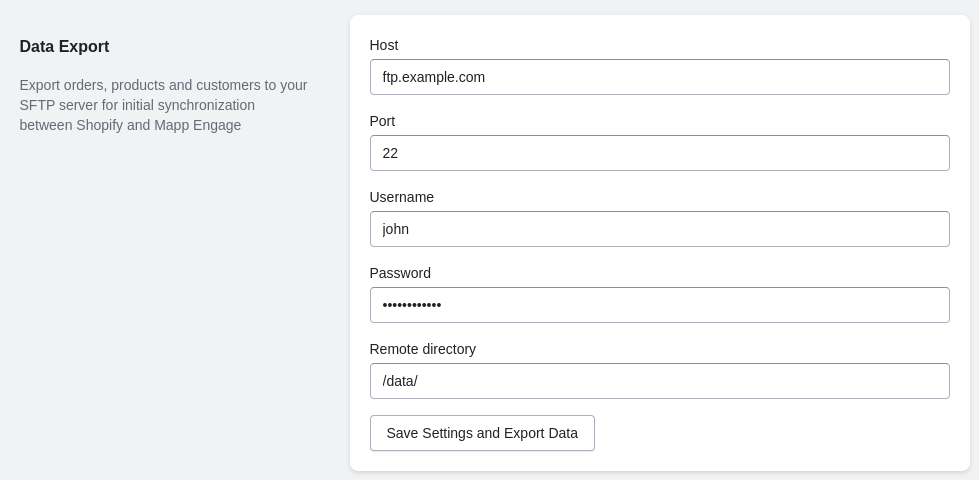
Under "Other Configurations", you can select if you want your users to confirm their subscription or use the abandoned cart function.

Under "Mapp Engage Group Configuration", choose groups where customers and subscribers will be added.
If you want emails sent from Mapp Engage, go to the "Message Configuration" section and select prepared messages for the given scenarios.
You must manually turn off emails in Shopify settings to avoid duplicate emails. This is only possible if you have Shopify Plus.
Select Save.
If the primary domain of your Shopify store ever changes, or if you add or remove market regions, please come to these Mapp Engage settings and click the "Save" button. The domain name is stored in the session. By saving again, you will reset it to the current value. Otherwise, your product URLs will have the old domain.
E) Initial import
You must set up this one-time job to connect Engage and Shopify. First, go to Data Management > Mapp Connect.
Find the integration you created and click on Edit.
Select Import Configuration.
Add new import job.
Enter a job name.
Define the job run (set at least 1 hour after the current time) and click on Apply.
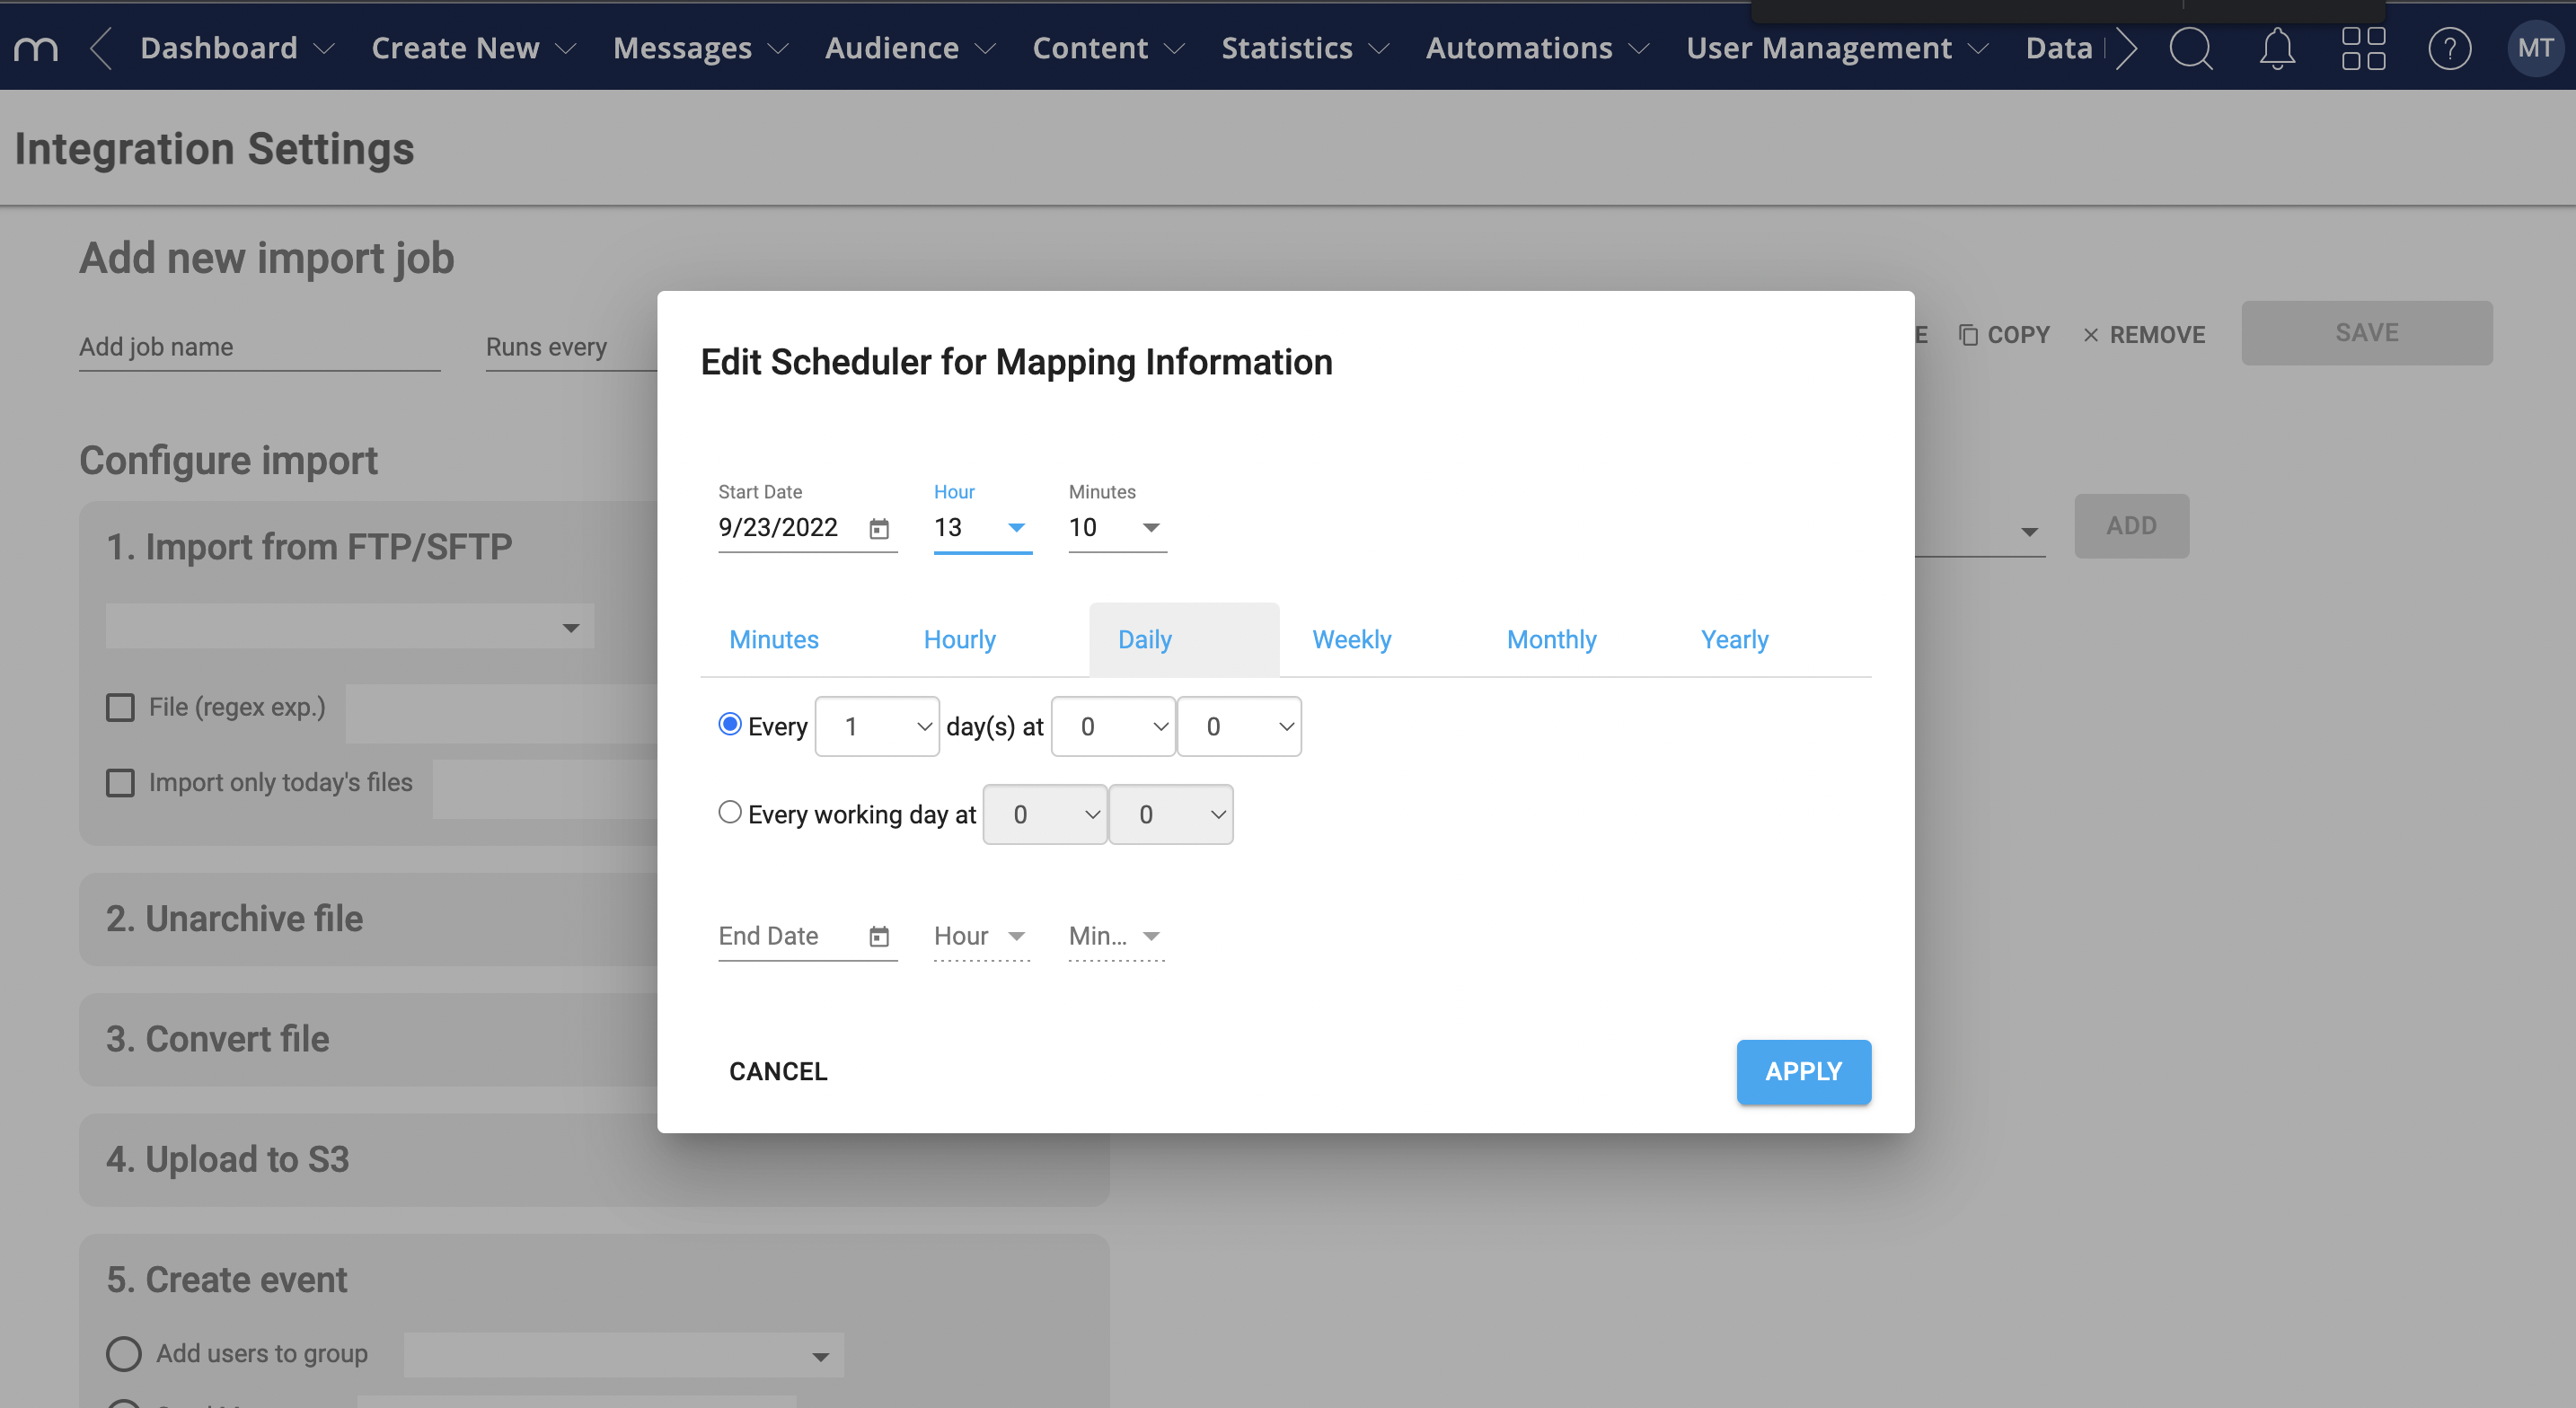
Set job status to enabled.
To configure the import, choose FTP and click on Test Connection in the Import from FTP/SFTP section.
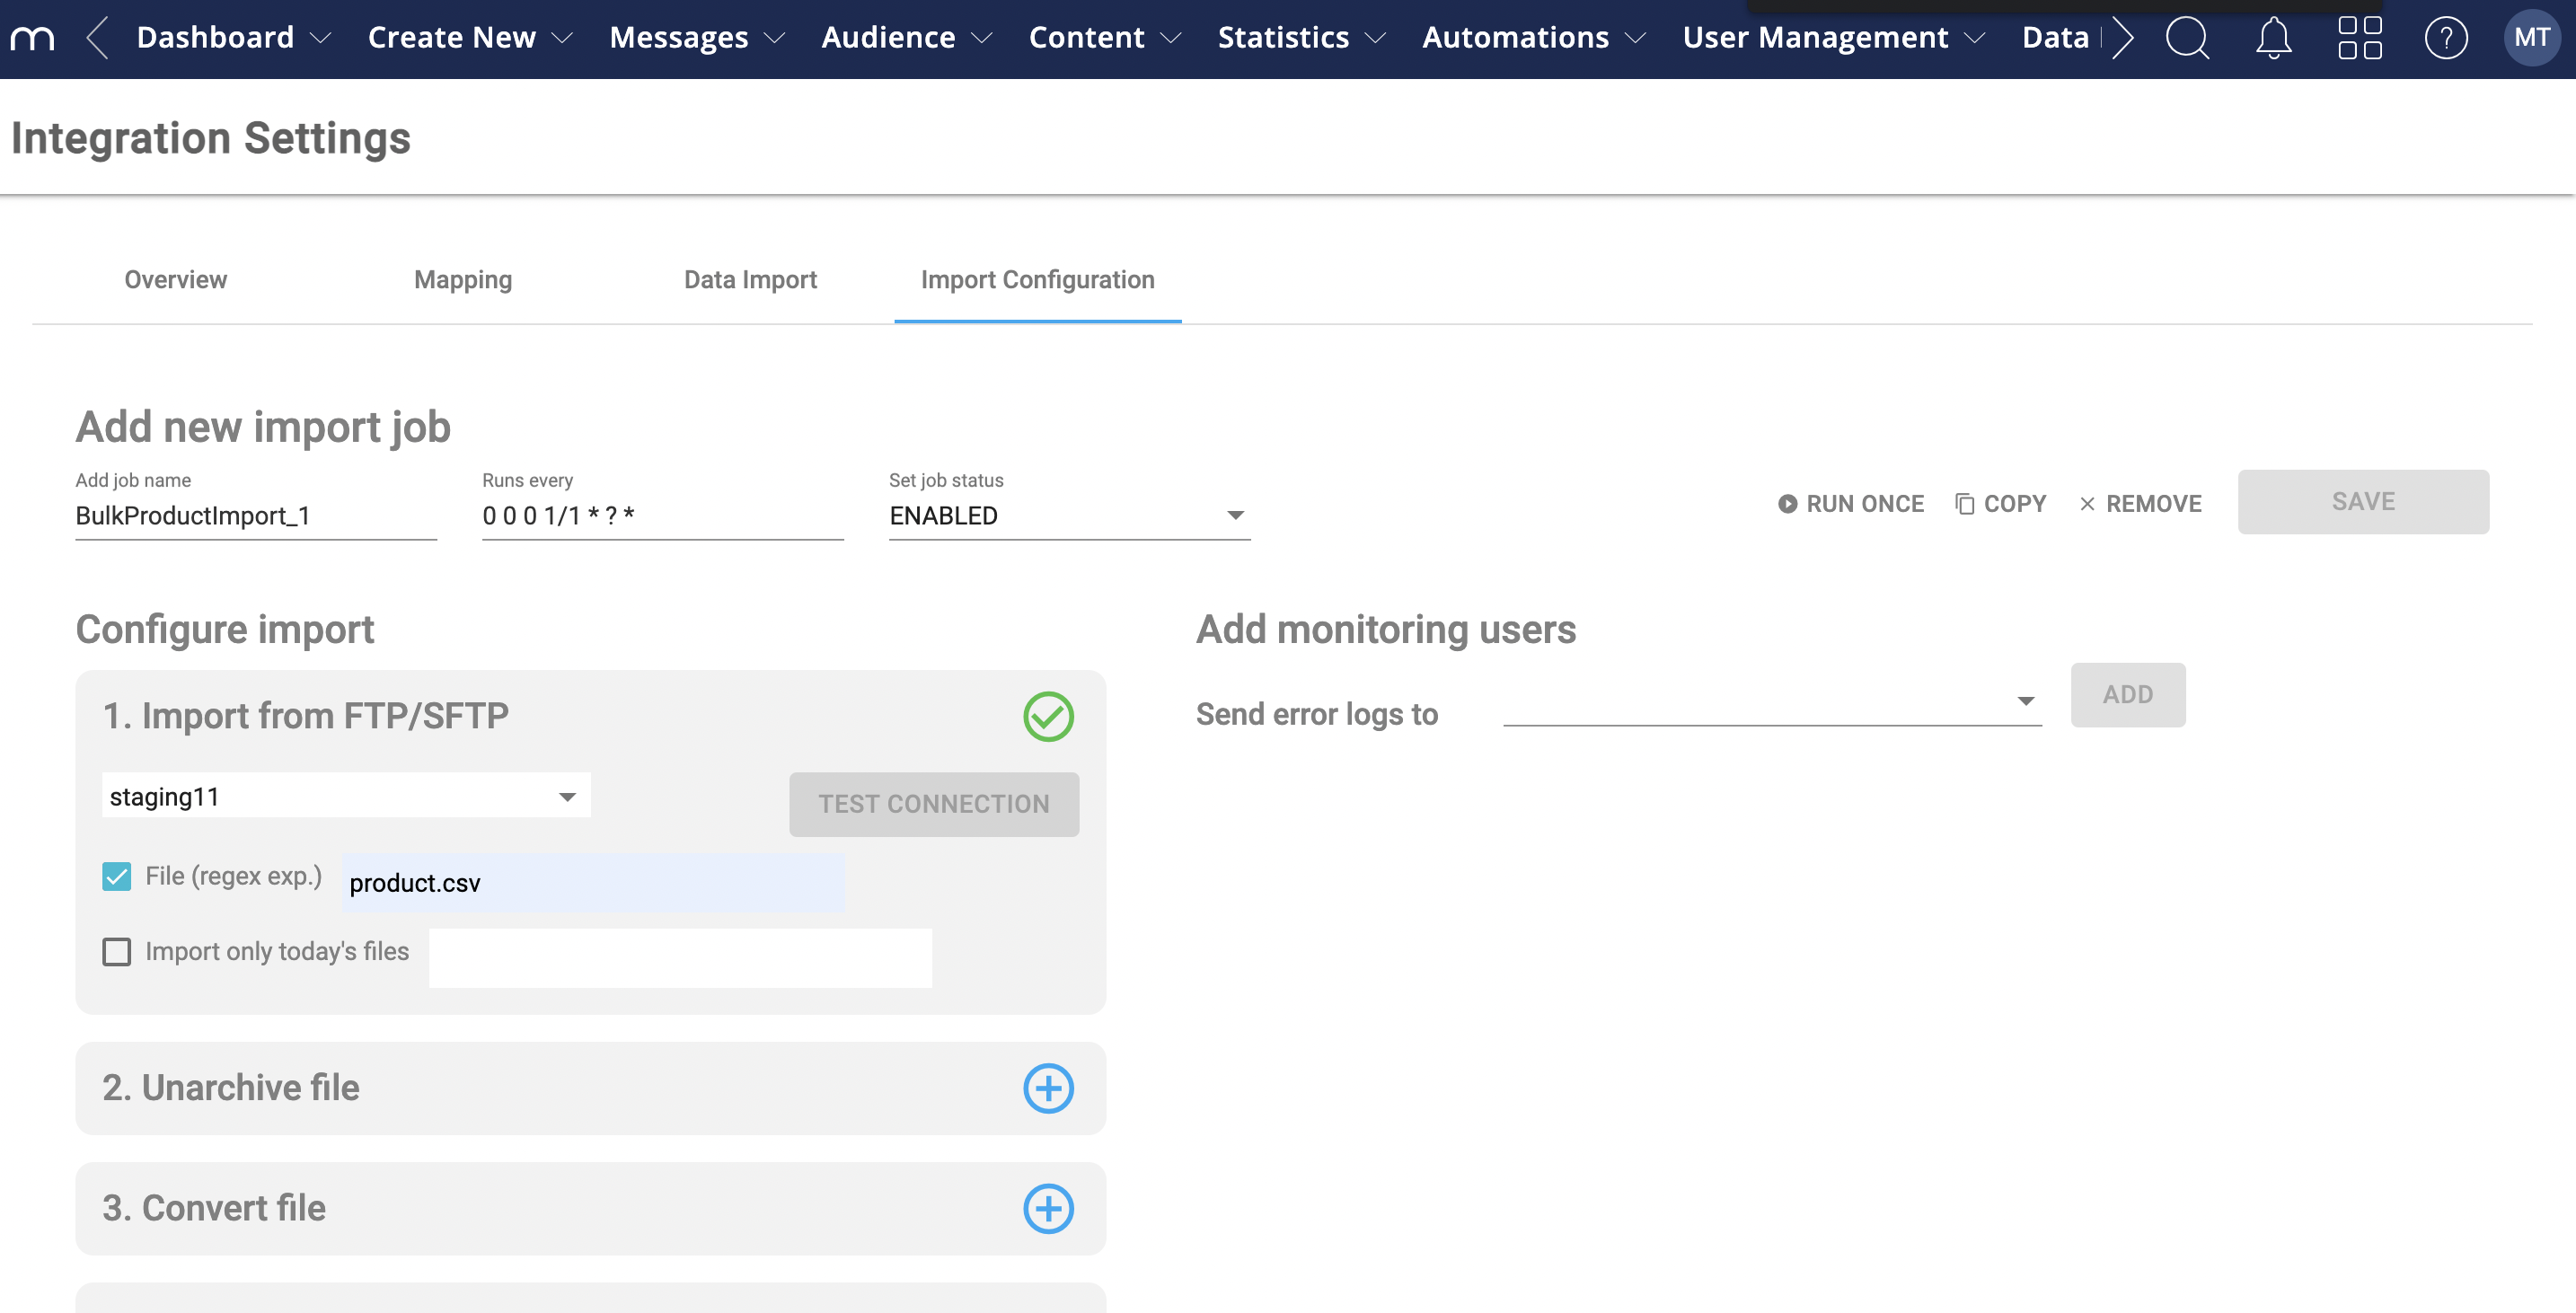
A green check icon indicates that the connection is successful.
Create an appropriate event. You can use the following:
Add users to the group (initial import of customers)
Add new Transactions Data
Add new Product Data
Please note that importing product categories via our Mapp Connect Shopify Plugin is currently impossible.
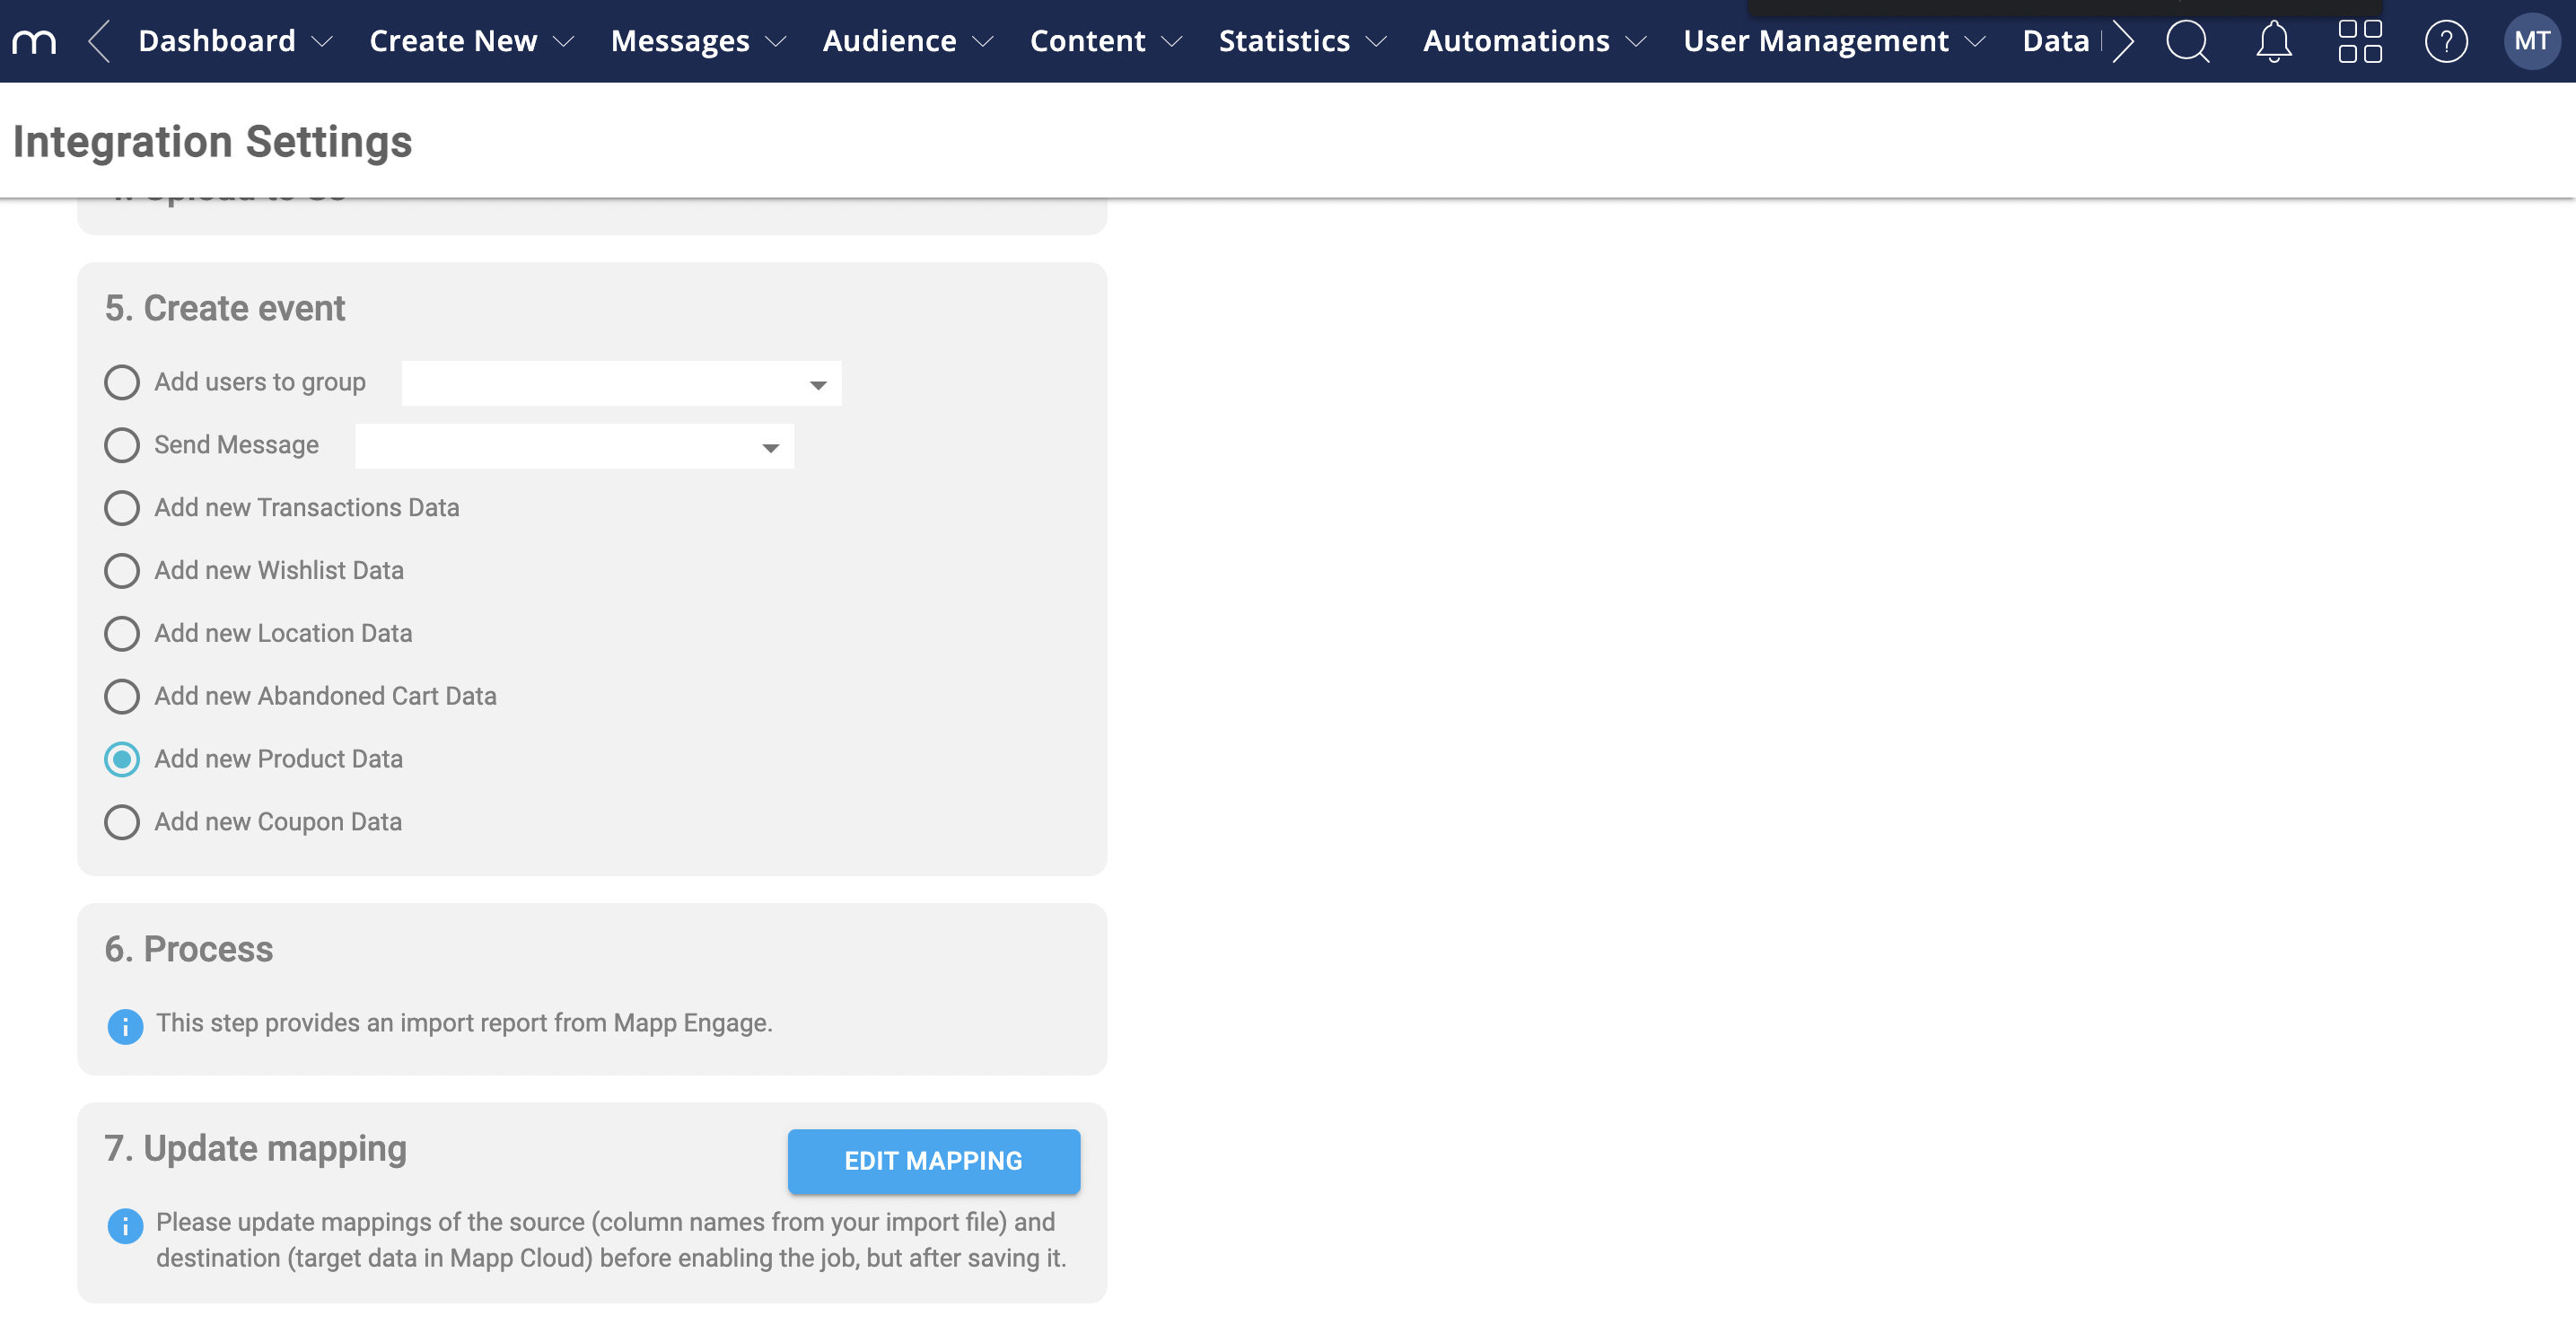
Add monitoring users by entering the email address of the person responsible for monitoring jobs. After you save this, the monitor will have an overview of the jobs.
Click Save.
For more general information about this tab, please see Set Up Data Imports.
Unsubscribe Behavior
When a user unsubscribes via Shopify, this information is included in every future user update.
Important: This functionality only works if the user unsubscribes via Shopify. The plugin does not recognize unsubscribe actions made directly in Engage.
If a user unsubscribes through Engage (e.g., using Engage unsubscribe links), Shopify will not be updated. Future user updates in Shopify may re-add the user to the subscriber group.
Additional Information
Data Sources
Key data like customer details, orders, and products are captured through webhooks and mapped as follows:Customer: Includes
id,email,first_name,last_name,phone,currency, and subscription status.Order: Includes
orderId,orderTotal,shippingAddress, and other key order details.Product: Captures
productName,productSKU,stockTotal, and descriptions.
Exports
Shopify’s Bulk API creates export jobs, and webhook notifications handle data delivery to an SFTP server.Debugging
FTP Errors: Credentials validation occurs before starting exports.
Export Issues: Contact Mapp support for unresolved issues.
Limitations
Abandoned carts only track carts entering checkout for logged-in users.
Unsubscribes: Shopify does not recognize unsubscribes from Engage links.