Mapping data from _ti object in Tag Integration is the last step to do.
In global context under window, you can find the _ti object which contains your tracking data. To map this data via Tag Integration (TI) you have to do two things:
Create a parameter that reads the data from the _ti object. Example: To track the pageName, create a parameter in TI like this
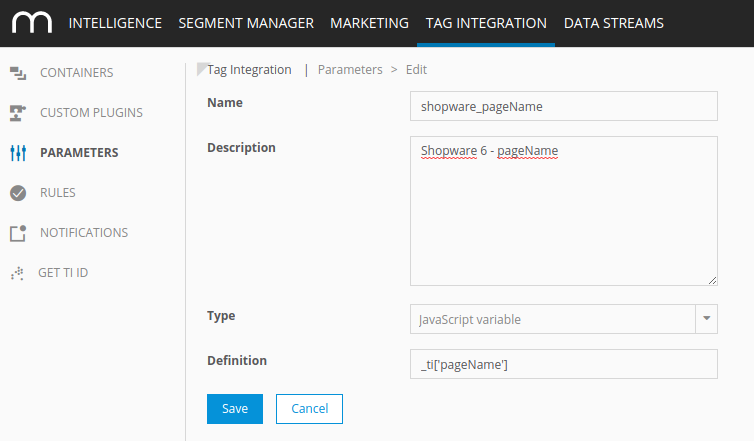
Map the data to the Mapp Intelligence plugin in your container within the Mapp Intelligence plugin
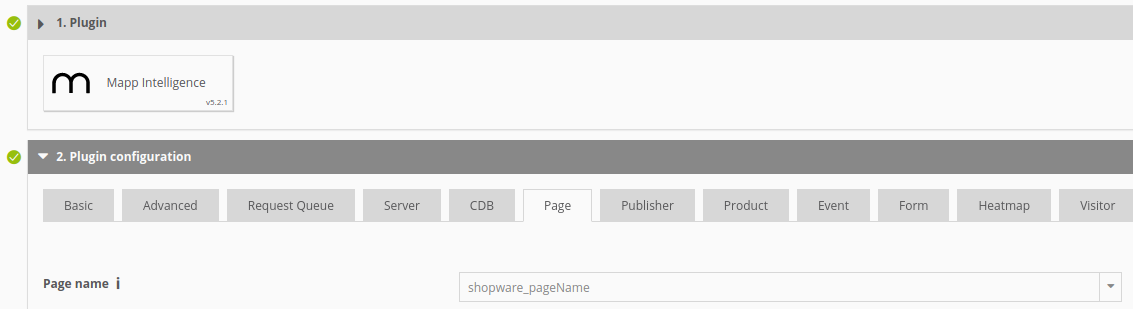
Now the page name of page requests will have whatever will be in _ti.pageName (which is the URL of the page without parameters).
Attribute overview of _ti object
Attribute | Description | Suggested mapping |
|---|---|---|
pageName | URL without parameter. | Page → Page name |
pageTitle | Meta title of page. | Publisher → Page title |
customerId | Anonymous Shopware customer id - only available if customer is logged in. | Visitor → Customer Id |
eMailSubscription | '1' if customer agreed to receive newsletter, '2' if not - only available if customer is logged in. | Visitor → Email Opt-in |
gender | '1' for male and '2' for female (this will only work if the technical name for Salutations is for male Mr or Herr, and Ms, Mrs, Miss or Frau for female (see Settings → Salutations in Shopware 6 Backend). Only available if customer is logged in. | Visitor → Gender |
age | Age of customer - only available if he entered the birthday during registration and customer is logged in.
| Visitor → URM Categories |
contentCategory | Depending on where you are the values can be: Checkout, Catalogue, Account, Home, Content. | Page → Content Groups |
contentSubcategory | Depending on where you are the values can be: Product Overview, Product Detail, Internal Search, Landing Page. | Page → Content Groups |
pageNumber | Number of page in product lists and search results. | Page → Page Parameter |
pageRequestType | Set to 'virtual' when adding products to basket, and view requests before adding to basket on pages that are not product detail pages. | Page → Page Parameter |
internalSearch | Search term on search result page. | Page → Internal Search Phrase |
numberOfSearchResults | Amount of search results on search result page. | Page → Number of Search Results |
productCost | Product price. Will be calculated based on the quantity during order or when multiple items are added to cart at once. | Product → Product Costs |
productId | The value you enter under 'Product number' when you create a product in Shopware 6. | Product → Product Name or ID |
productShopwareId | The Shopware 6 database ID of a product. | Product → Product Categories |
productName | The title of a product. | Product → Product Categories |
productQuantity | The amount of a product. | Product → Product Quantity |
productSoldOut | '1' if available stock is 0 or below, '' if available stock is at least 1. | Product → Predefined → Product Sold Out |
productCategories | All product categories as an array. | Product → Product Categories |
productCategory | The first product category. | Product → Product Categories |
productSubCategory | The second product category. | Product → Product Categories |
shoppingCartStatus | Possible statuses:
| Product → Shopping Cart Status |
currency | The currency ISO code. | Product → Currency |
orderId | The ID of an order. | Product → Order ID |
totalOrderValue | The total value of an order, incl. taxes. | Product → Total Order value |
couponValue | Value of coupons during order. | Product → Predefined → Voucher Value |
Customizing product event names via Datalayer
Since version 1.2.0 the plugin fires event requests for products that are added and removed to the wishlist, and added to / removed from cart via offCanvas cart and checkout pages (cart, confirm).
The event names can be overwritten by adding properties to the datalayer. This can be done in your theme via TWIG templates.
If you'd put it in your header.html.twig template, it would look like this:
{% sw_extends '@Storefront/storefront/layout/header/header.html.twig' %}
{% block layout_header %}
{{ parent() }}
<script>
window._ti = window._ti || {};
window._ti["add"] = "My add-to-cart event name";
window._ti["del"] = "My delete-from-cart event name";
window._ti["add-wl"] = "My add-to-wishlist event name";
window._ti["del-wl"] = "My delete-from-wishlist event name";
</script>
{% endblock %}