This article shows you how to optimize the landing pages of your website or app with personalized product recommendations.
You will find detailed information about Marketing Automation in our training chapters.
Preface
The purpose of personalized landing pages is to achieve improved customer retention by decreasing bounce rates and enhancing the probability of your users progressing in the sales funnel, for example, to product detail views.
Example: You want to recommend products to users, those other users purchased too when they visited the website via the same campaign or keyword. The focus is to recommend appropriate products based on the user's current behavior. Alternatively, you want to recommend the top sellers of the user's favorite brand. In this case, the focus lies on the product interest based on the long-term behavior of the user.
We recommend embedding two personalization widgets. One recommends products of the user's current sales cycle, and another one, addresses the general and long-term interests of the user.
Creating Segments in the Segment Manager and Importing them into Marketing Automation
Setting up the necessary target groups in the Mapp Segment Manager.
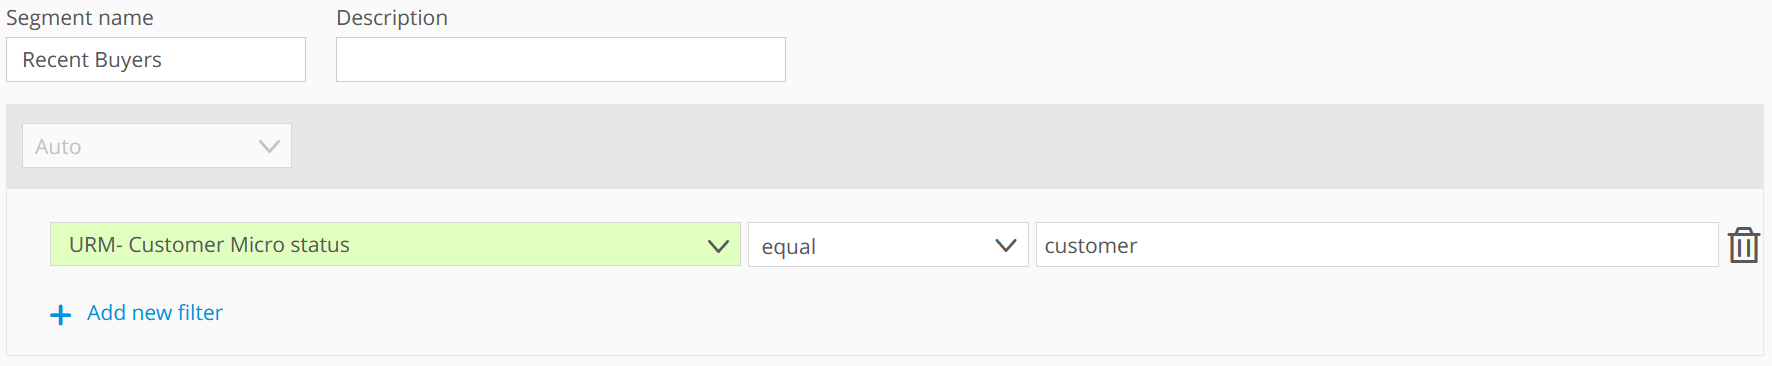
Mapp Segment Manager > Create new segment
Recent Browsers

Recent Shopping Cart Abandoners
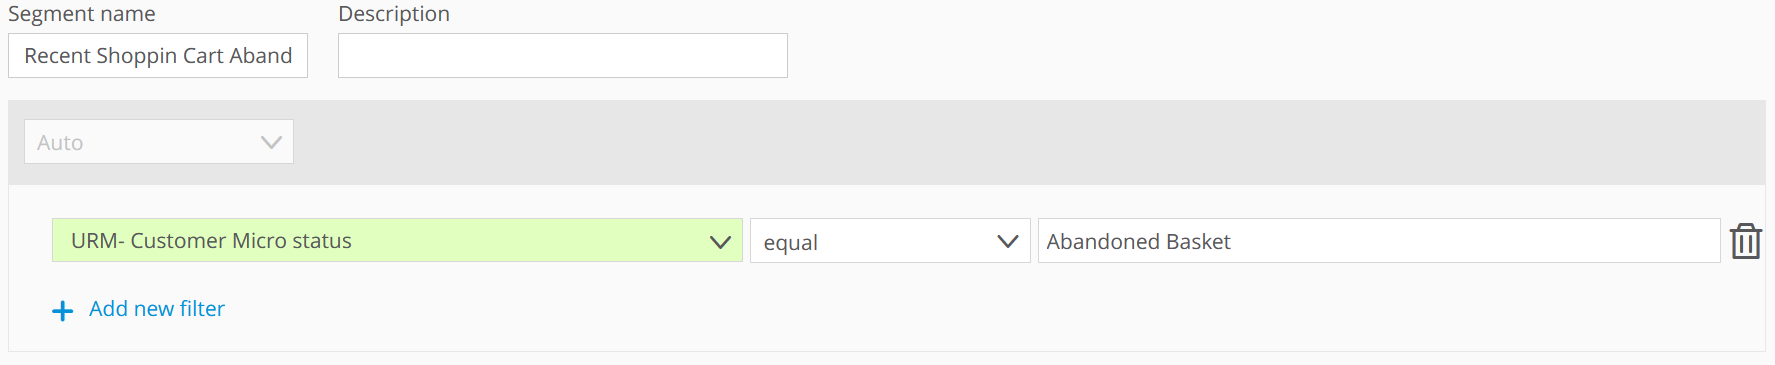
Recent Buyers
Import the segments in Mapp Marketing Automation.
Marketing Automation > Target Groups > Segments > Import Segment
Creating Onsite Placements
Create an onsite placement to show products in it that the user is currently looking for. Choose a suitable element on your landing pages that you want to personalize ("Div ID").
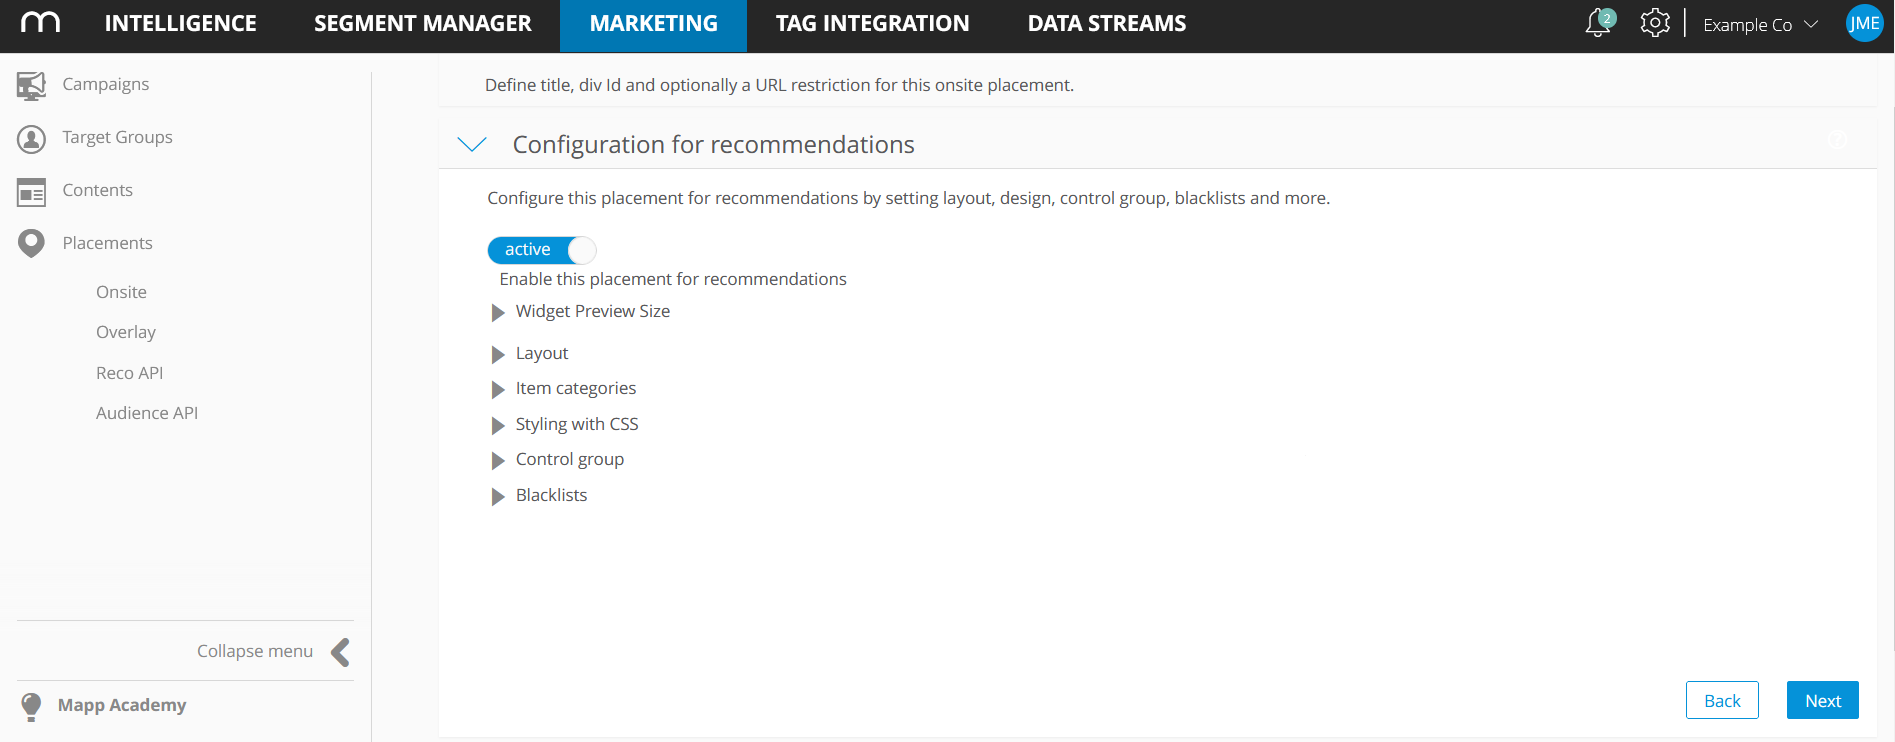
Marketing Automation > Placements > Onsite > Create a new onsite placement
Now select "Configuration for recommendations" and configure a suitable widget for showing product recommendations.
Optional: If you have enough space on your landing pages, we recommend setting up a second widget that shows products based on the general interests of the user. To do so, repeat the above process and create a second placement for showing product recommendations.
Creating Campaigns
Now we are going to set up the campaigns in Mapp Marketing Automation.
Marketing Automation > Campaigns > Create a new campaign
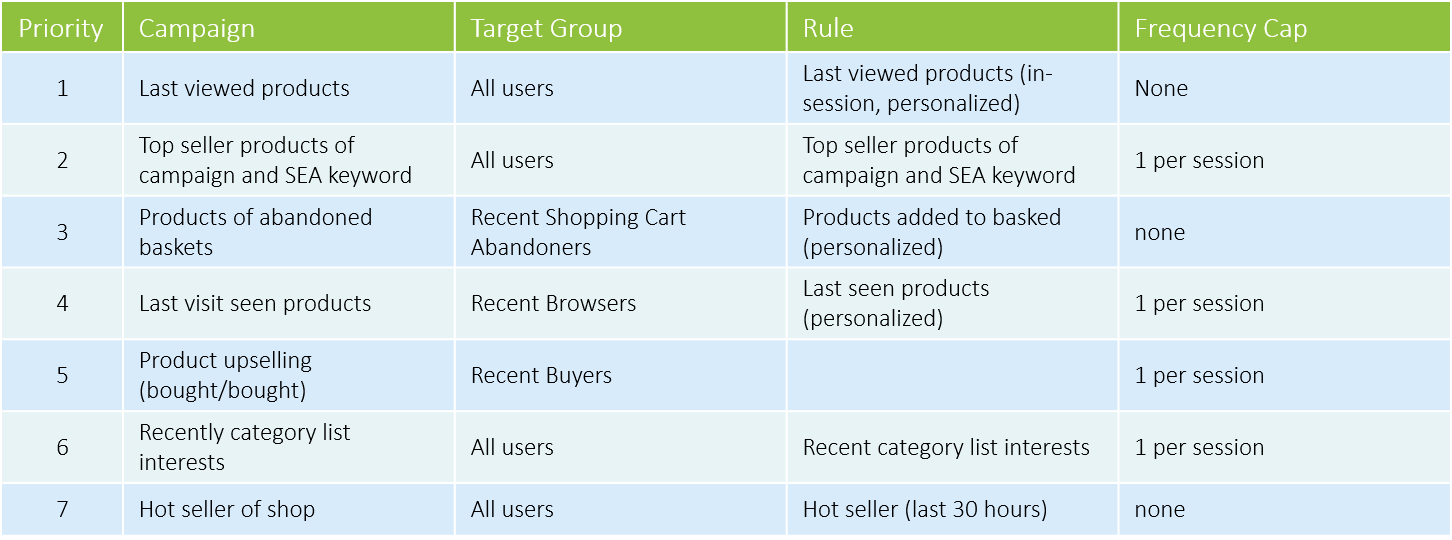
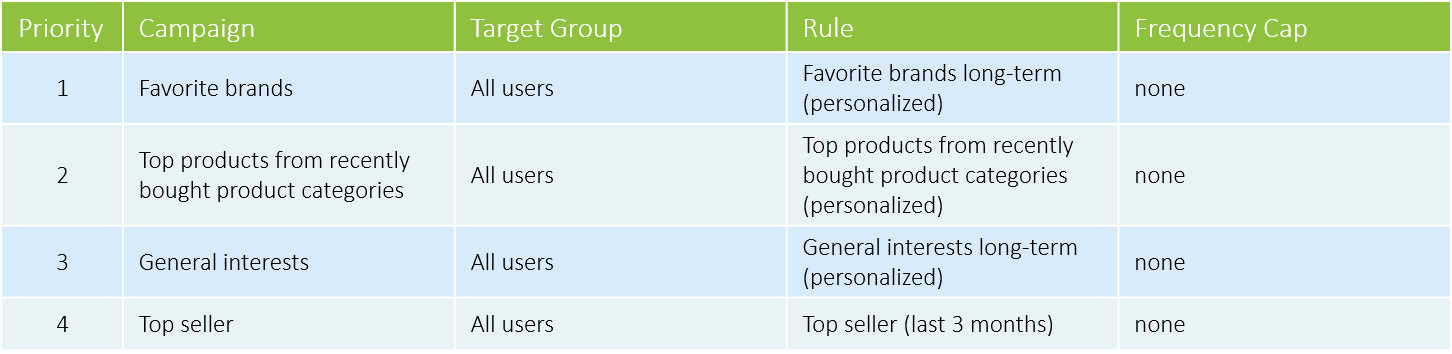
We will create several campaigns that address different target groups. For example, not every user has "abandoned" products in his shopping cart.
The order of the campaigns being displayed on the placements is critical. If the "Hot seller of shop" campaign, for instance, would be shown prior to the "Products of abandoned baskets" campaign, the target group "Recent Shopping Cart Abandoners" were never addressed because there will be always enough hot seller products.
Current Product Interest Widget
General Product Interest Widget
Now ensure that the campaigns work as desired by checking the performance data in the section "Placements."
Marketing Automation > Placements > Onsite > Performance
After about one hour, the first "Item views" should be measured.
Landing Page Optimization in App Context
In general, the Landing page optimization in app context is similar to the onsite optimization. Only the reco widget is handled differently.
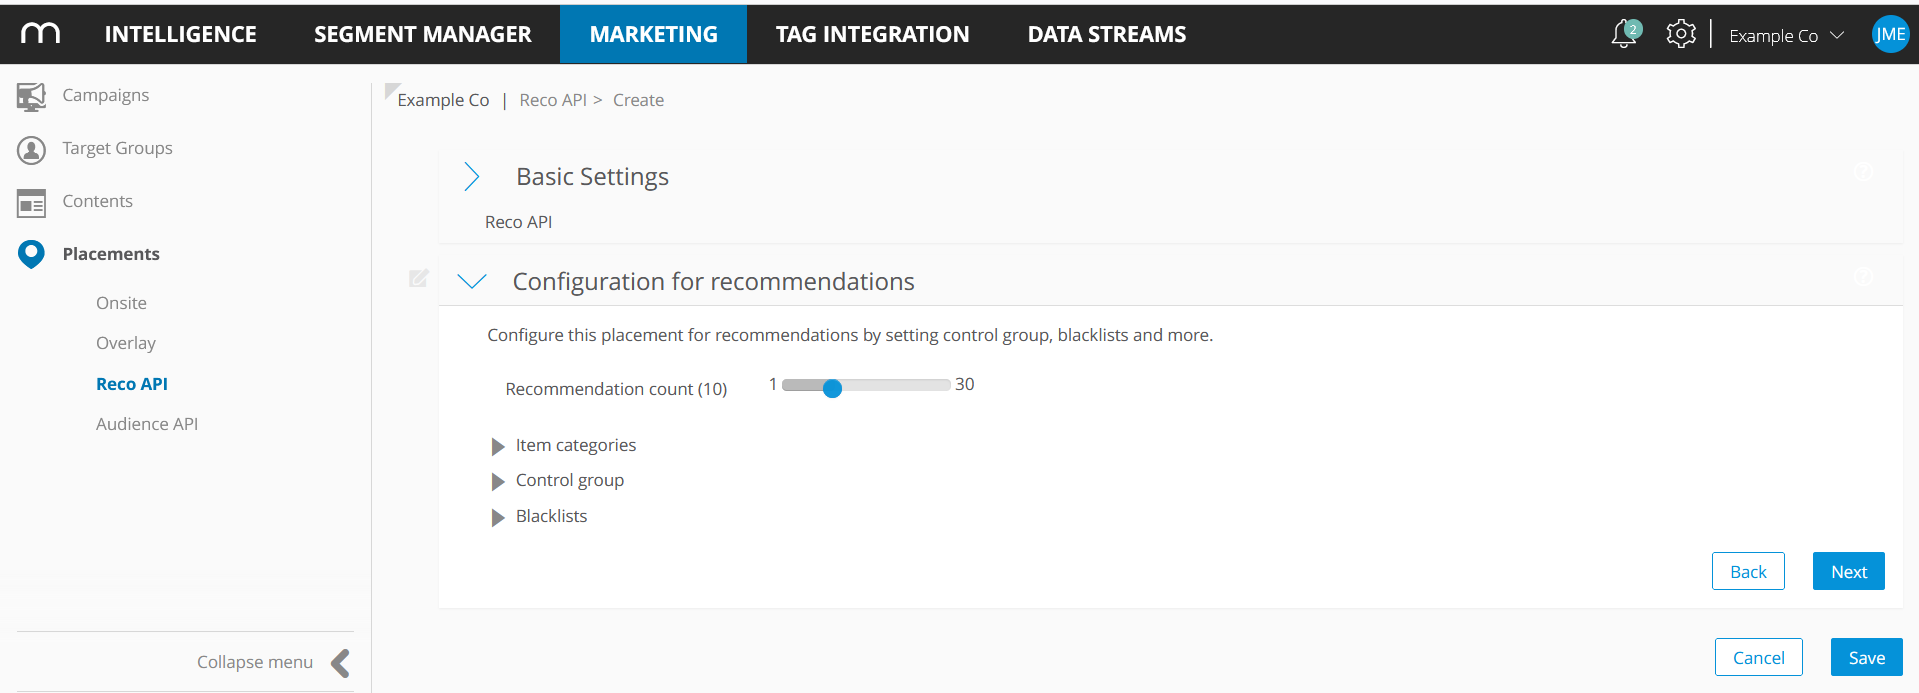
Create a "Reco API" placement. Read our SDK documentation "Recommendation API" in order to ensure an ideal implementation.
Similar to the onsite personalization, set up one or two placements.
Marketing Automation > Placements > Reco API > Create a new recommendation API placement
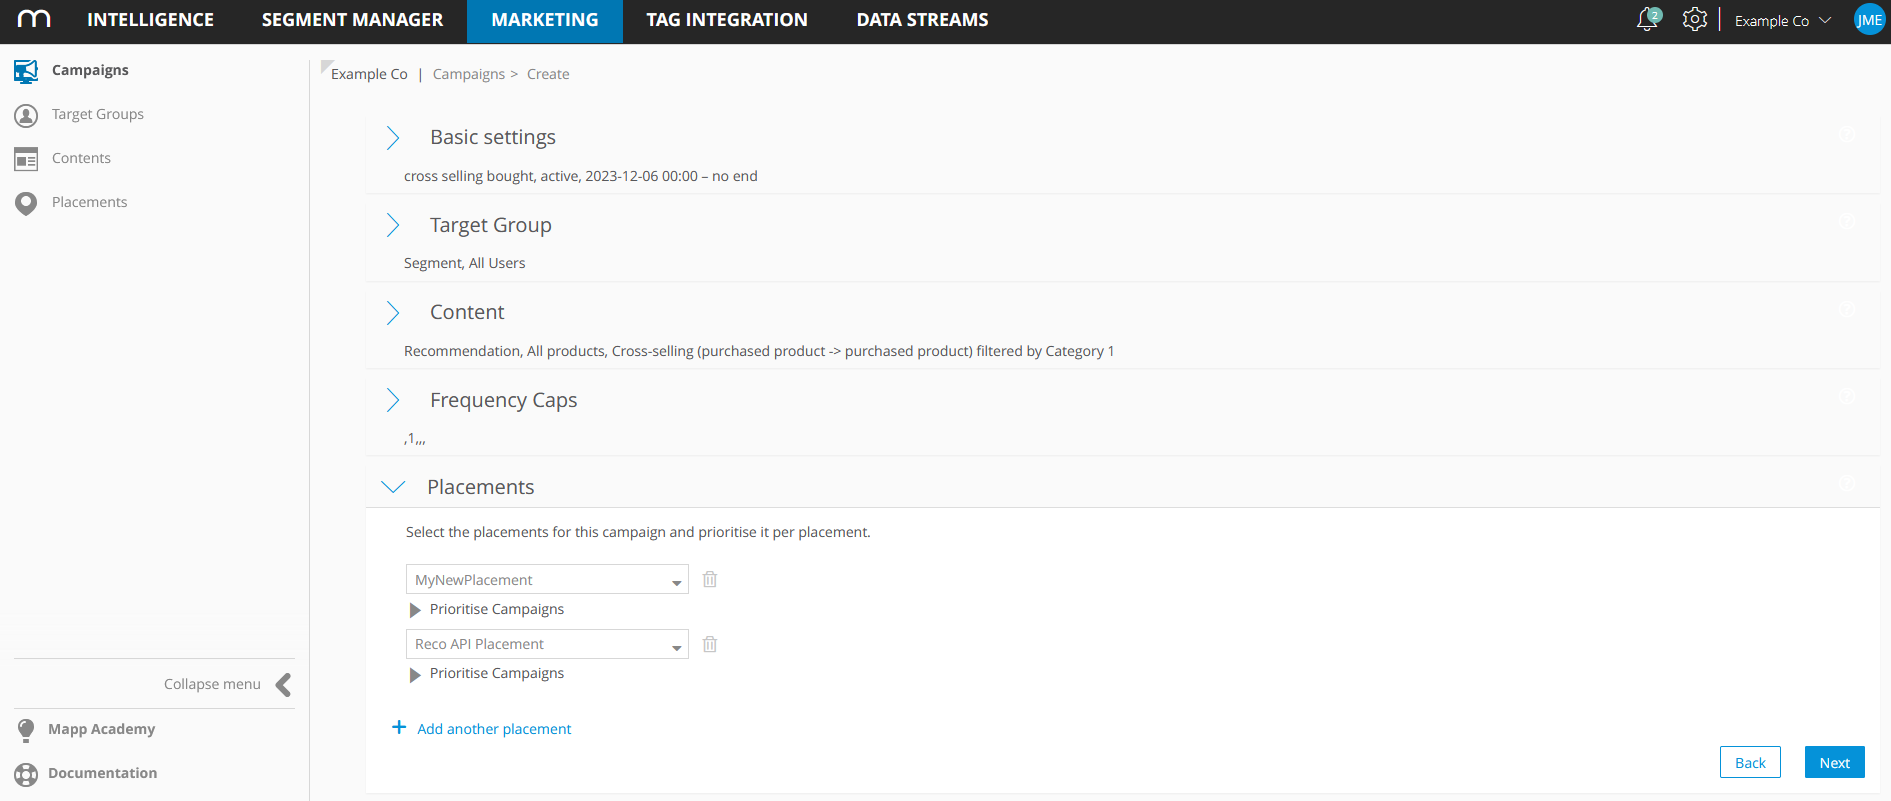
If you run a website and an app, we recommend showing campaigns on both the onsite placement and the Reco API placement to ensure optimal user experience.
To do so, extend the campaigns you configured for the onsite personalization by simply adding the Reco API placement.
Now ensure that the campaigns work as desired by checking the performance data in the section "Placements".
Marketing Automation > Placements > Onsite > Performance
After about one hour, the first "Item views" should be measured.