Use Case
With web push notifications, you can stay in touch with your audiences even if they are not currently visiting your website. This article demonstrates how you can use the web push channel to re-engage your contacts in case they abandoned products in their carts.
Prerequisites
An active Web Push channel.
Abandoned Cart data set up via one of the following:
Mapp Connect shop integration.
Mapp Intelligence Tracking Script/SDK: Tracking Abandoned Activity: Wishlist, Browse & Cart.
Procedure
1 Set up a Web Channel in Mapp Engage
Go to Administration > Channels > Web.
Select Create Web Channel.
Enter a unique Name for the channel.
Provide the FCM JSON key. The following video shows how to generate the Key in Firebase.
For more information, see Firebase Cloud Messaging.
Click Next to review the Summary.
Click Activate (if available), then Save.
If a valid FCM JSON key is provided, you can activate the channel on the Summary step before saving.
If the FCM JSON key is missing or invalid, Activate is unavailable; you can only Save or Close the process.
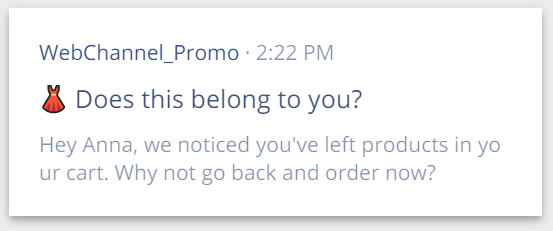
2 Compose the Web Push Notification
Go to Create New > Message > Web Push Notification.
Enter a unique Name (for example, Abandoned Cart Reminder) and click Next.
Select the website Channel you created (for example, WebChannel_Promo).
Add a Title and Body.
(Optional) Add an icon from upload or the content store.
Enter the website to open when the contact interacts with the notification.
Review the Preview, then click Save.
Click Next.
Set the Delivery date.
Select the Audience, then click Next.
Review the overview; the status will show Completed after sending.
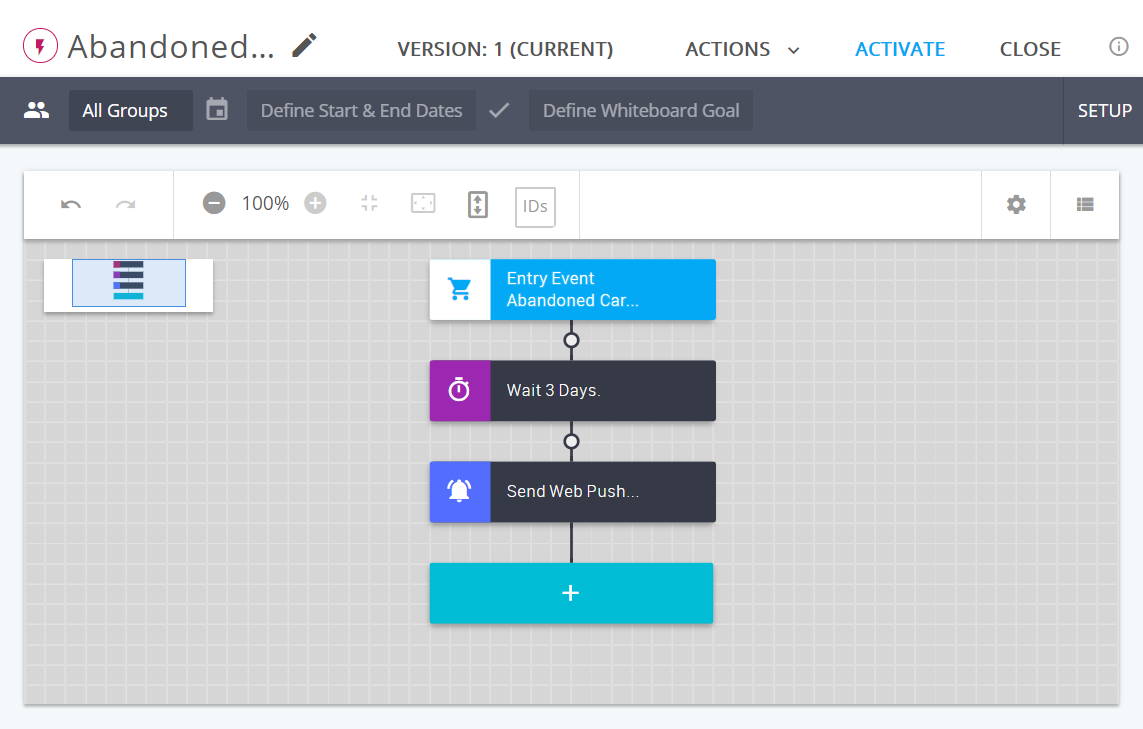
3 Create the Whiteboard
Go to Create New > Whiteboard.
Click the pencil to edit the Whiteboard.
Choose Abandoned Cart Event as the Entry Event.
Configure Abandoned Cart Event details.
Add a Wait step and set the timeframe.
Click Setup (top-right) to define a Whiteboard Goal.
Under Whiteboard Goals, click Add Event.
Select Transaction Registered and configure it.
Click Apply. Add more criteria as needed.
Activate the Whiteboard.