Goal
Set up a simple Abandoned Cart campaign in Mapp Engage that reminds contacts by email if they added products to their cart but did not complete a purchase.
Use Case
This example shows how to use Abandoned Cart events tracked with the Mapp Intelligence tracking pixel.
A user puts a product in the shopping cart of your online shop.
If they don't buy anything, they will get a reminder message 3 days later.
To support this use case, Mapp needs the following information from your online shop:
The added product (identified with SKU).
The removed product (identified with SKU).
Information, if the contact has placed an order.
Prerequisites
This how-to assumes the following setup is already complete. It does not describe these steps in detail.
Account Setup
- Ensure that Mapp Engage and Mapp Intelligence accounts are connected.
- Enable user matching between Mapp Intelligence and Engage (refer to Mapp Cloud User Matching).
- Confirm that account settings are compatible with IPv6 and that tracking domains support it if applicable.
Tracking Pixel Configuration
- Configure the tracking pixel (see Smart Pixel Setup & Configuration).
- Integrate tracking for your website's customer behaviors (e.g., browse abandonment) using unique, consistent event names.
Mapp Engage
You can use either Product Catalog or Related Data to store product information. Ensure the eCommerce table Abandoned Browse and the Product Catalog / Related Data use the same product identifiers. In Mapp Engage, this identifier is represented by the
productSKUcolumn. In Mapp Intelligence, it is thebaparameter (productName).
Procedure
A) Create a Prepared Message
This section shows how to create a message that dynamically includes product information based on the Related Data table.
In Mapp Engage click Create New > Message > Email Message.
Create the message.
Add message title, and compose the text.
Insert a placeholder for the product. When the message is sent, the placeholder is replaced by data from the related data set.
Example
In the email you want to include all products that your contact left in their cart, along with their price.
<%ForEach var='abandonedCart' items="${ecx:sort(user.abandonedCartProducts, 'timestamp', 'desc')}"%> <%${abandonedCart['productName']}%> <%${abandonedCart['productPrice']}%> <%/ForEach%>For more information, see Inserting Data From a Related Data Set Into a Message.
Save the message as a prepared message. You will use it again in the Whiteboard creation step.
B) Create the Whiteboard
In this step, you create the final step of your campaign - the automation that sends communication to your contacts regarding the products in their carts.
Tip
You can build this Whiteboard from scratch or use the Abandoned Cart template. The template already includes the required components: the Abandoned Cart event, a Wait step, and an email send-out, which you can adjust as needed. For instructions on creating a Whiteboard from a template, see Create an Event-Based Whiteboard.
In your Mapp Engage account go to Automations > Whiteboards and create an event-based Whiteboard.
Add the Whiteboard Goal:
When transaction is registered for a contact, the Whiteboard goal is met. The contact is removed from the automation and no message is sent to them.
Click SETUP.
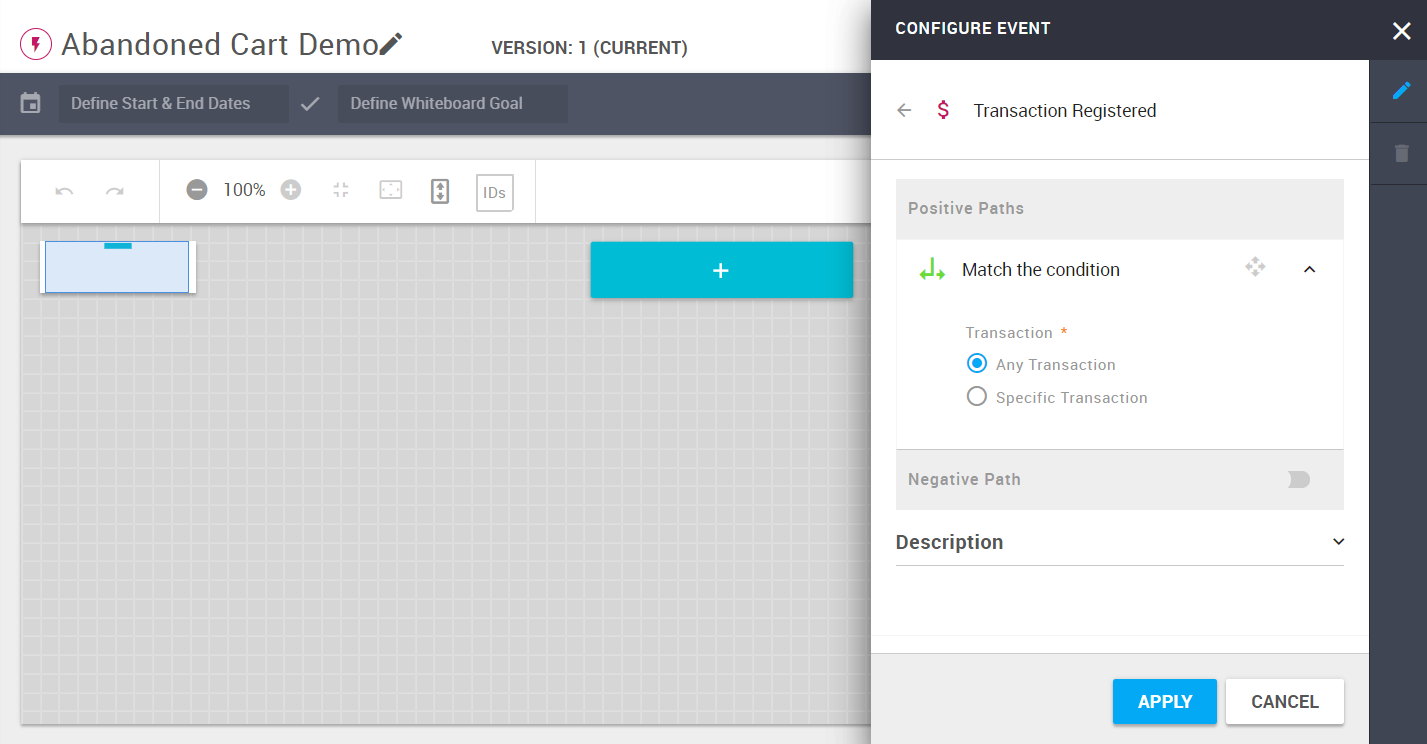
Under Whiteboard Goals, click Add Event.
Select Transaction Registered from the list.
For Transaction, select Any Transaction. Click Apply.
Click Apply again to save the setup.
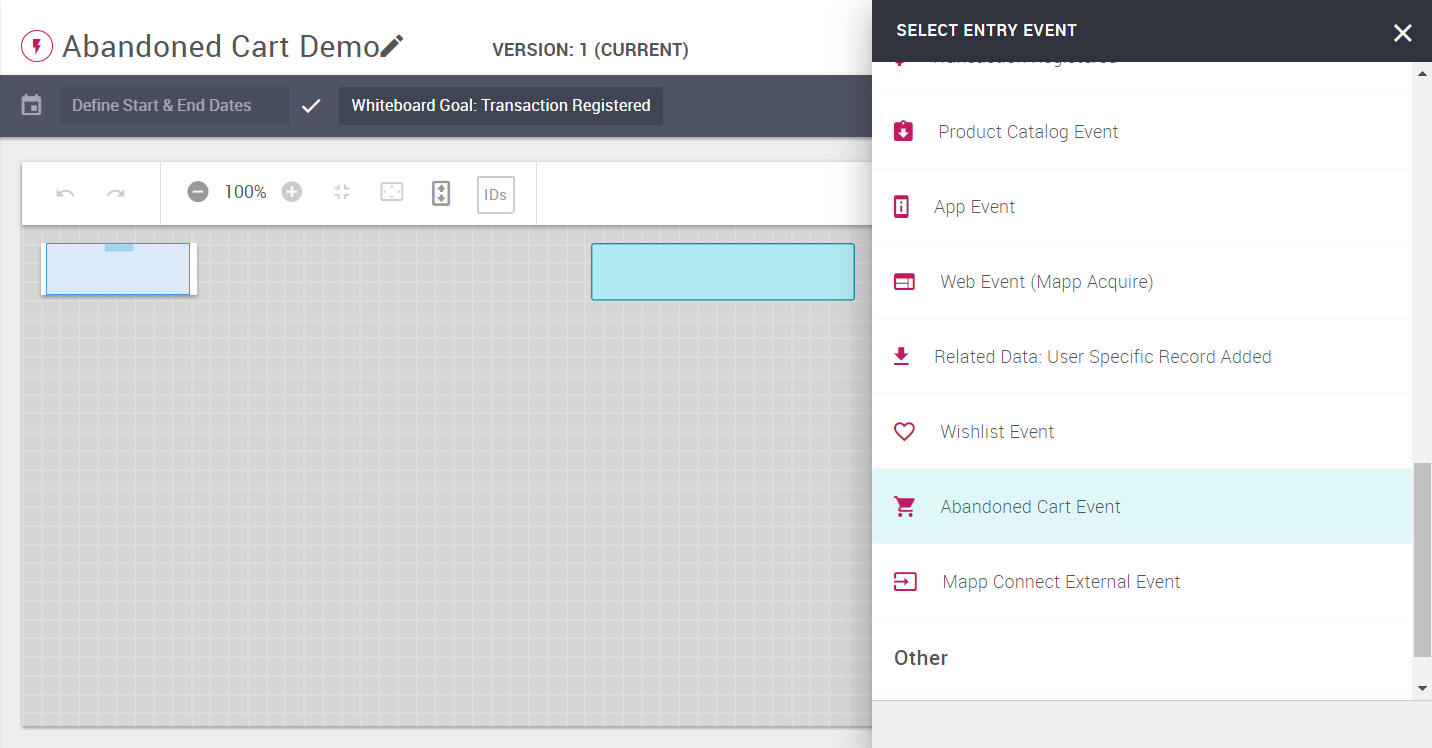
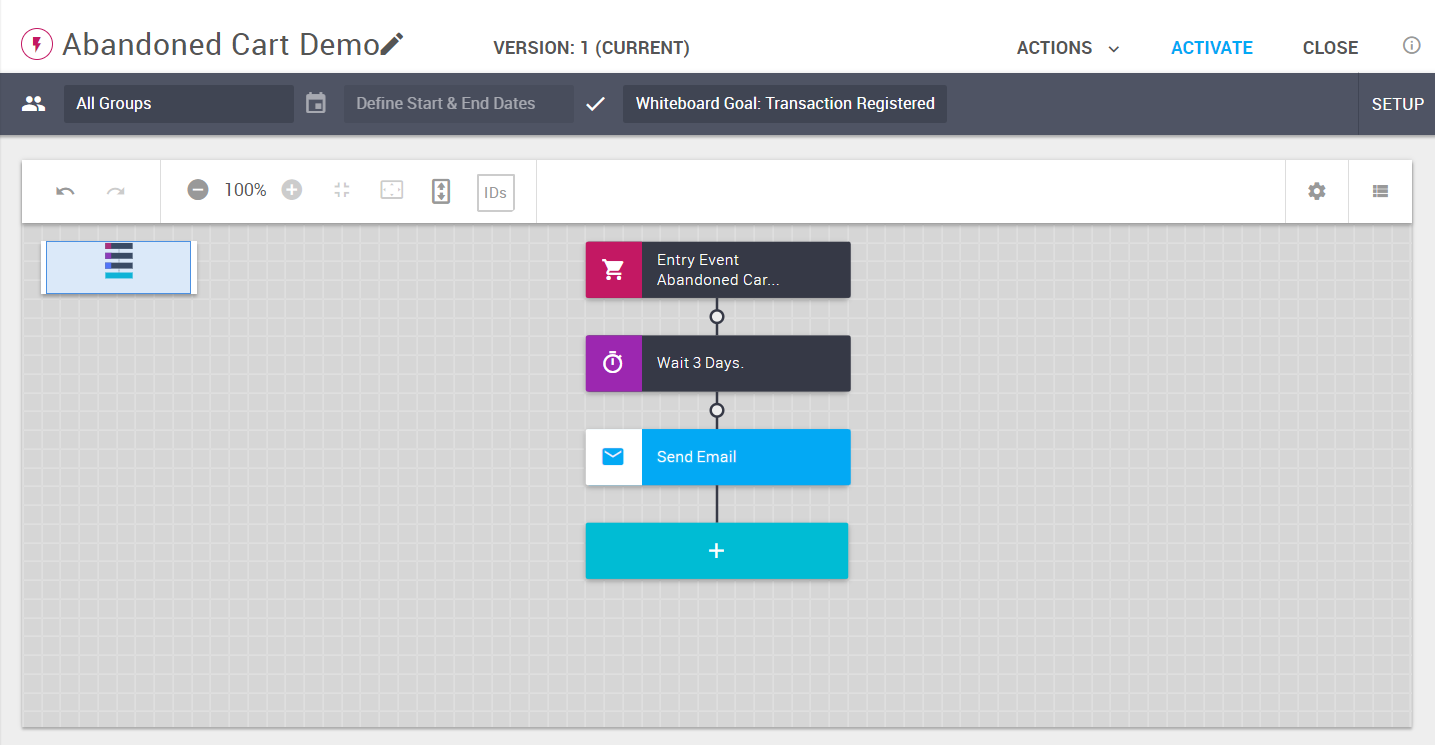
Click the plus sign to add the first step to the Whiteboard.
Select Abandoned Cart Event as your entry event.
The Whiteboard starts for every matched contact when a product is added to the Abandoned Cart related data table, and ends when the Whiteboard goal is met.
Contacts for whom the Whitebaord is triggered move on to the next step immediately. If a contact adds another product to their cart after the Whiteboard has been triggered, they do not return to that step.
Define details of the Abandoned Cart Event.
For React on select Add.
In Whiteboard Audience Definition specify the group.
In Event Definition select Any abandoned cart product.
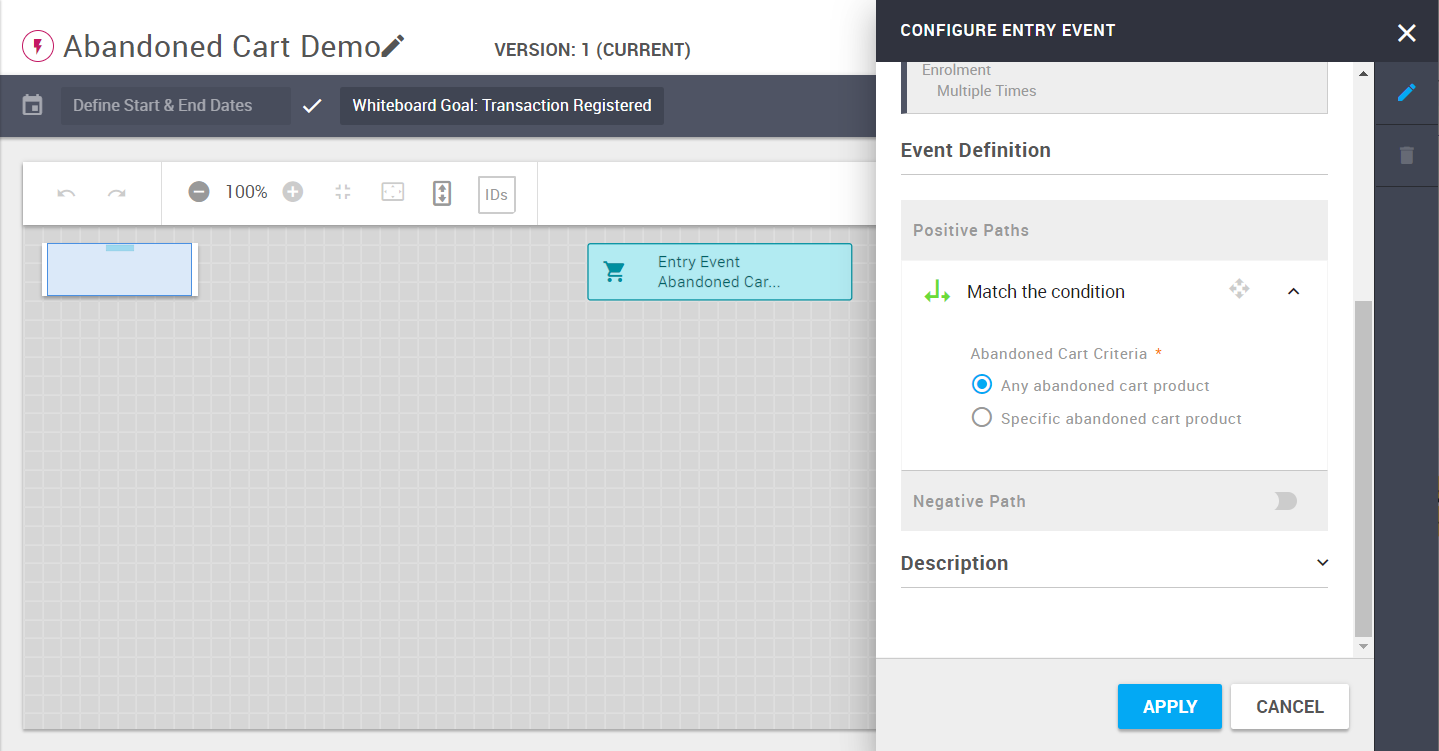
Click Apply.
Add step Wait and define the required timeframe.
It is good practice to let some time pass between your contact adding a product to their cart and sending a follow-up message. In this example, we added 3 days.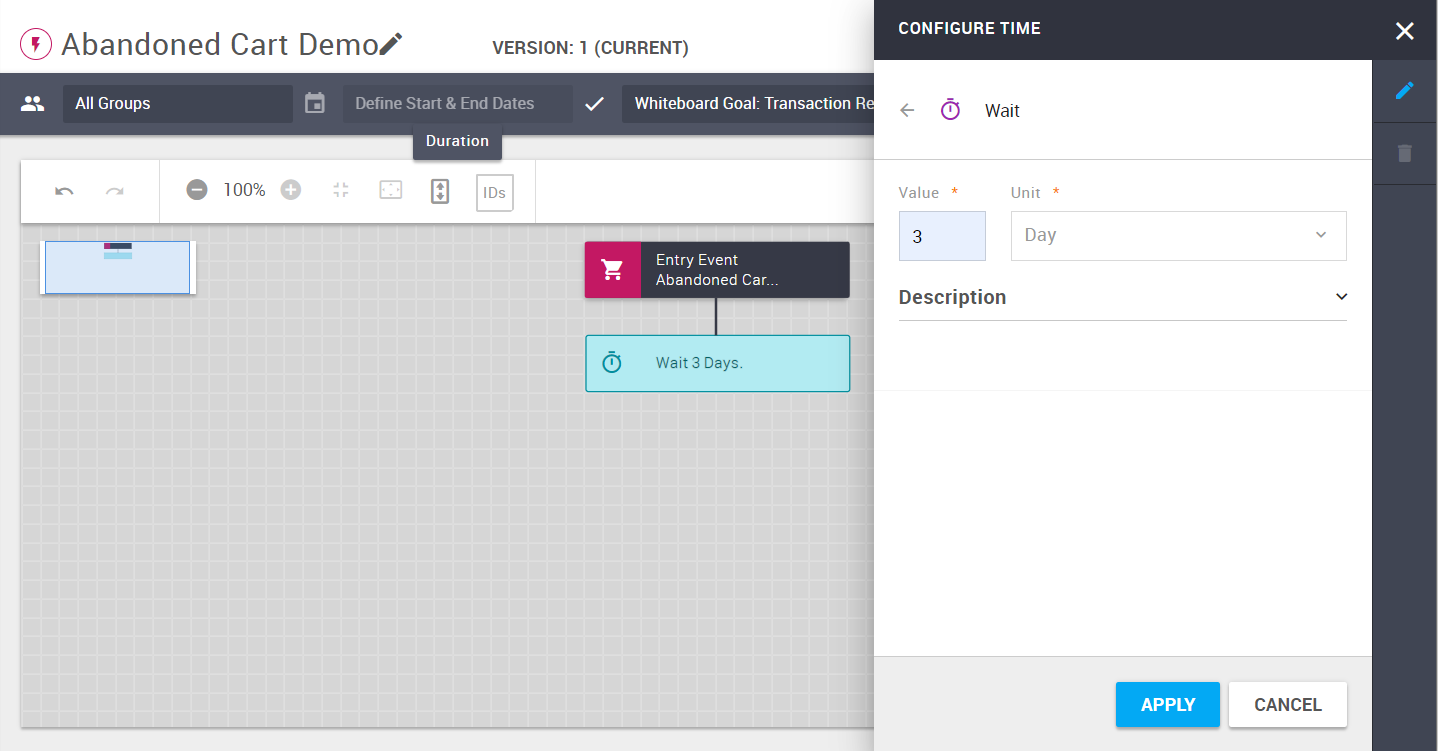
Add the job Send Email and select your prepared message.
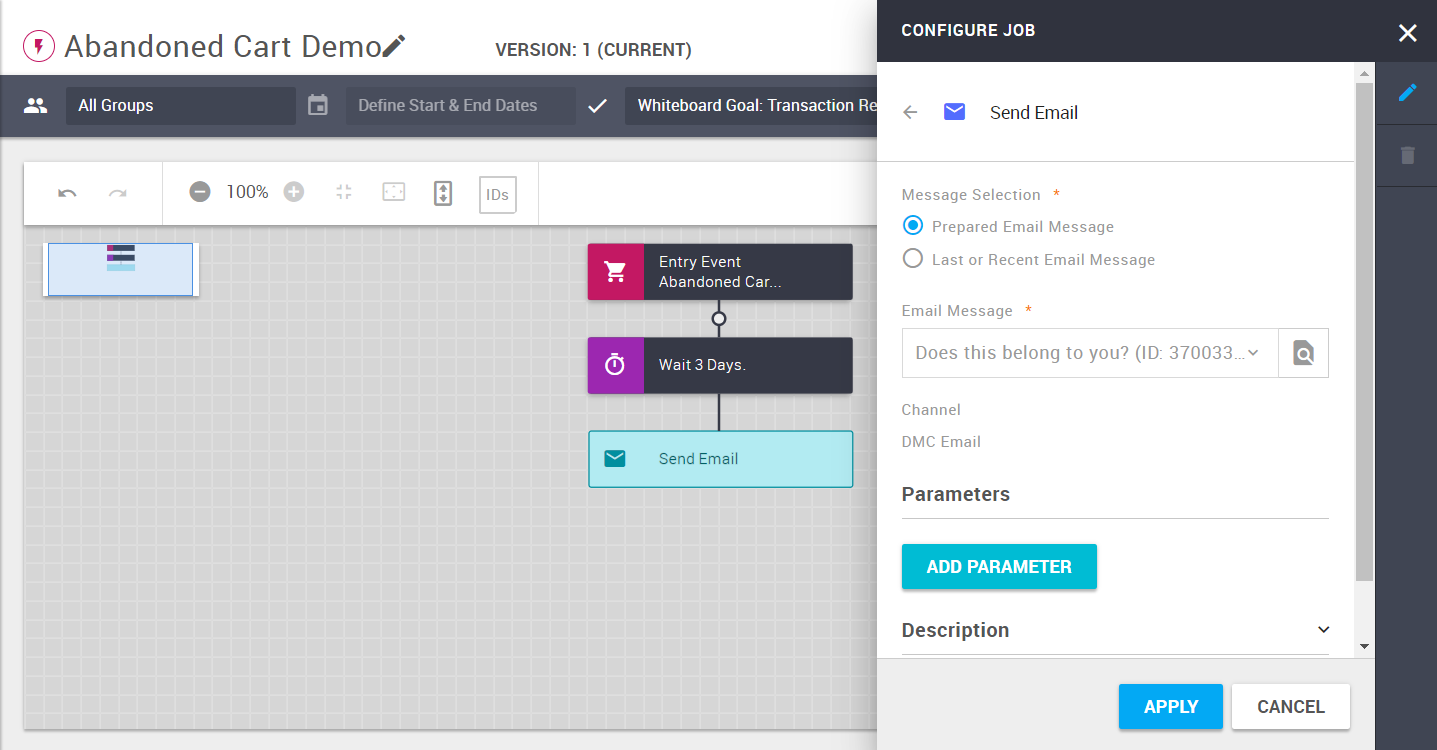
Click Apply.
Activate your Whiteboard.
If a contact reaches the last step or the goal of the Whiteboard is achieved, they will be removed from the Whiteboard.
In our example this means that if the contact places an order before the reminder email is triggered, no communications will be sent. Also, they rejoin the Whiteboard if they add another product after the email is received.