Goal
This guide explains how to perform a basic automatic integration of the Mapp Cloud iOS SDK into your project. You'll only need to add one method and configure your plist file.
For more advanced manual integrations:
Procedure
Download the iOS SDK. If using SPM for integration, skip directly to the SPM section.
Add the Import Statement
Objective-C
In yourAppDelegate.mfile, add this line:#import <AppoxeeSDK/AppoxeeSDK.h>Swift
Add the following to your Objective-C bridging header:#import <AppoxeeSDK/AppoxeeSDK.h>
Configure
application:didFinishLaunchingWithOptions: After importing the SDK, update theapplication:didFinishLaunchingWithOptions:method inAppDelegate:Objective-C:
- (BOOL)application:(UIApplication *)application didFinishLaunchingWithOptions:(NSDictionary *)launchOptions { [[Appoxee shared] engageAndAutoIntegrateWithLaunchOptions:launchOptions andDelegate:nil with:L3]; return YES; }Swift:
func application(application: UIApplication, didFinishLaunchingWithOptions launchOptions: [NSObject: AnyObject]?) -> Bool {
    Appoxee.shared()?.engageAndAutoIntegrateWithLaunchOptions(launchOptions, andDelegate: nil, with: .L3)
    return true
}
Ensure the
AppoxeeConfig.plistfile is present in the project as this method relies on its configuration.Configuration Details
SDK Key and Data Center
Enter the SDK Key (provided during app configuration).
Set the
is_euflag based on your data center location:YESfor the EUNOfor the US
⚠️ Important: Mismatching the flag with your data center environment will result in the following error in Xcode:
[Appoxee Error] Network protocol error with HTTP code: 403Server Enums
The
withparameter in the integration method accepts enums for server selection:L3, EMC, or CROC are valid options provided by the account manager.
TEST is for development purposes only and should not be used in production.
Push Notification Permissions
By default, users are prompted for notification permissions at the first app launch.
To delay this and trigger the dialog later, use the
notificationDialogparameter:
Objective-C:
[[Appoxee shared] engageAndAutoIntegrateWithLaunchOptions:launchOptions andDelegate:nil notificationDialog:NO with:L3];Swift:
Appoxee.shared()?.engageAndAutoIntegrate(launchOptions: launchOptions, andDelegate: nil, notificationDialog: false, with: .L3)
Create the
AppoxeeConfig.plistFile: Create a file namedAppoxeeConfig.plistin your project and include the following structure:<?xml version="1.0" encoding="UTF-8"?> <!DOCTYPE plist PUBLIC "-//Apple//DTD PLIST 1.0//EN" "http://www.apple.com/DTDs/PropertyList-1.0.dtd"> <plist version="1.0"> <dict> <key>inapp</key> <dict> <key>custom_fields</key> <array> <string>customString</string> <string>customNumber</string> <string>customDate</string> </array> <key>media_timeout</key> <integer>5</integer> </dict> <key>sdk</key> <dict> <key>app_id</key> <string>263177</string> <key>dmc_system_id</key> <integer>55</integer> <key>sdk_key</key> <string>5c59a5b6b52eb2.62524838</string> <key>jamie_url</key> <string>jamie-test.shortest-route.com</string> <key>is_eu</key> <true/> <key>open_landing_page_inside_app</key> <false/> </dict> </dict> </plist>
Using Swift Package Manager (Optional)
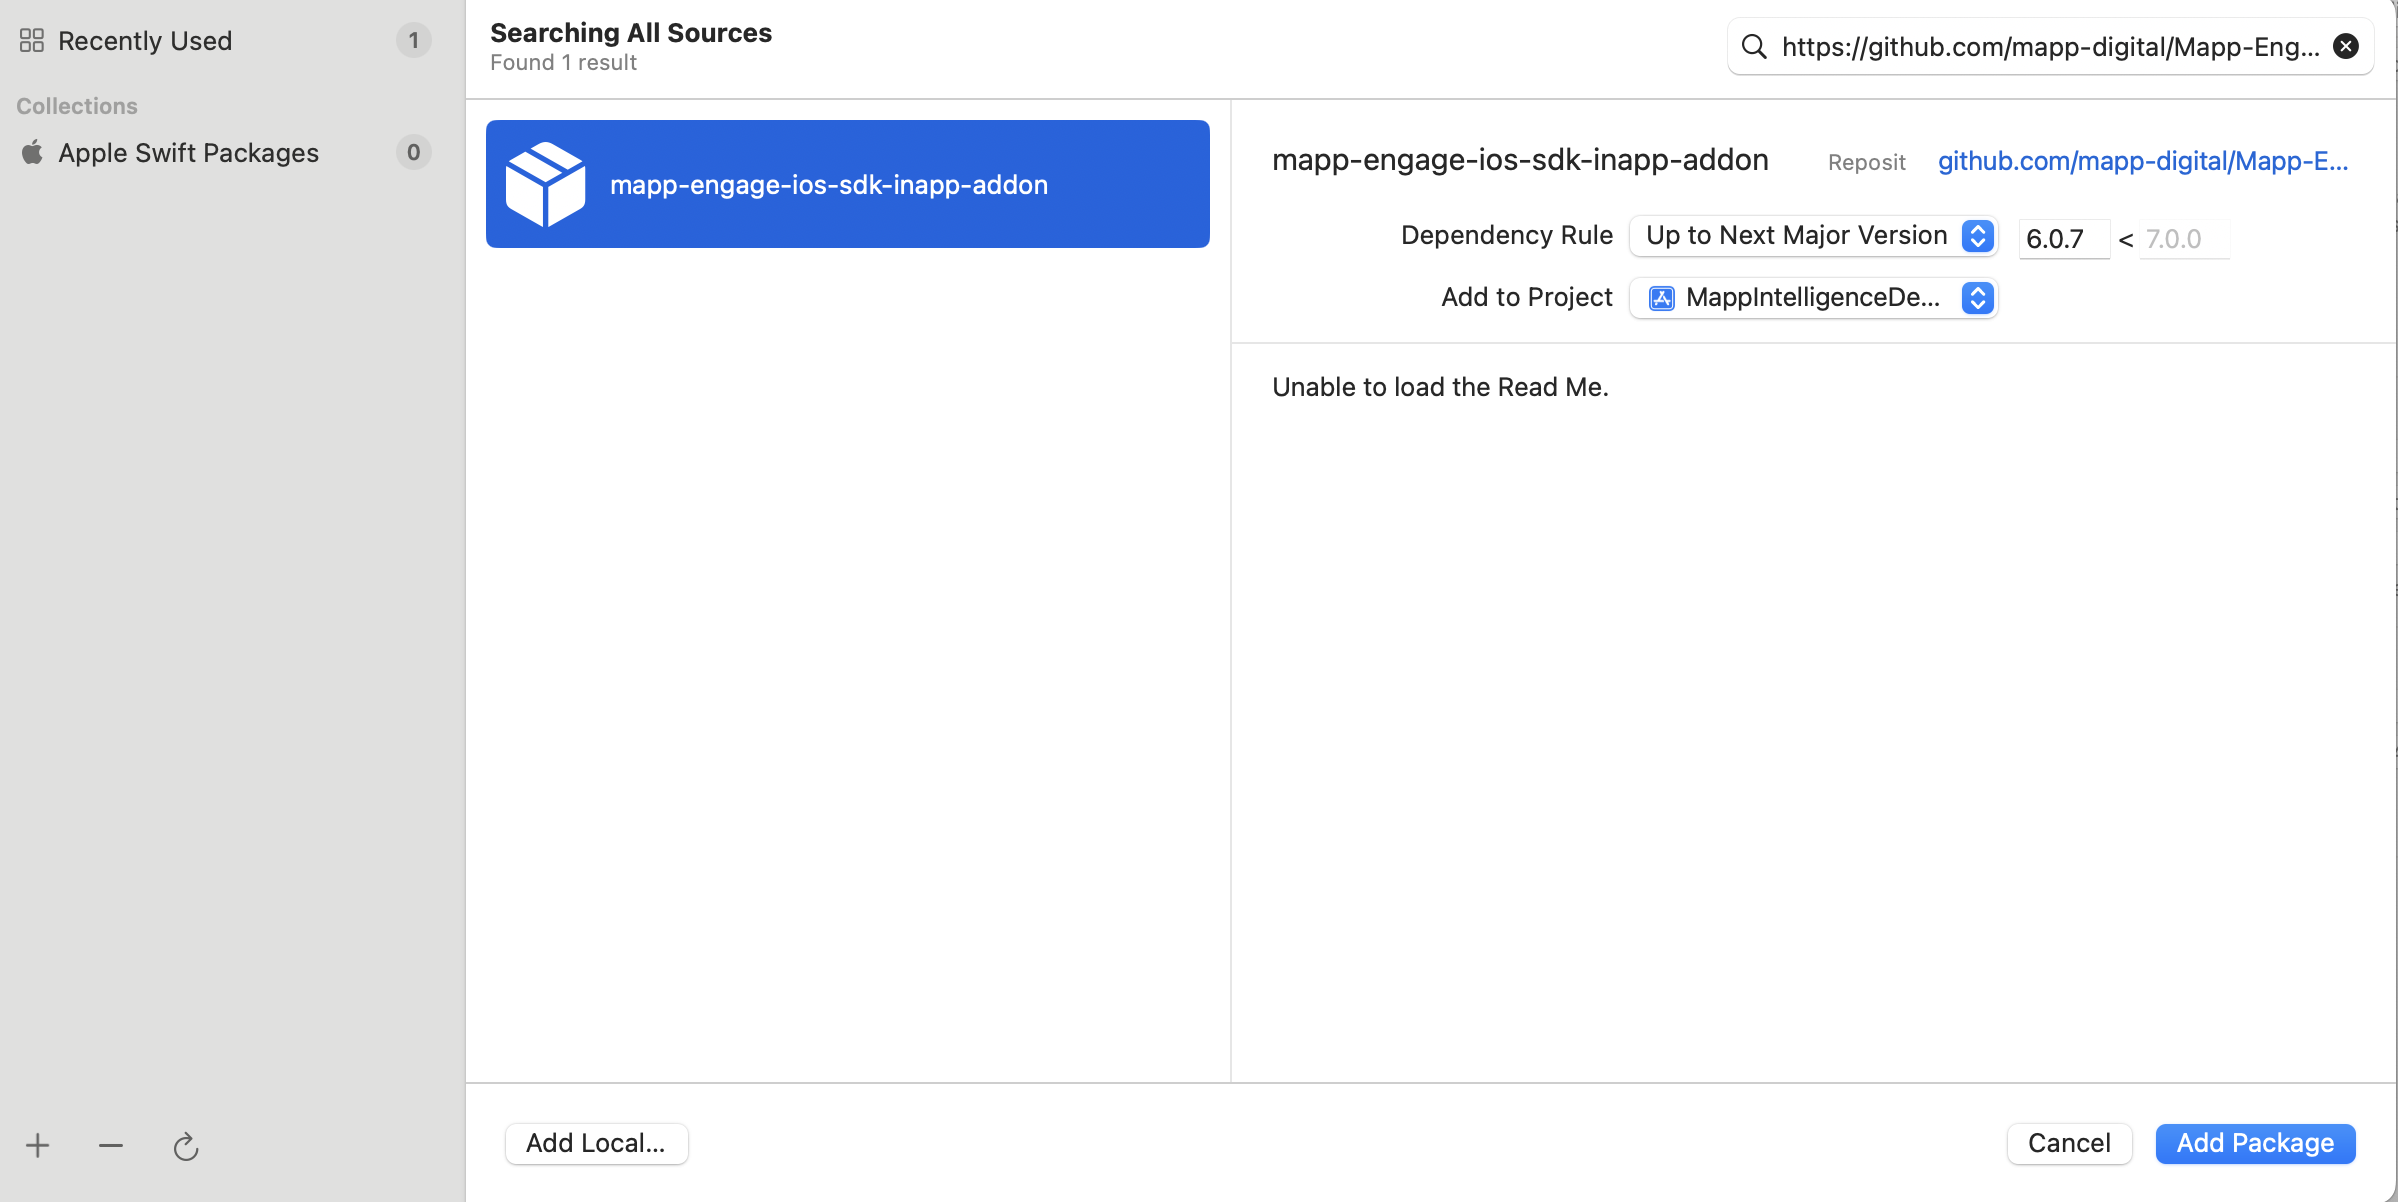
Go to our GitHub, and copy the git URL as you would for git clone.
Paste it inside the package search window and set up your version number. Then press Add Package.
After adding the package, go to Targets and select the target with the same name as your project.
Next, go to the Build Phases tab and expand the Copy Bundle Resources section.
After, expand the Package folder on the left side, then expand the SDK folder and drag and drop the AppoxeeInappResources file. Unselect Copy If Needed, select Create folder references, and press OK.
.png)
.png)
After that, you will be able to build a project. The same procedure applies to the Push notification Package. However, the git URL is different, and the name of the branch corresponds to the task.
If you want to update the package, right-click on it and select the update package option.
.png)
Using Cocoapods (Optional)
Add the following to your
Podfile:target 'YourApp' do pod 'MappSDK' endRun:
pod update
Additional Features
Push Permission Dialog: The push notification permission dialog appears by default on the first app launch. Refer to the documentation to customize its display logic.
Handle Foreground Notifications: From iOS 10 onward, you can decide whether to display notifications while the app is in the foreground. Learn more in the foreground notification guide.
Becoming a
UNUserNotificationCenterDelegate: IF you choose to act as theUNUserNotificationCenterDelegate, you must forward its methods to Appoxee.
Troubleshooting
Error 403: Ensure the
is_euflag matches your data center.Landing Pages Not Opening Inside App: Check the
open_landing_page_inside_appconfiguration.SDK Version Requirement: Features like delayed notification dialogs require SDK version 6.0.0 or above.