Goals
Enable your iOS application to send and receive push notifications through Apple Push Notification Service (APNs) and configure it for Mapp Engage.
Enable the iOS channel in Mapp Engage to deliver push notifications and in-app messages via the configured app.
Requirements
iOS Version Support:
Mapp Engage iOS SDK 6: requires iOS 12.0 or later.
Xcode Requirements:
Base SDK: iOS 12 or above
Deployment Target: iOS 12 or above
Download
Install the Mapp Engage iOS SDK via Swift Package Manager, CocoaPods, or as a manual XCFramework. For setup steps, see Basic Automated Setup.
Installation
A) Enable Apple Messaging for Mapp Engage
Prerequisites
Access to the Apple Developer Member Center.
A valid Apple Developer Account.
Explicit App ID (Bundle Identifier) for your application.
Installed Xcode with the application project ready for configuration.
Procedure
Log In to the Apple Developer Member Center
Navigate to Apple Developer Member Center.
Use your Apple ID and password to sign in.
Register an Explicit App ID
Navigate to Certificates, Identifiers & Profiles > Identifiers > App IDs.
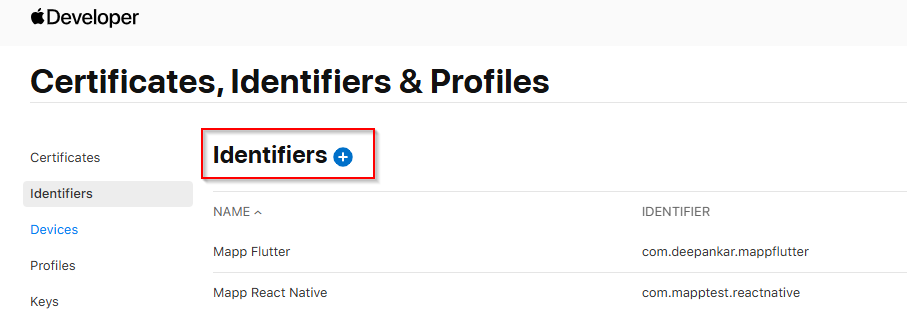
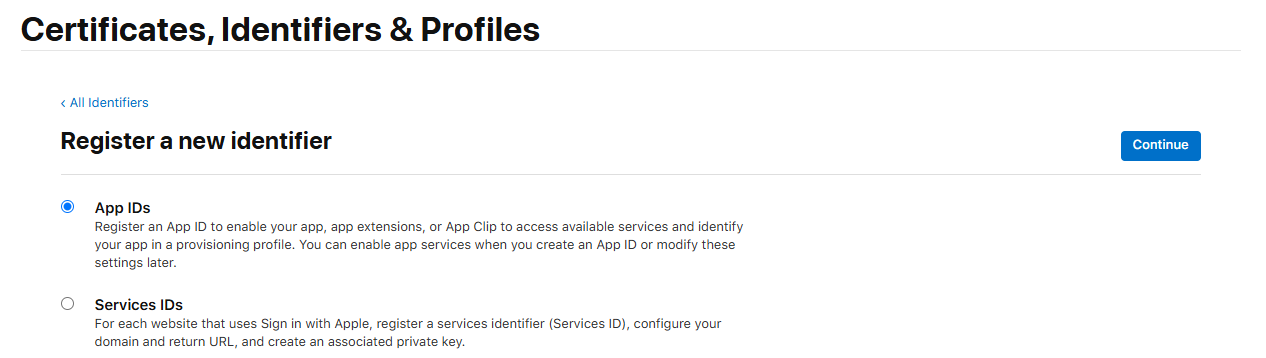
Select + to create a new App ID.
Enter your application details:
Description: Enter a name for your App ID (e.g.,
MyApp).Bundle ID: Use the Bundle Identifier of your app from Xcode (e.g.,
com.example.myapp).
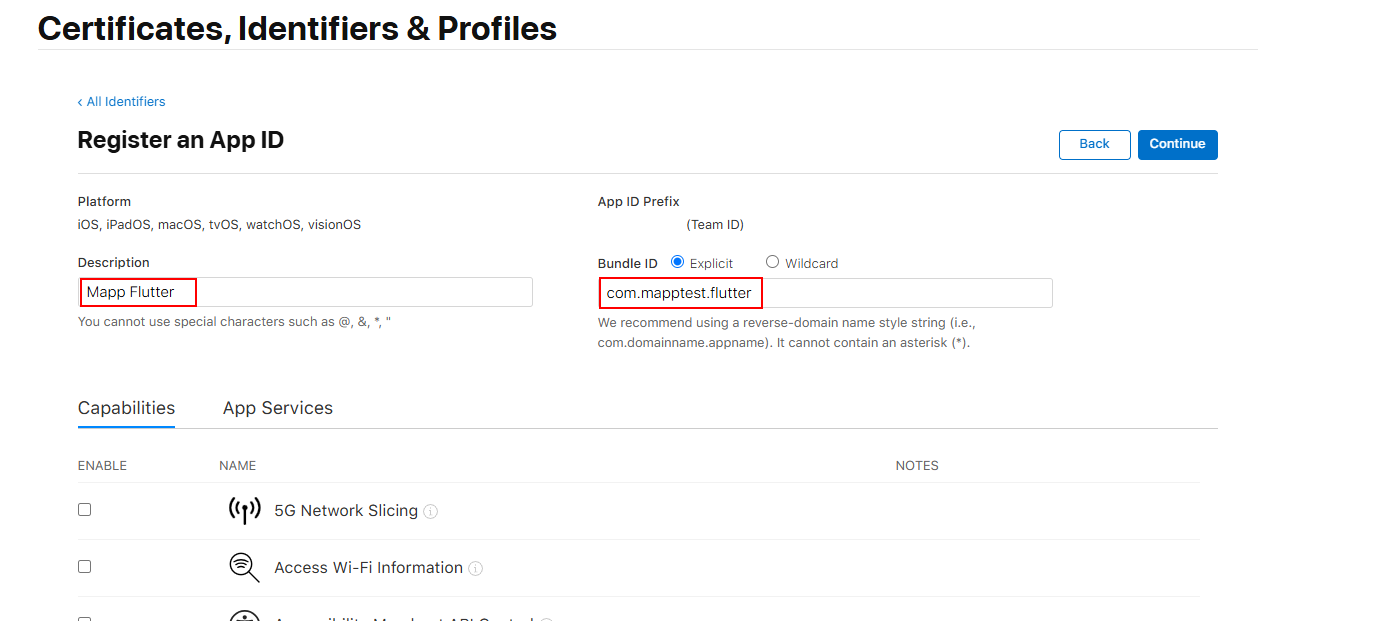
Under Capabilities, ensure that Push Notifications is enabled.
Save your App ID.
More information: Set the bundle ID and Register an App ID.
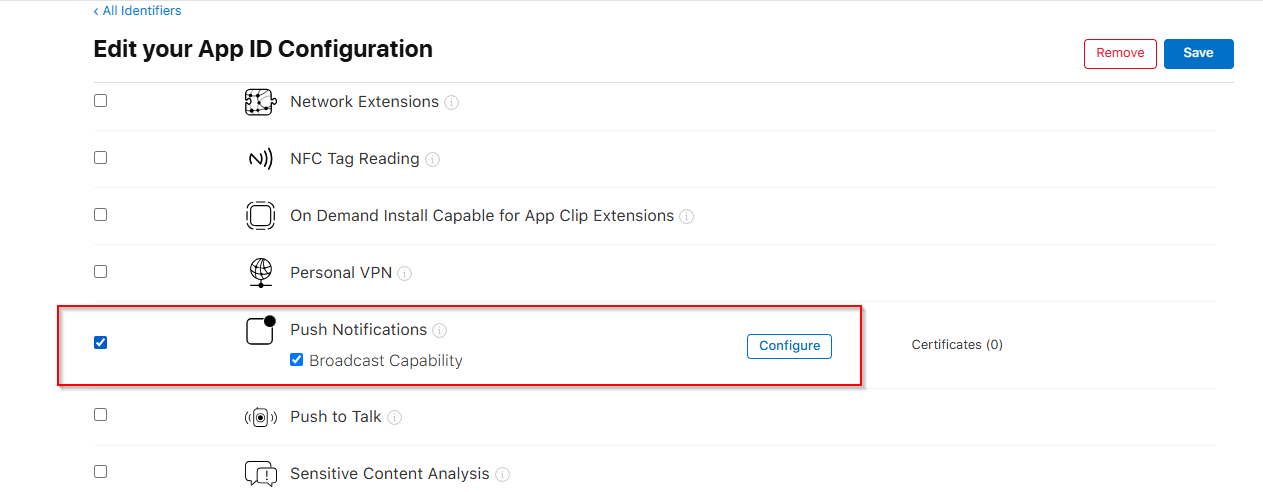
Enable Push Notifications for Your App
Under your newly created App ID, click Edit.
In the App Services section, enable Push Notifications.
Click Save.
More information: Enable push notifications.
Create an APN SSL Certificate
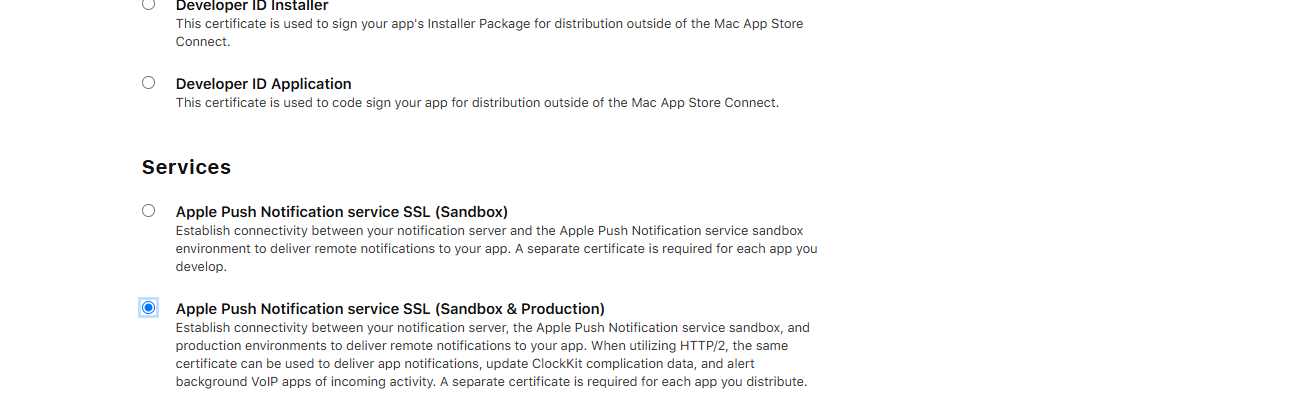
Under Certificates, Identifiers & Profiles, go to Certificates > +.
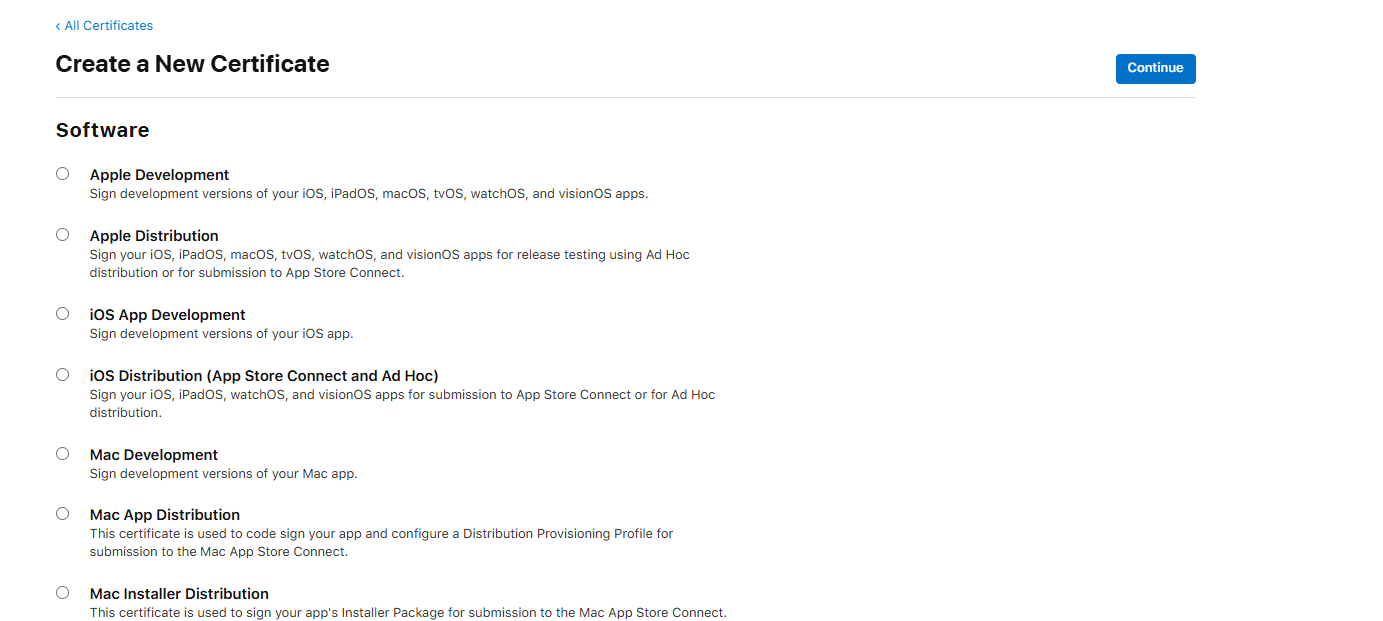
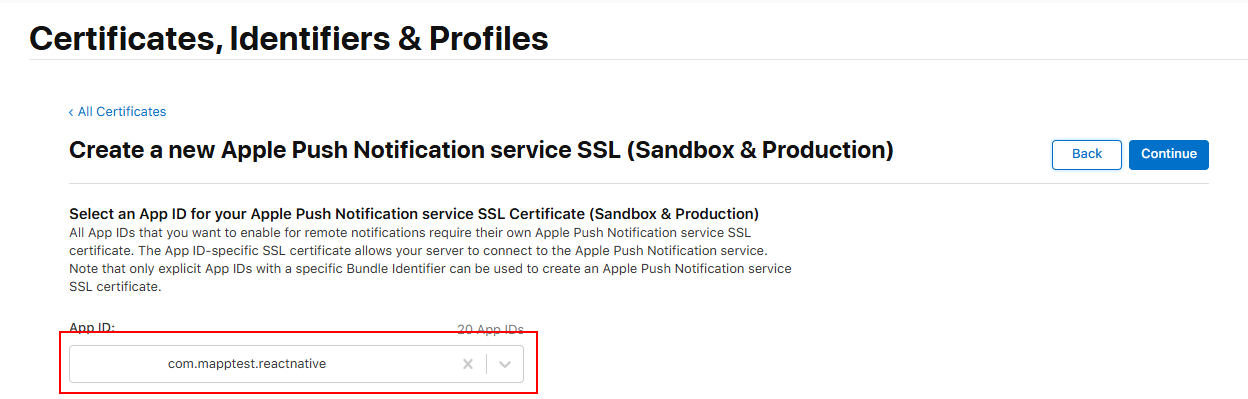
Select Apple Push Notification Service SSL (Sandbox & Production) and click Continue.
Choose the App ID you created earlier.
Follow the on-screen instructions to upload a Certificate Signing Request (CSR):
Open Keychain Access on your Mac.
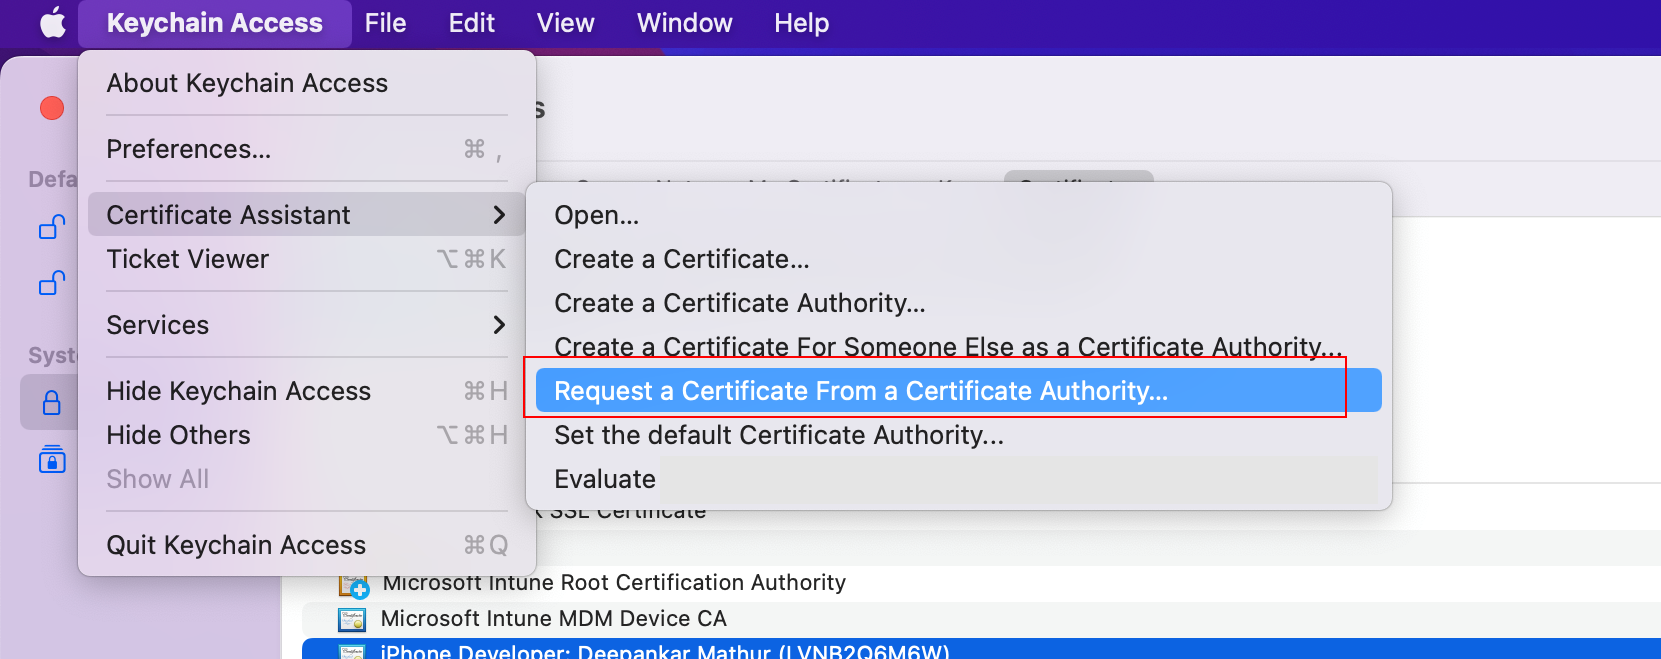
Go to Keychain Access > Certificate Assistant > Request a Certificate from a Certificate Authority.
Fill in the required details and save the CSR file to your system.
Download the APN certificate and double-click it to add it to your Keychain.
More information: Create Developer ID certificates.
Export the p12 Certificate
Open Keychain Access.
Locate your APN certificate under the My Certificates section.
Right-click and select Export.
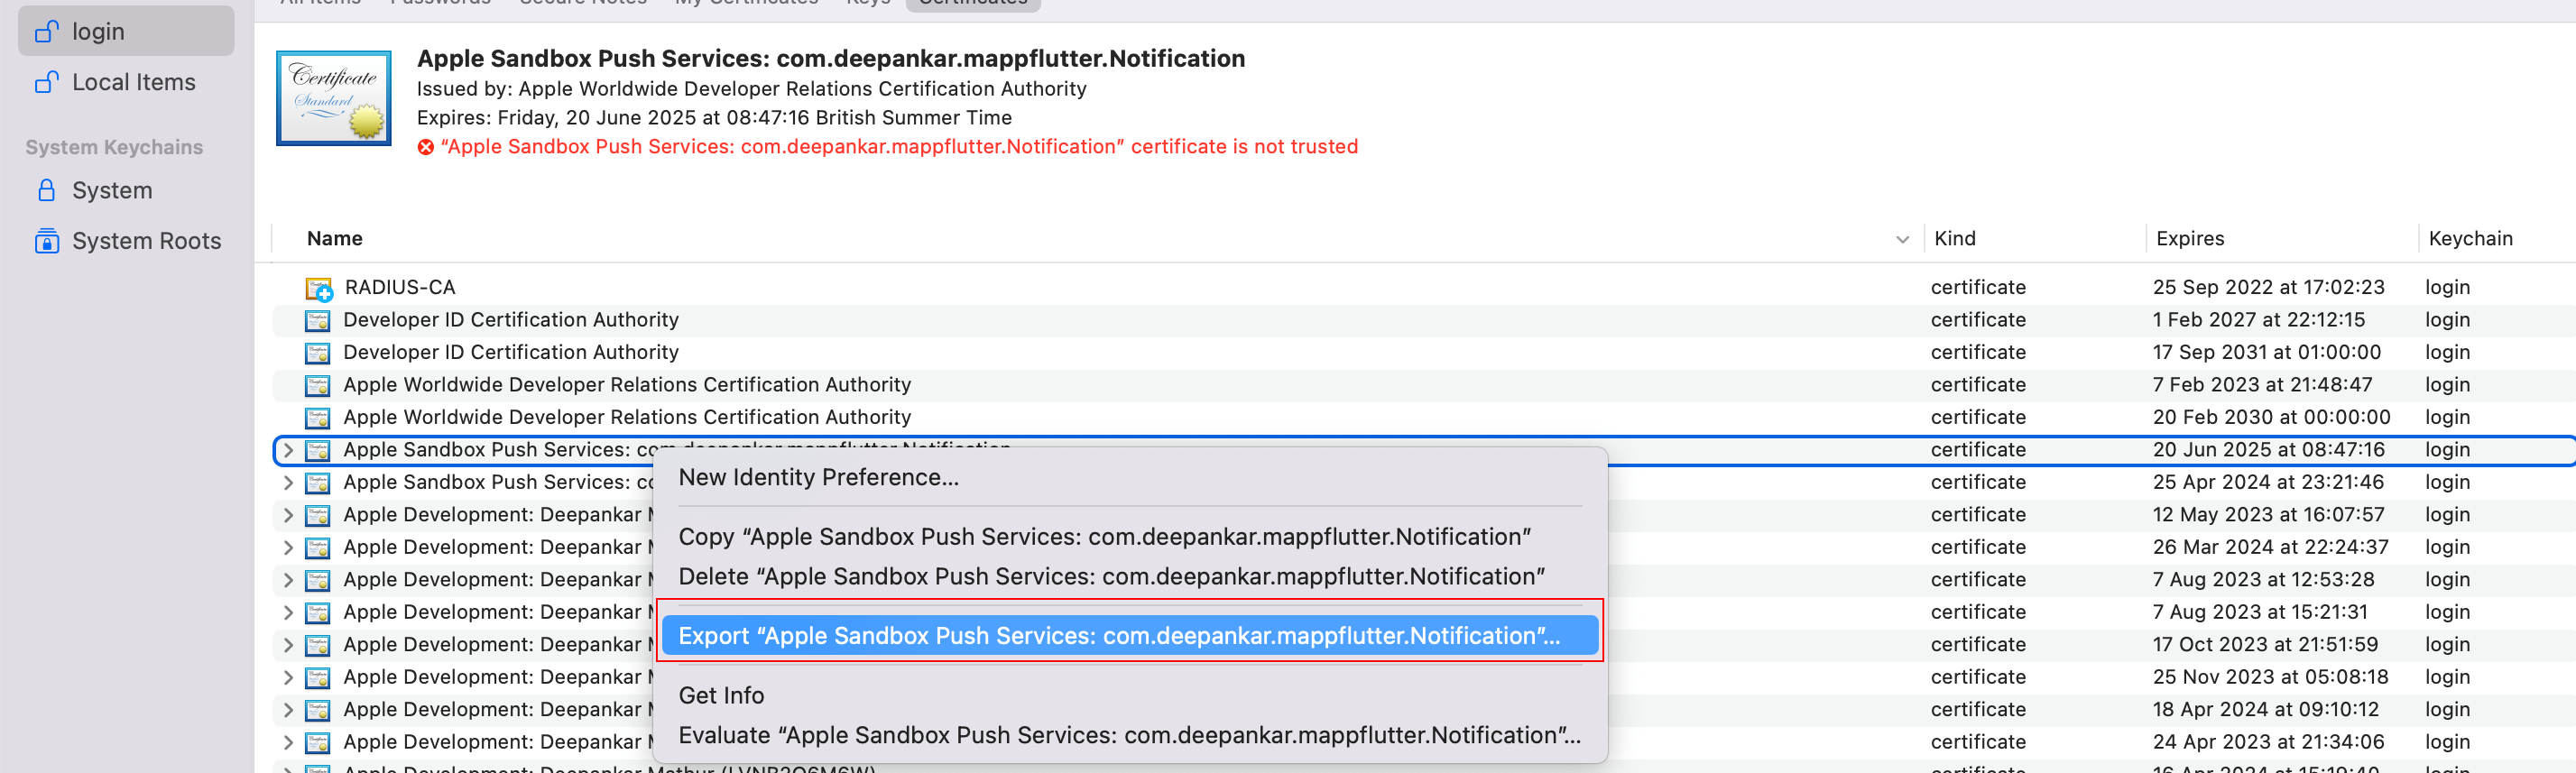
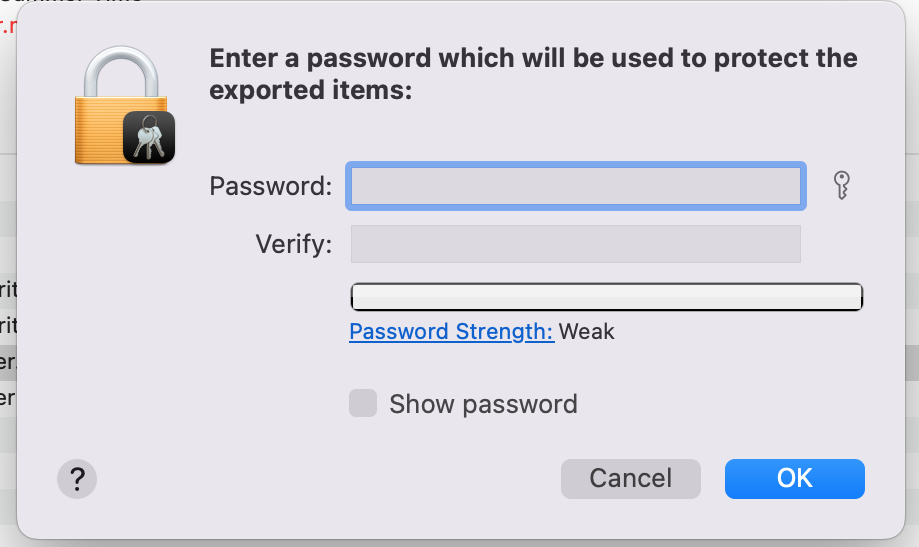
Save it as a
.p12file and set a secure password.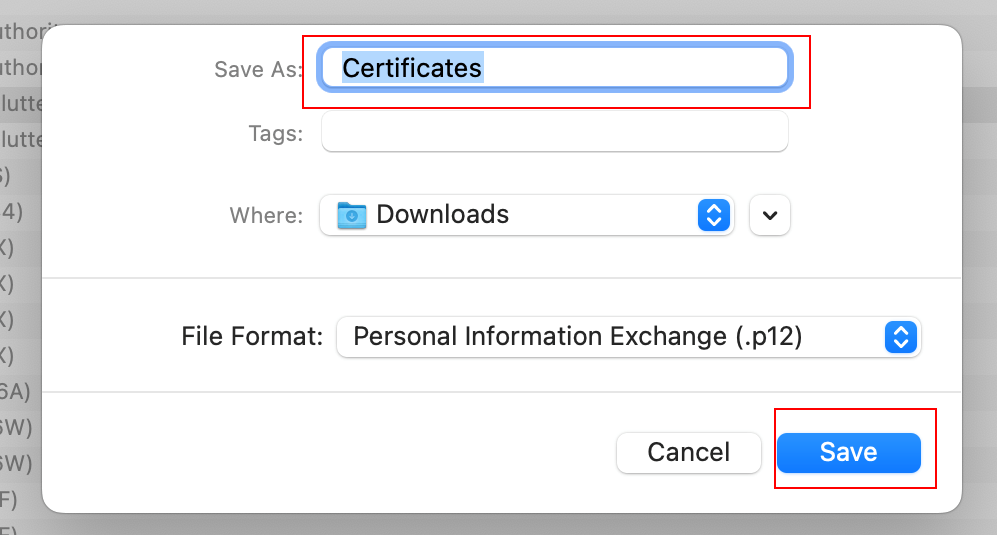
More information: Establishing a certificate-based connection to APNs.
Token-Based Authentication (Optional)
If you prefer token-based authentication, create a
.p8key from the Keys section under Certificates, Identifiers & Profiles.Save the
.p8file securely as it will not be retrievable again.More information: Establishing a token-based connection to APNs.
Add the Certificate to Mapp Engage
Share the
.p12or.p8certificate with your Mapp Project Manager.Provide the following details:
Certificate Password (if using
.p12).Bundle ID associated with the certificate.
Indicate whether the certificate is for Development or Production.
For more information, see iOS Authentication Certificates and Tokens.
Update Provisioning Profiles
If creating the certificate invalidates existing provisioning profiles, regenerate and update them in Xcode.
More information: Developer Account Help.
B) Enable iOS Channel in Mapp Engage
Prerequisites
Completion of Step A: Enable Apple Messaging for Mapp Engage.
Access to the Mapp Engage admin interface.
Procedure
Log In to Mapp Engage and navigate to Channel Settings:
From the top menu, go to Administration > Channels > App.
Create or Select an iOS Channel
Click Create App Channel.
Name the app channel and optionally add a description
Select iOS as the channel type and click Next.
.png "image(685).png")
Configure Channel Parameters:
In the Configure iOS Channel section, fill in the following details:
App Store ID: (Optional) Enter your app’s App Store ID.
Bundle ID: Enter the same Bundle Identifier used in Xcode and for the APNs certificate.
.png "image(686).png")
Environment: Choose between Production or Development based on the certificate type.
.png "image(687).png")
Add Notification Sounds (Optional)
To add custom sounds for notifications:
Add the sound files to your project in Xcode.
Reference these sound names in the channel configuration.
.png "image(688).png")
Add Buttons (see Create Localized Button Sets)
.png "image(689).png")
Enable Push Notifications and In-App Messages: use the toggle options
.png "image(694).png")
Certificate File: Upload the
.p12or.p8file generated in Step A.
For .p12:Enter the certificate password
.png "image(692).png")
For .p8:
Enter the Key ID and Team ID
.png "image(693).png")
Save and Activate the Channel
Click Save to store the configurations.
After saving, click Activate to enable the channel.
Keep in mind:
If you encounter errors during configuration, verify that the uploaded certificate matches the Bundle ID and environment.
For troubleshooting, consult the Testing and Troubleshooting SDK Integration section in this documentation.
Installation via SPM
Create a new XCode project: File > New >Project
Then, in the project you created, Project >Package Dependency > plus sign
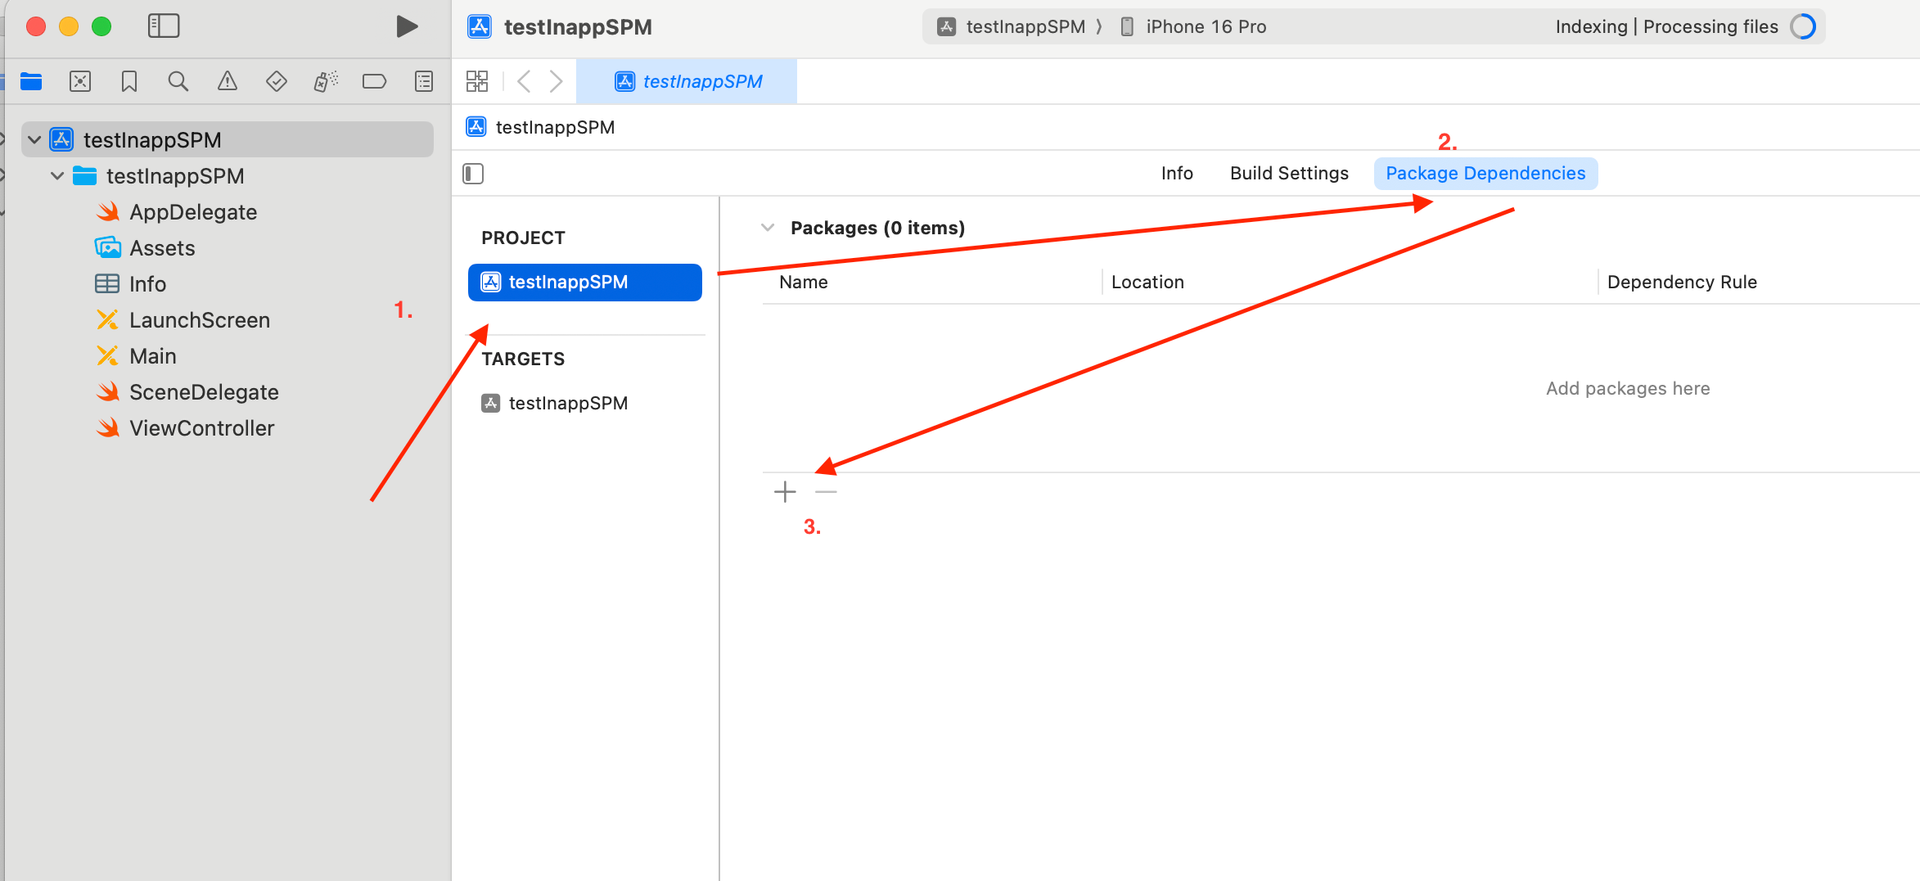
Then, follow the steps in Basic Automated Setup.
Next Step: Integration
To proceed, follow the Integration Guides.