The Android SDK setup allows you to send and receive Push notifications in Mapp Engage.
Prerequisites
Android Studio: Ensure you have the latest version installed.
JDK Version: Depending on the SDK version, ensure you have Java 11 or higher (Java 17 for version 6.0.22 and later).
Gradle: Configure your Gradle to match the SDK requirements.
Download
Download the latest Android SDK versions here.
Installation
A) Set Up the Android SDK
Gradle Setup: Add the following dependencies to your
build.gradlefile:implementation('com.mapp.sdk:mapp-android:X.X.X') // Replace with the correct version implementation platform('com.google.firebase:firebase-bom:33.0.0') implementation 'com.google.firebase:firebase-messaging' implementation 'com.google.firebase:firebase-analytics'For Maven:
<dependency>
  <groupId>com.mapp.sdk</groupId>
  <artifactId>mapp-android</artifactId>
  <version>X.X.X</version>
</dependency>
Java Compatibility:
For versions below 6.0.18, Java 8 is required:
compileOptions {
    sourceCompatibility JavaVersion.VERSION_8
    targetCompatibility JavaVersion.VERSION_8
}
For versions 6.0.18 and newer, Java 11 is required:
compileOptions {
    sourceCompatibility JavaVersion.VERSION_11
    targetCompatibility JavaVersion.VERSION_11
}
Add Required Permissions: Add the following permissions to your
AndroidManifest.xml:<uses-permission android:name="android.permission.INTERNET" /> <uses-permission android:name="android.permission.POST_NOTIFICATIONS" />The SDK supports a minimum Android SDK version of 19.
Important: The SDK relies on AndroidX. If your project hasn't yet migrated to AndroidX, follow the official migration guide to avoid manifest merger issues: AndroidX Migration Guide
B) Enable Firebase Cloud Messaging
Step 1: Set Up Firebase in the Developer Console
Log in to the Firebase Developer Console.
Click "Create a Project".
.png "image(648).png")
Enter a Project Name. While any name is acceptable, it is recommended that you use something relevant to your app for easier identification.
.png "image(649).png")
Review the configuration and continue with creating the project.
.png "image(650).png")
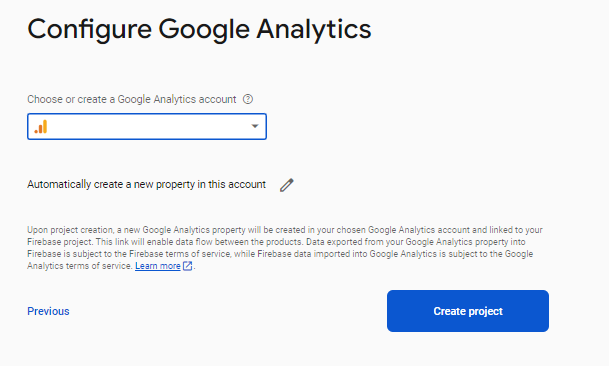
Link an existing Google Analytics account or create a new one.
The project has been created.
.png "image(651).png")
After the project is created, go to Project Settings by clicking the gear icon in the top left corner.
.png "image(652).png")
Navigate to the Service Accounts tab, and click "Generate new private key". This will download a JSON file containing the private key. Forward this key to Mapp to enable push messaging functionality.
.png "image(653).png")
Step 2: Integrate Firebase with Your Android App
In the Firebase Console, register your Android app by providing the package name.
.png "image(654).png")
Download the
google-services.jsonfile and place it in the root directory of your Android app module..png "image(657).png")
Update Your Gradle Files: To make the
google-services.jsonvalues accessible to Firebase SDKs, you'll need to add the Google Services Gradle plugin to your project.Root-level (Project-level)
build.gradle.ktsfile:id("com.google.gms.google-services") version "4.4.2" apply falseModule-level (App-level)
build.gradle.ktsfile:plugins { id("com.android.application") // Add the Google services Gradle plugin id("com.google.gms.google-services") ... } dependencies { // Import the Firebase BoM implementation(platform("com.google.firebase:firebase-bom:33.4.0")) // TODO: Add the dependencies for Firebase products you want to use // When using the BoM, don't specify versions in Firebase dependencies implementation("com.google.firebase:firebase-analytics") // Add the dependencies for any other desired Firebase products // https://firebase.google.com/docs/android/setup#available-libraries }
Sync your project with the updated Gradle files.
C) Enable Android Channel in Mapp Engage
A Mapp Project Manager or Implementation Manager manages the setup of the Android Channel in Mapp Cloud. Follow the steps below to ensure proper configuration.
Step 1: Create the Mobile Account in Mapp Cloud
A Mapp Project Manager or Implementation Manager will handle account setup within the Mapp Cloud infrastructure. This account is linked to the Mapp Engage system(s).
Step 2: Create Channel Addresses for Each Mobile App
The Mapp Project Manager or Implementation Manager will create mobile app channels for both production and development apps. You need to provide the Mapp representative with your Cloud Messaging API/Server Key.
Follow the steps below to create the channel:
Navigate to the Channels Section: Go to the main menu and select Administration > Channels > App.
Enter Channel Information: Input a unique channel name and description. Click Next.
Provide FCM Credentials:
Note: Google will deprecate FCM Keys in June 2024.
Instead, use the service account key from your Firebase Project.
To obtain the key, open your Firebase project, navigate to Project Settings, select Service Accounts, and click on Generate New Private Key.
Download the generated key, open the file, and copy the contents of the JSON file into the FCM Credentials text field.
.png "image(642).png")
Configure Notifications:
Select the environment (e.g., production or development).
Add custom sound names, included in the Android project resources, that can be used as notification sounds.
Localized buttons can also be configured at this stage.
.png "image(640).png")
Enable Required Features: Activate In-App and Push Notifications.
.png "image(643).png")
Review and Activate:
Review the configuration on the summary page.
If everything is correct, click Save.
After saving, click Activate to finalize and activate the new channel.
.png "image(644).png")
Next Step: Initialization
To proceed, follow the Initialization documentation.