Overview
Use the Personalization Builder window to create and edit personalization rules. The window has two views. In Edit Mode, you define the conditions of a block. In Structure Mode, you manage the blocks of the rule and their content. For when to use which view, see Personalization Builder.
Navigation Path
Navigate to Audience > Segmentation > Personalization.
Click Create, or click Edit in the context menu of an existing personalization.
.png)
Settings
Setting | Description |
|---|---|
Description | Describes the purpose of the rule. Recommended, because personalization names are not unique. |
Advanced Options | Expands the Group drop-down list, where you select a group. |
Graphical | Shows the rule in the graphical interface. |
Code | Switches to the code editor for manual input. You can switch between the views as long as the rule remains compatible. Some expressions are only possible in code. |
Edit Mode
In Edit Mode, you define the conditions of the selected InsertIf or InsertElse block. When you create a personalization, the Builder opens in this view with the initial InsertIf block selected.
Element | Description |
|---|---|
Structure - InsertIf Block | Shows the block you are editing. Click Structure to switch to Structure Mode. |
InsertIf Block Name | Shows the name of the block. You set the name with Edit Block Name in Structure Mode. |
| Adds a condition at the same structural level and opens the Condition Builder. |
| Opens the context menu for a condition. Here you add or modify conditions and grouping. |
| Opens the context menu for the condition with these options:
|
Conditions to be matched |
|


Condition Builder
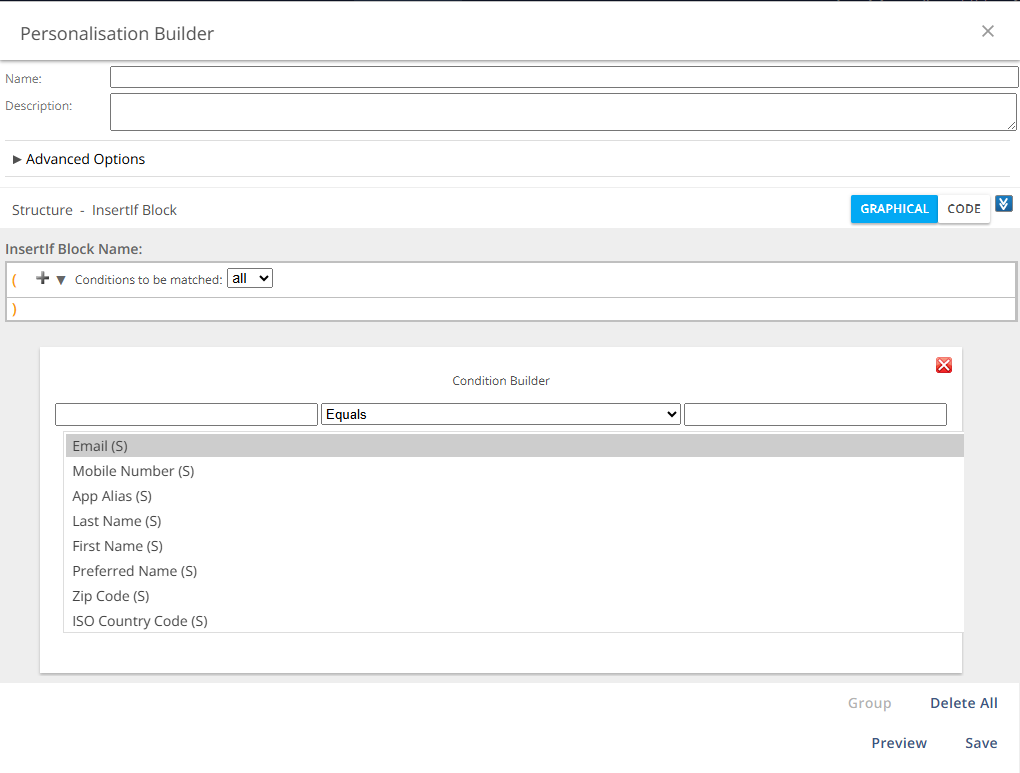
The Condition Builder opens when you add a condition. You select an attribute, define how it relates to a value, and add the condition to the block.
Setting | Description |
|---|---|
First input field | Shows all available standard and custom attributes. Select the attribute that the condition evaluates. |
Center drop-down menu | Defines the relationship between the attribute value and the value in the second field. The available relationships depend on the selected attribute:
|
Second input field | Specifies the value that the attribute value is compared with. With Equals and Does Not Equal, the values must match exactly. For less strict matching, use Starts With, Ends With, Contains, or Regex. Wildcards are not supported. |
Compare two attributes | Lets you select another attribute instead of a fixed value, so that you compare two attributes with each other. |
Structure Mode
In Structure Mode, you see all blocks of the rule and manage their order, nesting, and content. Each row shows the block type and the block name, for example InsertIf Block: Platinum or Default Block: Default. A rule always starts with an InsertIf block. The following blocks determine which parts of the rule apply to the recipient.
Element | Description |
|---|---|
Brackets | Enclose the nested content of a block. Click the bracket to show or hide the nested content. A collapsed block shows |
| Adds an |
| Opens the menu of the block. The available options depend on the block type. A default block, for example, only offers Edit Block Name, Add Content, and Add Nested InsertIf.
|
Pencil icon and ▼ on content blocks | Open the content of the block for editing in the Add Content dialog. Content blocks have no further menu options. |


Add Content
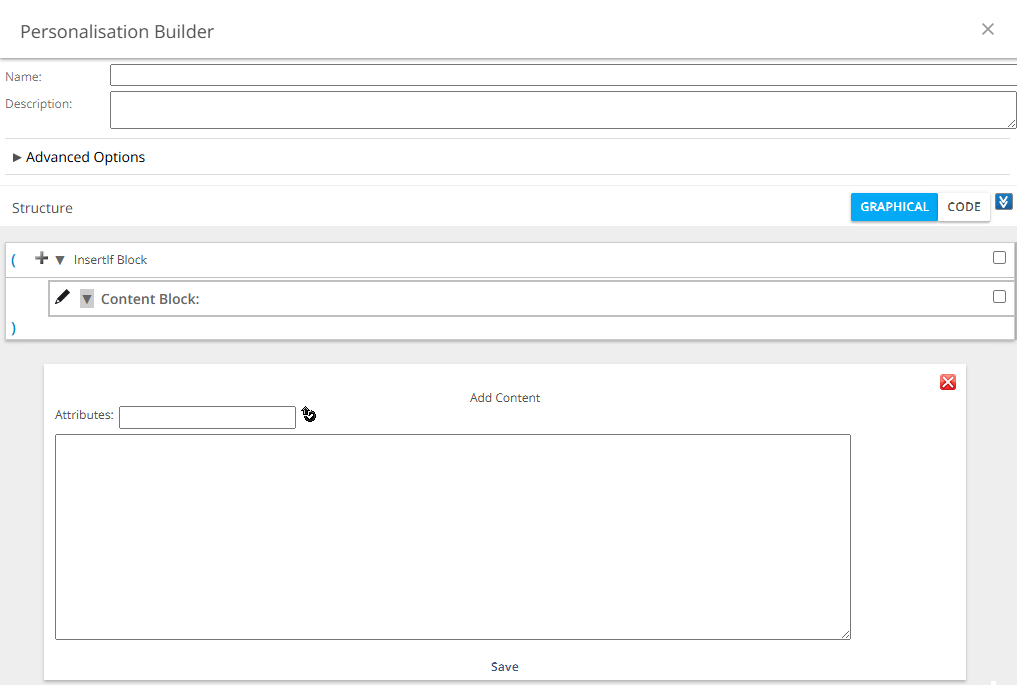
The Add Content dialog inserts a content block into the selected InsertIf or InsertElse block. Content can include fixed text, HTML formatting, and placeholders. To edit existing content, click the pencil icon of the content block. You can also save a personalization without content.
Setting | Description |
|---|---|
| Adds the attribute selected in the Attributes field to your content. |
Input field | Defines the fixed content of the block. HTML tags are supported. Nested blocks can contain their own content. Example for a greeting based on gender:
|

Actions
Action | Description |
|---|---|
Group | Groups all selected rules at the same structural level. If nested grouping exists, remove the brackets before you create a new group. |
Delete All | Removes all rules in the structure. |
Preview | Opens the preview in a new window, where you test the rule. See Personalization Builder: Preview. |
Save | Saves the personalization rule to your library so that you can reuse it. |
Use | Inserts the personalization into a message without saving it for future use. |
Examples
For worked examples of InsertIf/InsertElse conditions and content blocks (personalized salutations, loyalty program tiers, subject line capitalization), see Personalization Builder: Examples.